Care and Maintenance
Changing Film Ribbons
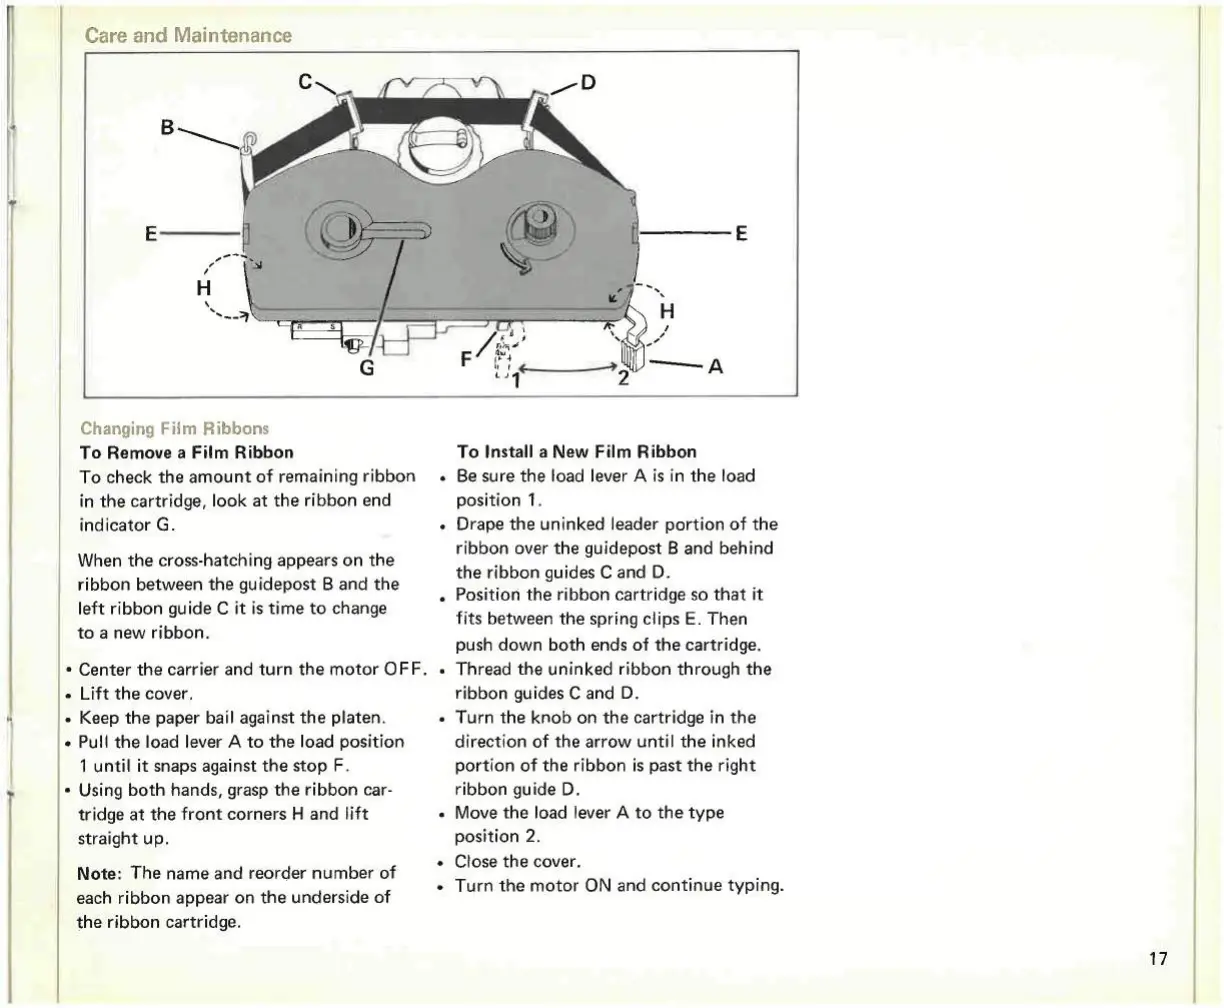
To Remove a Film Ribbon
To check the amount of remaining ribbon
in the cartridge,
look
at the ribbon end
indicator G.
When the cross-hatching appears on the
ribbon between the guidepost B and the
left ribbon guide C it is time to change
to a new ribbon.
•
Center the carrier and turn the motor OFF.
i
Lift the cover.
Keep the paper bail against the platen.
Pull the load lever A to the load position
1 until it snaps against the stop F.
Using both hands, grasp the ribbon car-
tridge at the front corners H and lift
straight up.
Note:
The name and reorder number of
each ribbon appear on the underside of
the ribbon cartridge.
To
Install
a New Film Ribbon
. Be sure the load lever A is in the load
Position 1.
• Drape the uninked leader portion of the
ribbon over the guidepost B and behind
the ribbon guides C and D.
. Position the ribbon cartridge so that it
fits between the spring
clips
E. Then
push down both ends of the cartridge.
• Thread the uninked ribbon through the
ribbon guides C and D.
• Turn the knob on the cartridge in the
direction of the arrow until the inked
portion of the ribbon is past the right
ribbon guide D.
• Move the load lever A to the type
Position 2.
• Close the cover.
• Turn the motor ON and continue typing.

 Loading...


