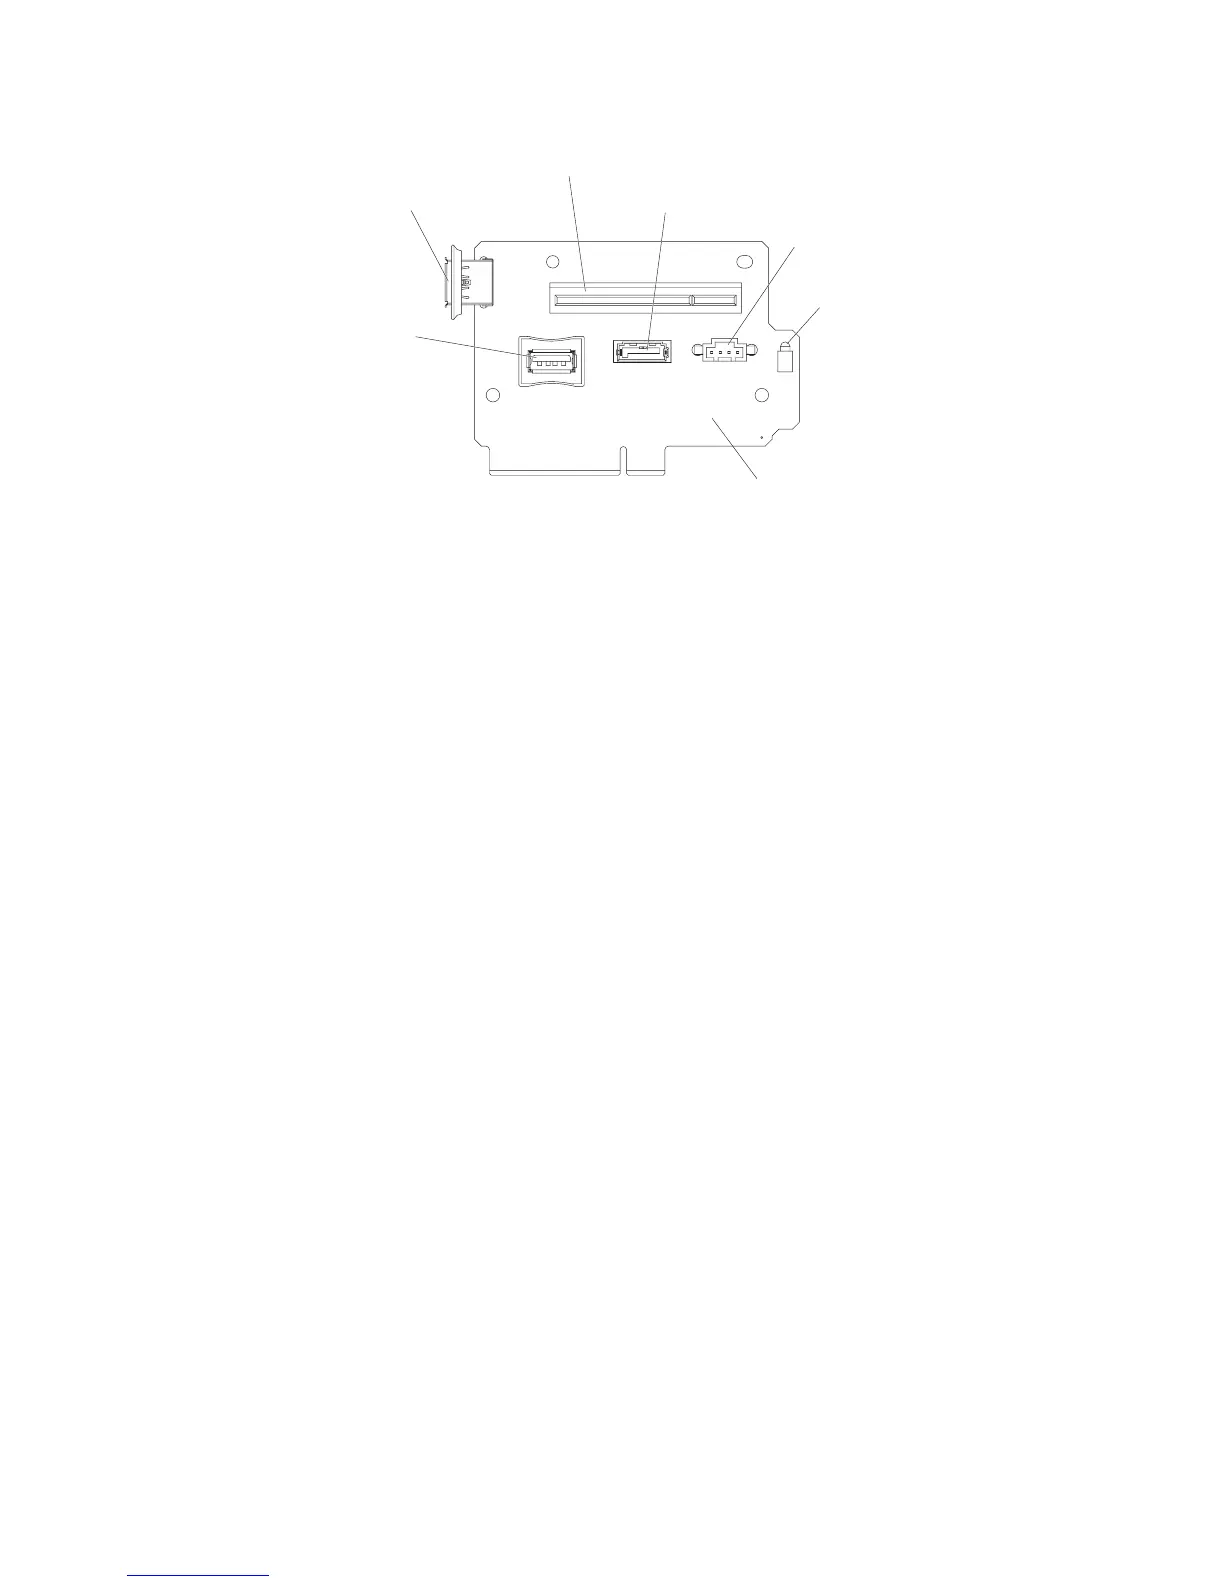
USB hypervisor
connector
USB
tape
signal
PCI Express SAS
controller connector
SATA tape signal
Tape drive
power
SAS controller
error LED
SAS riser card
(tape-enabled model server)
a. Disconnect and remove the configuration cable from the system board.
This cable will be replaced by the tape-enabled configuration cable.
b. Turn the SAS controller so that the keys on the bottom edge align correctly
with the connector on the tape-enabled SAS riser-card in the SAS
riser-card and controller assembly.
c. Firmly press the SAS controller horizontally into the connector on the SAS
riser-card.
d. Gently press the opposite edge of the SAS controller into the adapter
retention bracket on the SAS riser-card and controller assembly.
Note: Depending on the height of your SAS controller, you might have to
remove the retention bracket from the tape-enabled SAS riser-card and
controller assembly, install the SAS controller and riser card on the SAS
riser-card and controller assembly, and replace the retention bracket.
8. Connect the following tape enablement kit cables to the connectors on the
SAS riser-card and the hard disk drive backplanes:
v SAS signal cables into the SAS connectors on the hard disk drive
backplanes
v SAS backplane power cable (that is connected to the system board) to the
hard disk drive backplanes
v Configuration cable to the configuration connector on each hard disk drive
backplane
9. Connect the tape-enabled configuration cable to the system board.
10. Install the hard disk drive backplanes.
94 System x3650 M3 Types 4255, 7945, and 7949: Installation and User’s Guide
 Loading...


