5. Inspect the drive to decide which of the following conditions most closely match the symptom on the drive:
Tape spooled off the supply reel - All the tape appears to be on the takeup reel and no tape is on the supply reel (inside the cartridge). Test the drive after the
procedure is completed.
Tape pulled from leader pin (or broken at the front end) - All the tape appears to be on the supply reel (inside the cartridge) and little or no tape appears to be
on the takeup reel. The leader block is positioned in the takeup reel. Return the drive after the procedure is completed.
Tape broken in mid-tape - Tape appears to be on both the supply reel (inside the cartridge) and takeup reel. Test the drive after the procedure is completed.
Tape tangled along tape path - Tape appears to be tangled and damaged but intact. Return the drive after the procedure is completed.
-- OR --
No damage to tape (or no apparent failure) - There appears to be no damage or slack to the tape. Return the drive after the procedure is completed.
Tape spooled off supply reel
Edit online
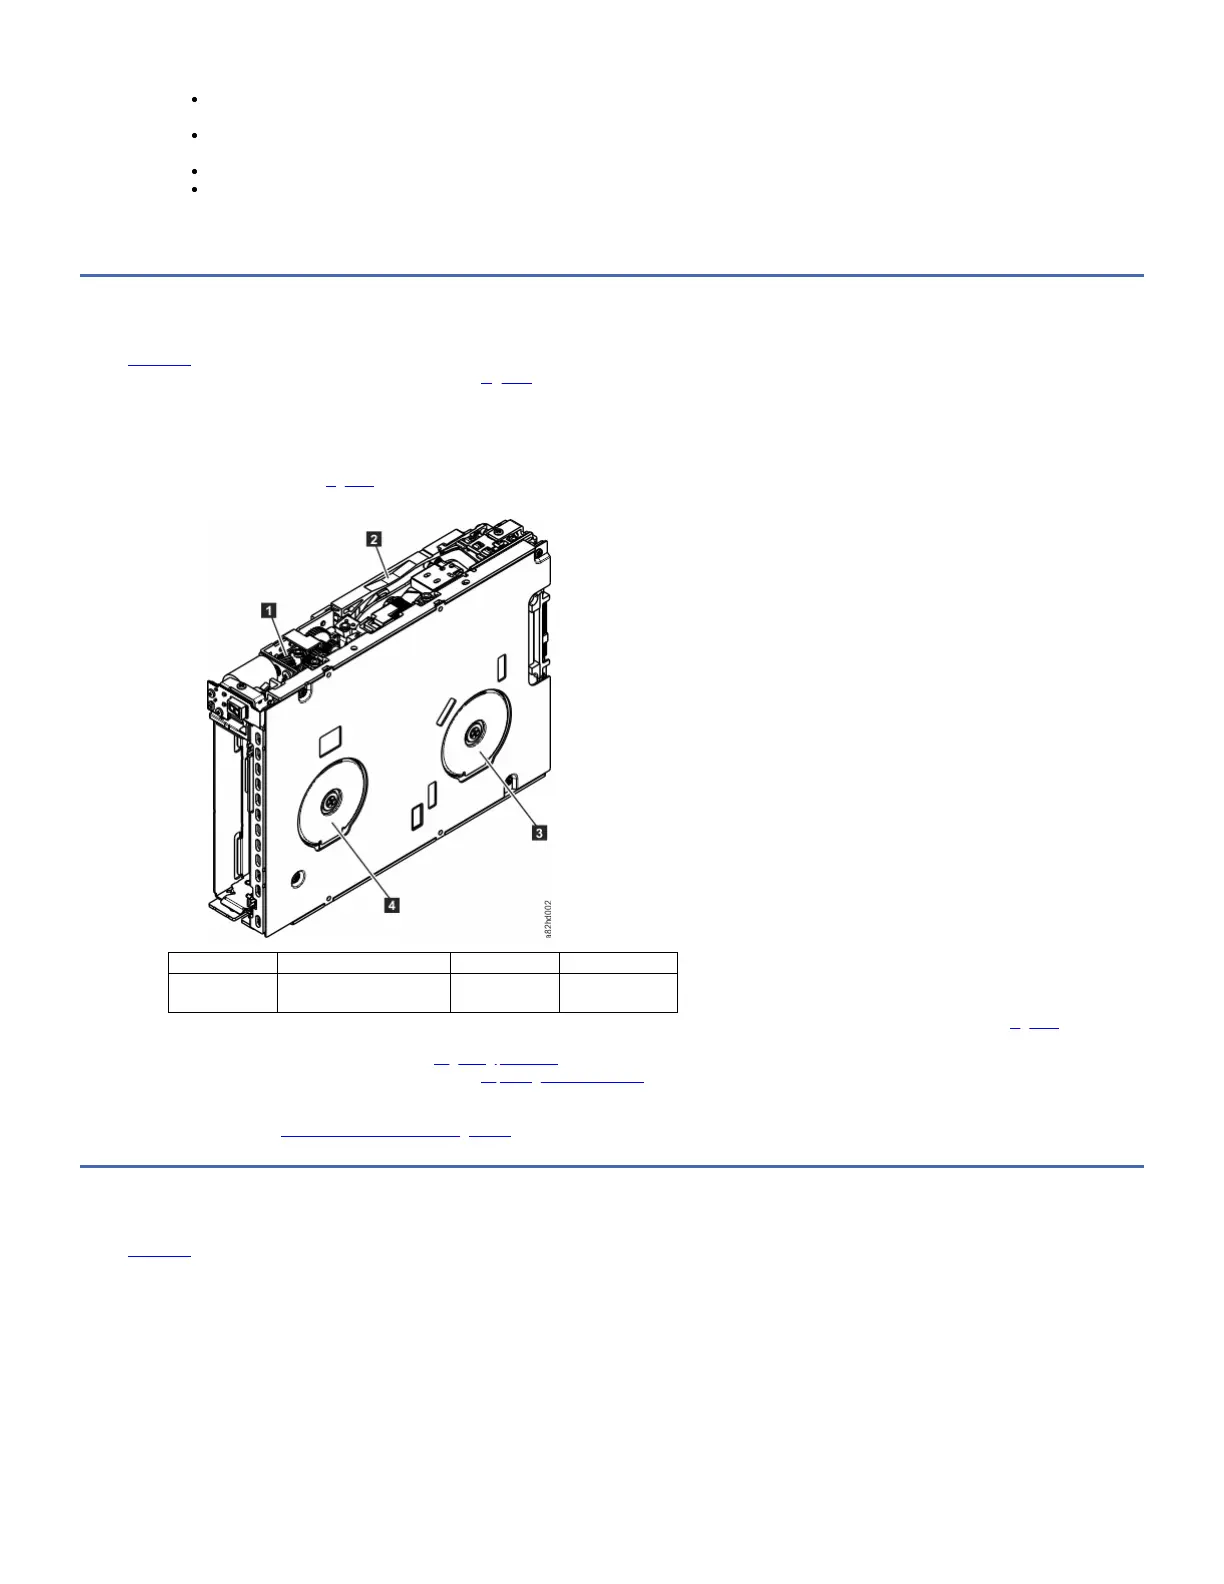
Attention: DO NOT TOUCH THE OUTER GUIDE RAIL (2 in Figure 1). THIS RAIL IS VERY DELICATE AND EASILY DAMAGED.
1. From the takeup reel, pull an arm 's length of tape around the rear of the tape path and over the head and rollers on the left side of the drive.
2. Set the drive on its left side with the head and tape path facing up.
3. Make sure that the tape is not twisted. Untwist tape if required.
4. Moisten a cotton swab with water and wet approximately 13 mm (0.5 in.) of the tape end and feed it onto the supply reel (inside the cartridge).
5. Turn the supply reel (4 in Figure 1) clockwise, allowing the moistened tape to adhere to the hub as it winds around the supply reel (inside the cartridge).
Figure 1. Rewinding tape into cartridge
1 Loader motor worm gear 3 Takeup reel motor
2 Outer guide rail
WARNING: DO NOT TOUCH
4 Supply reel motor
6. Continue spooling into the cartridge until the tape is taut and remains within the flanges of the tape guiding rollers. Turn the supply reel (4 in Figure 1) 10 more
turns. Ensure that you do not stretch the tape.
7. Reassemble the drive, reversing the steps in Beginning procedure.
8. Reassemble the drive chassis, following the steps in Replacing the internal drive.
9. Reinstall the drive canister into the cradle assembly. Ensure that the connector on the drive is seated properly into the connector on the cradle.
10. Allow the drive to complete mid-tape recovery. This action takes several minutes. When this activity completes, push Unload to eject the cartridge.
11. Test the drive (see Function code 1: Run drive diagnostics) to determine if it needs to be replaced.
Tape pulled from or broken near leader pin
Edit online
Figure 1. Drive with cover removed to reveal gear train.