15
Section 7
OTHER FUNCTIONS
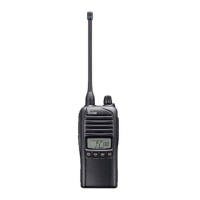
The Smart Ring and ATS functions have an answer
back feature and confirmation function for when a
call has reached the called station, even if the user is
temporarily away from the transceiver. Smart Ring is a
manual confirmation, and ATS is automatic.
D Smart Ring
q Set the same CTCSS tone frequency to all the
transceivers in the group, and then turn ON the
Tone Squelch. (p. 11)
w Push [TOP] to enter the Function mode.
e Push to send a Smart Ring call.
• When a member of the group answers the call, “ë” and
“FOUND” blink.
• If no answer is received, the transceiver sounds short
failure beeps and “FAILD” appears.
r
Blink
Push [PTT] to answer and to stop the blinking and
the beeps.
NOTE: The Smart Ring function can be used only if
the called station has the same CTCSS tone
frequency and is operating on the same channel.
NOTE: The setting to the left is for only the calling
station. A called station automatically sends an
answer back signal without any presetting. All the
IC-41PROs set to the same operating channel
within the communication area will send an answer
back call.
D ATS
q Hold down [Side 2] for 2 seconds to turn ON the
ATS function.
•
When an RX channel is selected, an error beep sounds.
• The transceiver automatically sends a searching signal
every 60 seconds.
• “
” blinks.
• When you receive an answer back signal, “
” stops
blinking until the next search transmission.
• If no reply is received, “
” blinks until the next search
transmission.
If no reply is received
Blinks Blinks
w Hold down [Side 2] for 2 seconds to turn OFF the
ATS function.
Smart Ring and ATS (Automatic Transponder System)
You can enable the use of the RX channels on the
transceiver screen using the optional CS-41PRO
clOning sOftware. RX channels are not displayed
as the default. Also, you can edit the RX frequencies
between 450 through 520 MHz using the CS-41PRO
or using the transceiver if the RX channels have been
enabled.
D Editing an RX frequency
q Select the desired RX channel (Example: RX-01).
w Push [TOP] to enter the Function mode, and then
hold down [TOP] for 2 seconds to enter the RX VFO
mode.
• Push to select the wide or narrow channel spacing.
RX VFO mode
RX channel
(in function mode)
Displayed when a Narro
channel spacing is set.
e Rotate [ROTARY SELECTOR] to select the desired
RX frequency. The frequency selection scrolls ac-
cording to the bandwidth setting.
r
Narrow channel spacing
(12.5 kHz steps)
Wide channel spacing
(25 kHz steps)
Push to select the editing digit.
• The editing digit blinks.
t Rotate [ROTARY SELECTOR] to set the desired
number to the digit.
y Repeat steps r and t to edit the RX frequency.
u Hold down [TOP] for 2 seconds to save the RX
frequency and return to the standby mode.
• Two beeps sound.
RX channels and frequencies

 Loading...