5.0 Installation guide – kit.1
The thermostatic mixing valve must be installed in such a position that maintenance of the TMV and its
valves and the commissioning and testing of the TMV can be undertaken.
IMPORTANT
BEFORE CONNECTION, FLUSH WATER THROUGH PIPEWORK TO RE-
MOVE ALL DEBRIS ETC. WHICH COULD DAMAGE THE VALVE MECHANISM
NOTES:
These products are intended for installation into vertical walls. Installing
into a horizontal surface is not recommended.
Isolating valves should be installed into the supply pipe-work to permit
future servicing & maintenance.
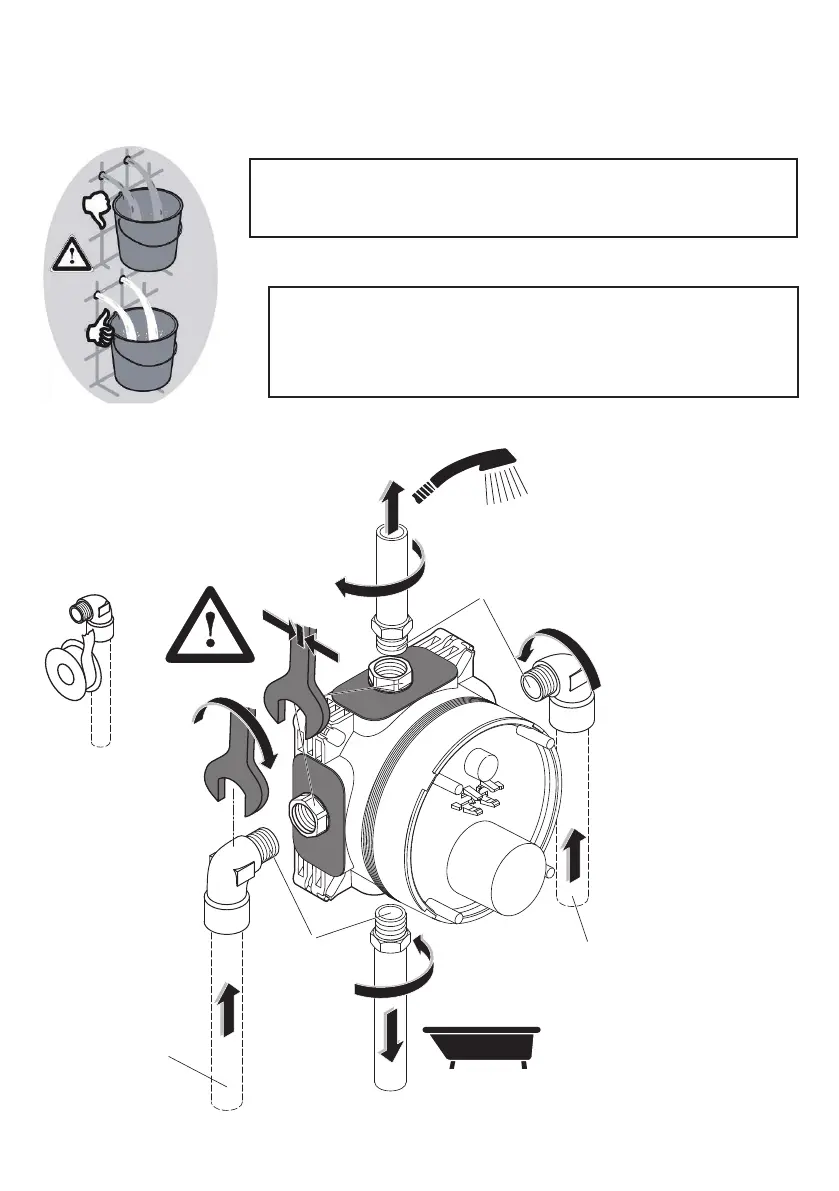
5.1 Connecting pipe-work - preliminary
G1/2
G1/2
COLD water
supply pipe
HOT water
supply pipe
Example: Bottom outlet to tub ll
Some pipe-work can be connected to the
valve-box prior to mounting into the wall.
Example: Top outlet
to shower
• Apply PTFE tape or similar
to inlet elbow threads.
• Hold connector in
valve-box stationary,
using 25mm open
ended spanner.
Tighten elbow into
connector
Alternatively, instead of PTFE tape, use a WRAS approved thread sealant; e.g.: Loctite 577 or Permabond
A1044. DO NOT SOLDER NEAR VALVE-BOX.
14
 Loading...