10
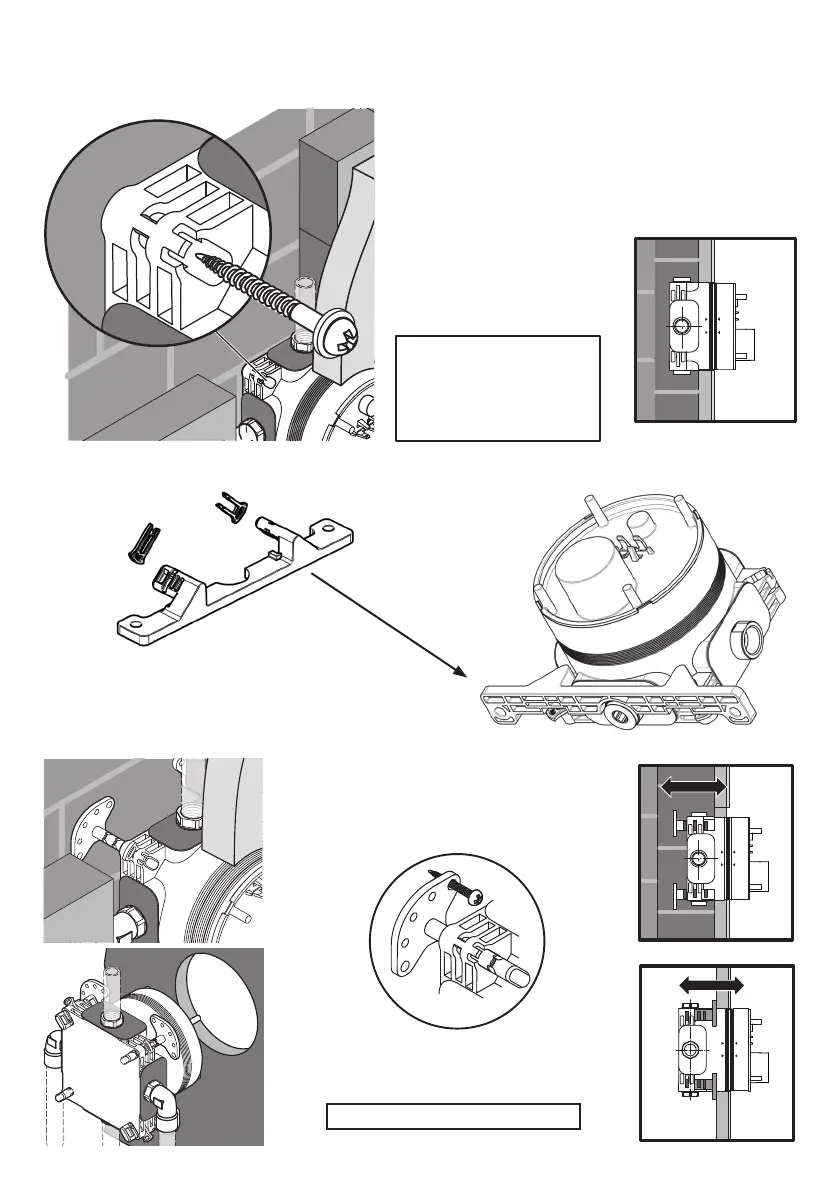
These products can be mounted using one (or a combination) of these 3 methods:
MIN
MAX
A. Directly through the valve-box using the 4 corner
slots onto a solid surface. This method does not allow for
any depth adjustment.
NOTE:
All fixing methods utilise
the 4 slots positioned in the
corners of the valve-box.
B. Using the mounting bracket supplied & attach to any one of 4 sides
C. Using adjustable xing legs (OPTIONAL) in either direction (x4 positions)
MIN
MAX
MIN
MAX
Legs with feet to rear:
Towards a brick wall.
Legs with feet forward:
Towards a panel.
For adjustable leg details, see 5.3
4.3 Mounting options, quick overview
 Loading...