7
※ iTDC Quick Installation Guide
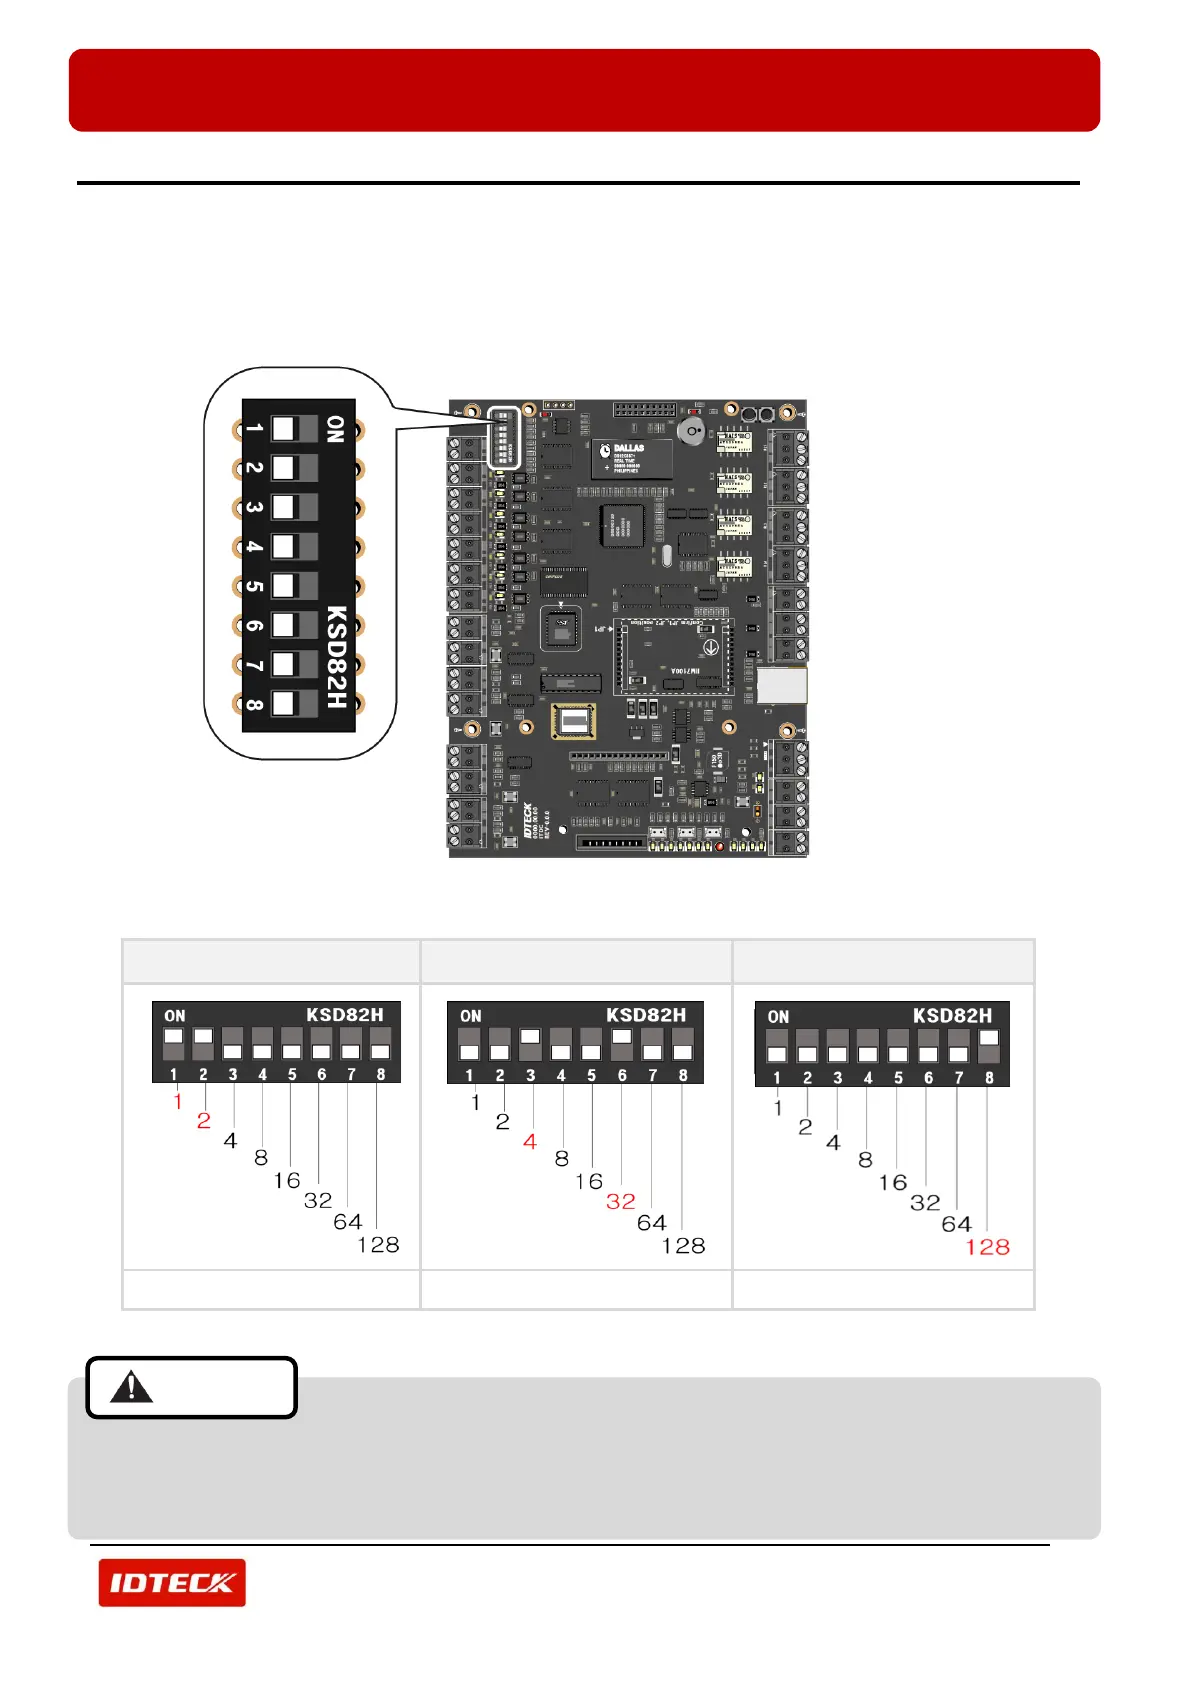
2. BOARD ID SETTING
Board ID is unique address used for Serial Communication. If more than one iTDC/iTDC-SR board is used, Board
IDs must be different from each others.
There is an 8 channel DIP switch on the upper left side of the iTDC/iTDC-SR board for Board ID setting. Each
channel of DIP switch has assigned address value and the Board ID is the sum value of each switch set to “ON”
position. Refer to the example below.
(Figure: Position of DIP Switch and Magnification of the Switch)
4+32 = 36 (Board ID = 36)
128= 128 (Board ID = 128)
(Figure: Board ID Setting Example by DIP Switch)
Board ID must be set before main power connection to the iTDC/iTDC-SR.
If more than one iTDC/iTDC-SR-MAIN boards are installed, you must set different Board ID for
each iTDC/iTDC-SR board.