■■
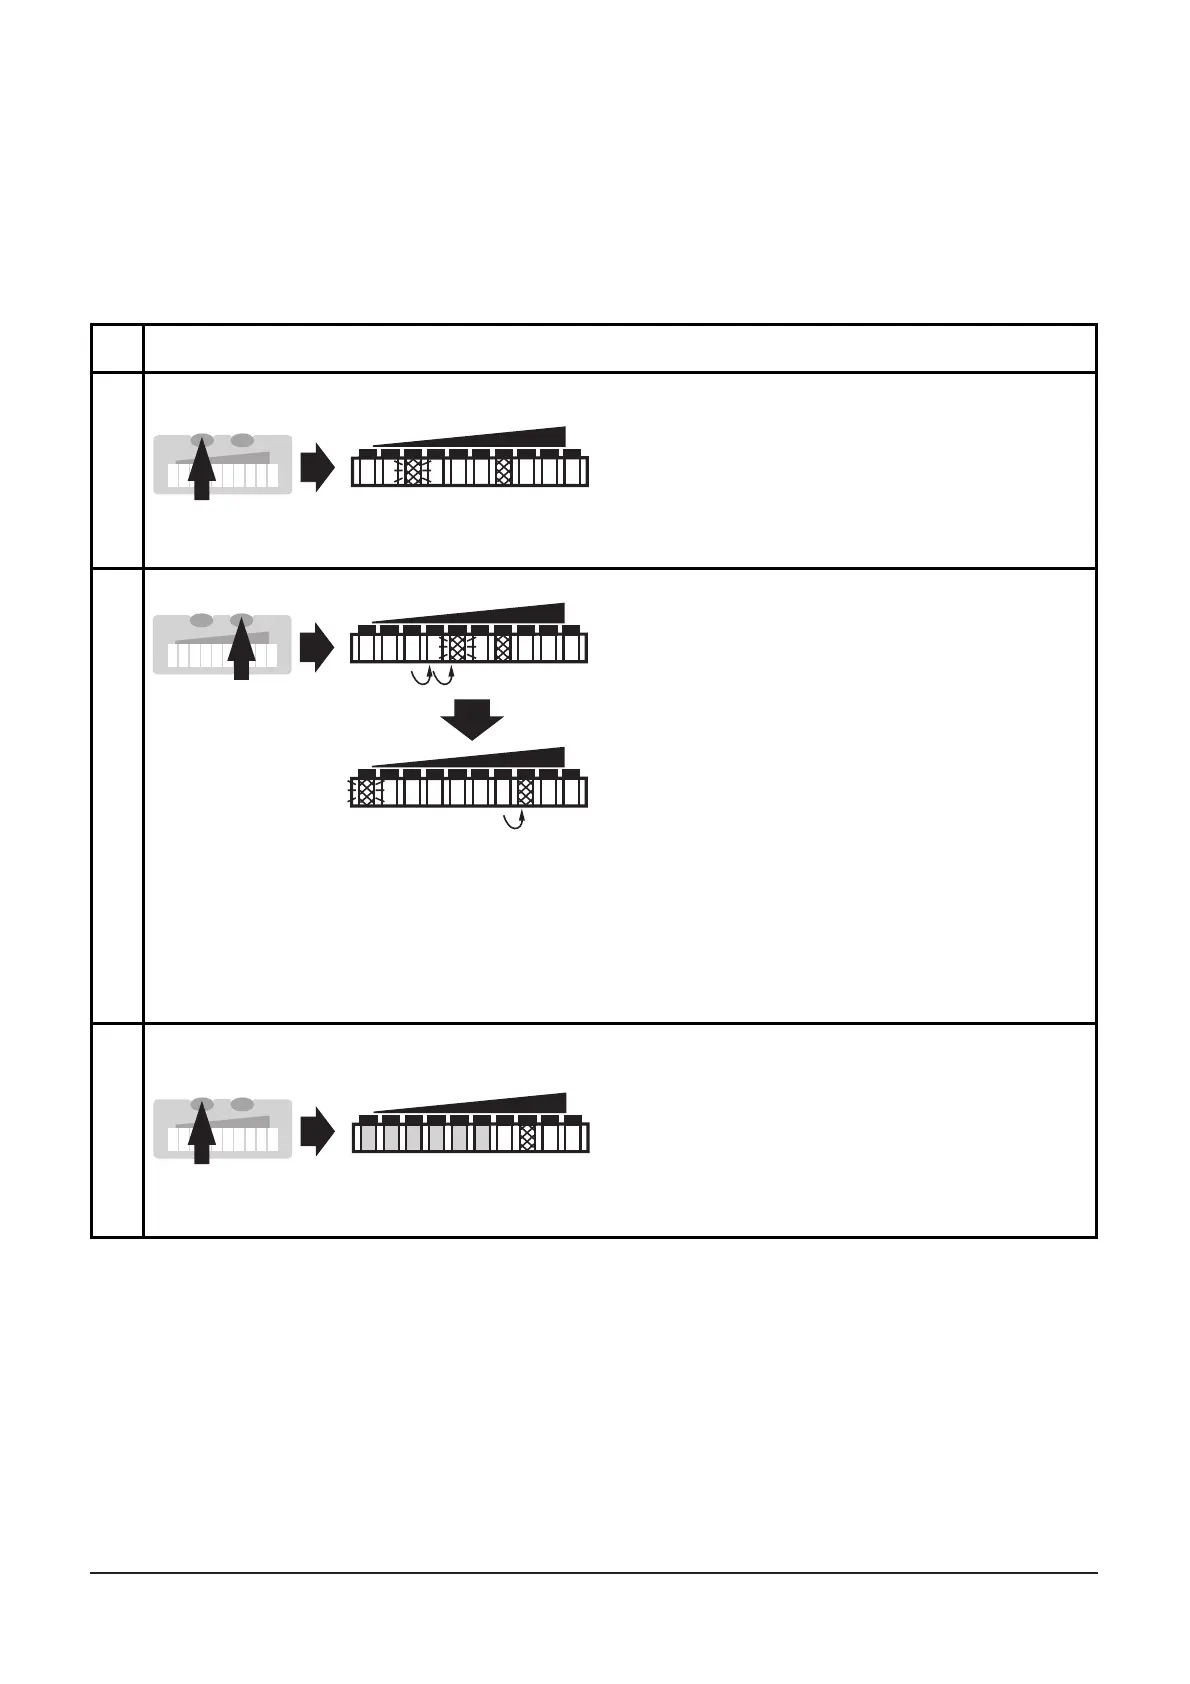
Setting of the switch point flow (SP
Flow
)
The switch point is preset at the factory (LED 7). The setting influ-
ences the reaction time of the unit.
• High switch point = fast reaction in the case of flow decrease.
• Low switch point = fast reaction in the case of flow increase.
32
LEDs = red, if last measured flow value < SP.
LEDs = orange, if last measured flow value ≥ SP.
*Decrease the switch point: Let the flashing and lit LEDs move to the
maximum setting value. Then the cycle starts again at the minimum setting
value.
**Overflow: If the flashing LED and the lit LED exceed the maximum setting
value, the cycle starts again at the minimum setting value.
1
2
Press the Mode/Enter button
briefly. The current switch point is
indicated:
LED lit: coarse setting, LED
flashes: fine setting.
Press the Learn/Set button and
keep it pressed
After 5 s the switch point is
increased* (incremental by
pressing briefly or scrolling by
holding pressed).
Indication:
The flashing LED moves from left
to right. After LED 9 has been
reached the cycle starts again at
LED 0. The LED which is constantly
lit moves on by one position.**
3
Press the Mode/Enter button
briefly (acknowledgement).
The indication goes off briefly.
The set switch point becomes
effective; the unit passes into the
run mode flow.