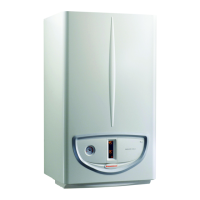
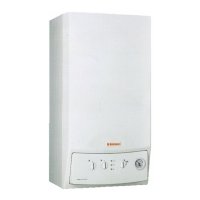
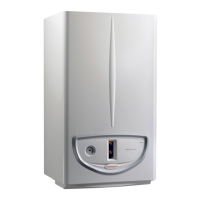
INSTALLER
USER
TECHNICIAN
26
3.3 Troubleshooting.
N.B.: maintenance operations must be performed by
a qualified technician (e.g. Immergas Technical
Assistance Service).
- Smell of gas. Caused by leakage from gas circuit
pipes. Check tightness of the gas delivery circuit.
- The fan works but the ignition discharge on the
burner train does not occur. The fan may start but
the safety air pressure switch does not change the
contact. Check:
1) that the intake-exhaust duct is not too long (over
permissible length).
2) that the intake-exhaust duct is not partially
blocked (on the exhaust or intake side).
3) that the diaphragm on the fume outlet is adequate
for the length of the intake/exhaust ducting.
4) that the sealed chamber is perfectly tight.
5) that the fan feed voltage is not less than 196 V.
- Irregular combustion (red or yellow flame). This
may be caused by a dirty burner, blocked reed
valve, or incorrect installation of the intake-exhaust
terminal. Clean the abovementioned components
and check correct installation of the terminal.
- Frequent cut-in of the temperature-rise safety ther-
mostat. This may be due to low water pressure in
the boiler, insufficient water circulation in the heat-
ing circuit, blocked circulating pump or by an
anomaly in the boiler control card. Check on the
pressure gauge that values are within the set lim-
its. Check that radiator valves are not all closed.
- Presence of air in the system. Check opening of the
cap on the special air valve (see fig. page 19). En-
sure that pressure of the system and expansion ves-
sel preload are are within the set limits; the preload
value for the expansion vessel must be 1.0 bar, and
system pressure between 1 and 1.2 bar.
- Ignition block; see pages 22 and 4 (electrical con-
nection).
3.4 Converting the boiler in case of gas
change.
If the unit has to be adapted for a different gas to that
specified on the dataplate, the relative conversion kit
must be requested for quick and easy conversion.
Boiler conversion must be performed by a qualified
technician (e.g. Immergas Technical Assistance Serv-
ice).
To convert to another type of gas:
- replace the main burner nozzle;
- move the jumper (13 page 28) to the correct posi-
tion for the type of gas required (Natural or LPG);
- adjust maximum boiler heat output;
- adjust minimum boiler heat output;
- adjust (if necessary) heating power;
- adjust the first slow f burner ignition step;
- seal the gas flow control devices (if modified);
- after completing conversion, apply the sticker,
present in the conversion kit, near the dataplate.
Using an indelible marker pen, cancel the data rela-
tive to the old type of gas.
These adjustments must be made with reference to
the type of gas used, following that given in the table
on page 30-31.
3.5 Checks following conversion to other type
of gas.
After ensuring that conversion has been made with
nozzles of the diameter required for the type of gas
used and adjustment has been made to the set pres-
sure, check:
- that there is no flame return in the combustion
chamber;
- that the burner flame is not too high or low and is
stable (does not detach from burner);
- that the pressure testers used for setting are per-
fectly closed and there are no leaks from the gas
circuit.
N.B.: all boiler adjustment operations must be per-
formed by a qualified technician (e.g. Immergas Tech-
nical Assistance Service). Burner adjustment must
be carried out using a differential “U” or digital type
pressure gauge, connected to the pressure point on
the sealed chamber (detail 20 page 19) and the gas
valve outlet pressure point (detail 6 page 28), keep-
ing to the pressure value given in the table on page
30-31 for the type of gas required by the boiler
3.6 Possible adjustments for Eolo Maior @.
• Adjustment of boiler rated heat output (see fig.
page 28).
- Turn the domestic hot water temperature selector
(2 page 21) to the maximum setting;
- open the hot domestic water valve to avoid modu-
lation;
- adjust boiler rated heat output by means of the
brass nut (3), keeping to the max. pressure values
given in the tables on page 30-31 according to the
type of gas used;
- turn clockwise to increase heating power, and
counterclockwise to decrease.
• Adjustment of boiler min. heat output (see fig.
page 28).
N.B.: proceed only after setting the rated pressure.
Minimum heat output is adjusted by means of the
brass nut (4) on the gas valve, keeping the brass nut
(3) locked.
- shut off power supply to the modulating coil (sim-
ply detach a faston); turn the screw clockwise to
increase the pressure, and counterclockwise to
decrease. On completion of adjustment, reconnect