INFANT
WITH INBUILT HARNESS
USE
USING INBUILT HARNESS
Ensure the restraint has been installed & setup as per
“SET UP” & “INSTALLATION” (refer page 10 & 12).
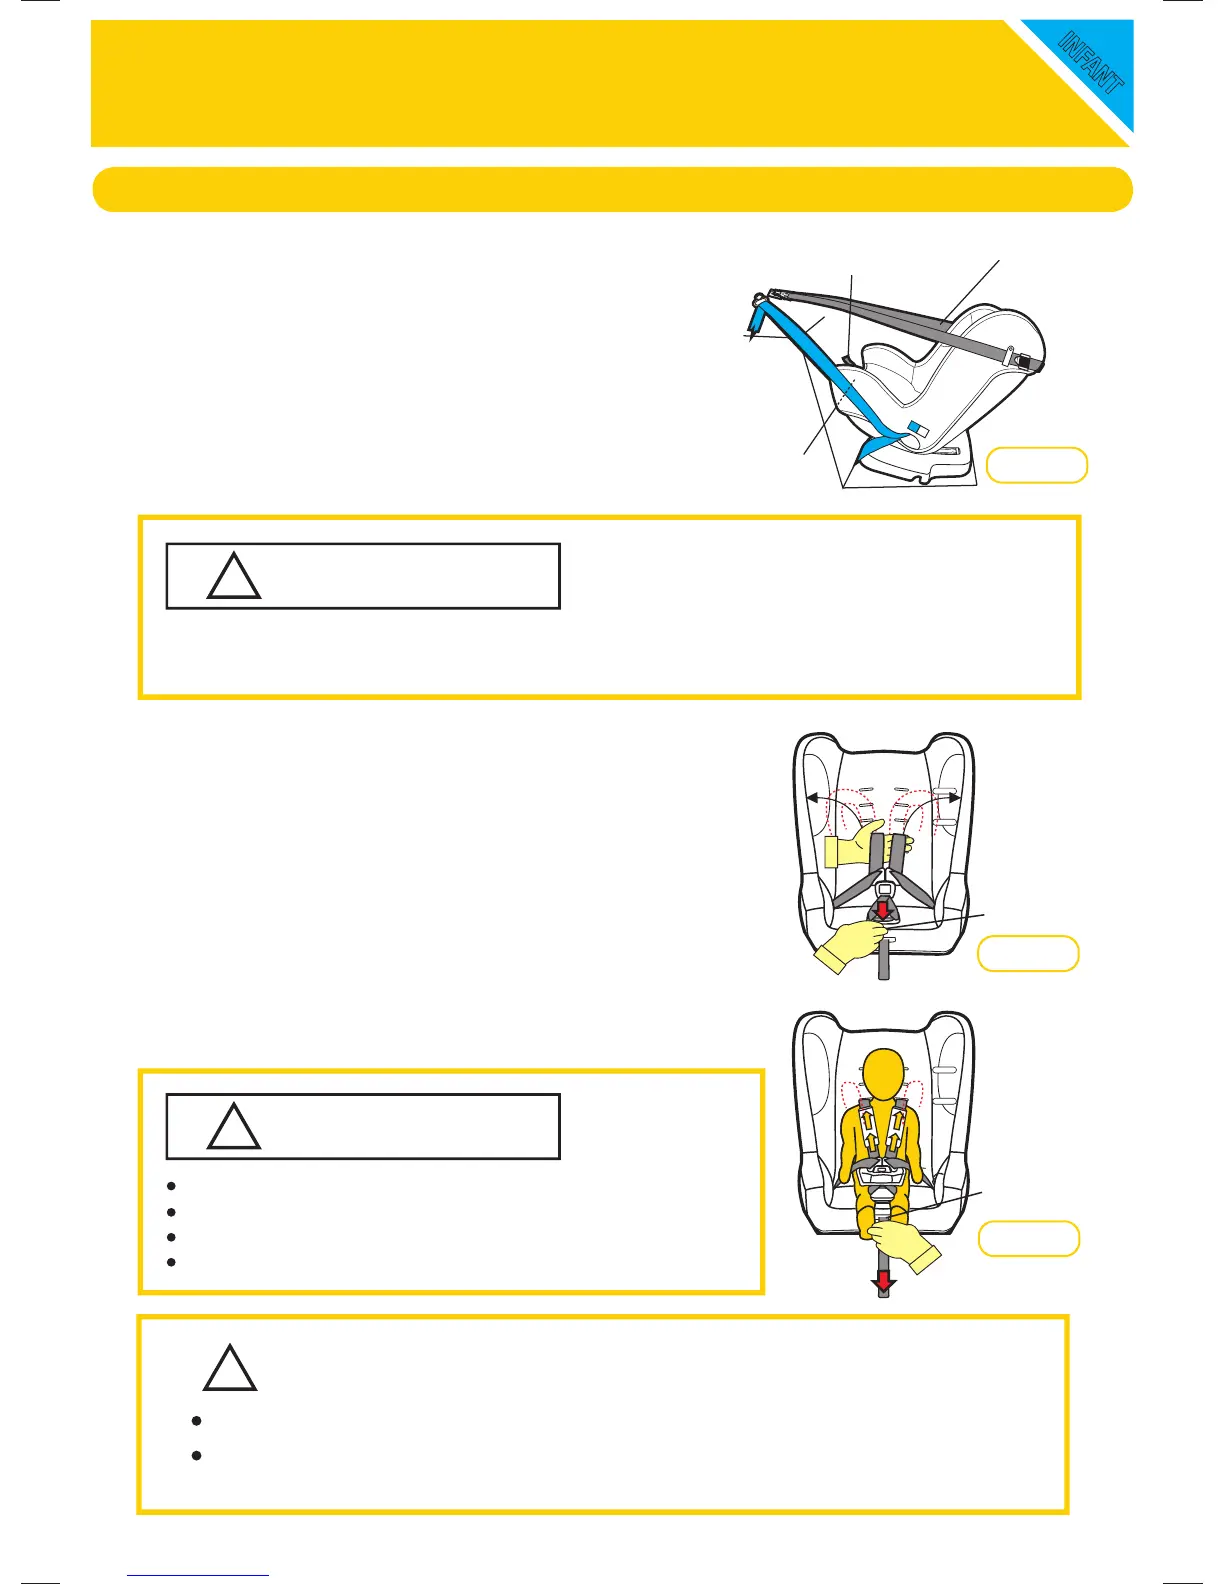
Lengthen the harness in excess of what is needed
before placing the baby in the car seat. To lengthen
the harness, push the harness adjuster (G) that is
located at the front of the seat (see Figure 2) whilst
grasping both shoulder harness straps and pulling
out till lengthened to the desired amount. Ensure
shoulder straps are pulled equally on each side.
Place baby/child in car seat with legs either side of
the crotch strap, place harness over the shoulders
and hips and engage the two buckle tongues (CLICK)
into buckle. CHECK IT IS PROPERLY ENGAGED.
Ensure child is placed centrally in the seat.
Pull harness adjuster strap (H) to take the slack out of
the harness until it is a rm but comfortable t (refer
Figure 3)
NOTE: If upper anchorage strap has been loosened
to allow easier placing of the baby in the restraint,
tighten the upper anchorage strap so it has no slack
in it. DO NOT TIGHTEN EXCESSIVELY.
Step 1:
Step 2:
Step 3:
Step 4:
(G) Harness
Adjuster
(Under cover)
(H) Harness
Adjuster Strap
Upper Anchorage
Strap
Figure 1
Figure 3
DO NOT LEAVE CHILDREN UNATTENDED IN THE CAR.
Fit the restraint rmly to the car seat.
Fit the harness rmly to the child.
A loose restraint or harness is dangerous
To ensure baby’s back is evenly supported, do not put more than one nappy on the baby and
make
sure the nappy is not thickly folded at the back.
WARNING
!
WARNING
!
PULL TO
TIGHTEN(H)
Figure 2
PULL TO
LENGTHEN
PULL TO
LENGTHEN
PRESS(G)
IMPORTANT
!
A LOOSE HARNESS IS DANGEROUS.
The Padded Insert/s (if tted) are designed to provide extra support and comfort for small babies.
Discontinue use when the insert is a tight t or creates discomfort for larger babies/children.
17