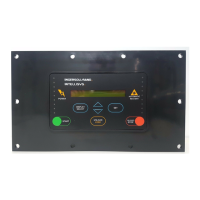
4.2.4 COMPRESSOR CONTROL
Each compressor can be set to Local or Sequence con-
trol through the ISC. Local control means the ISC will
bypass that particular compressor in all sequences, and
will not tell it to load or unload. Sequence control means
the ISC will include the compressor in any sequence that
calls for it.
The Compressor Control Set Points can be accessed by
entering the Set Point routine while the ISC is either
stopped or running. Perform the following steps to
access each compressor, or use the Set Point Map of
Figure 6.1 as a quick reference of how to get to the
COMPRESSOR CONTROL Set Points.
Step Action
1 While not in any Set Point routine, press
the SET button once and observe
“PRESSURE SET UP” in the display.
(NOTE: If you press SET more than once,
the display will cycle through the Pressure
Set Up Set Points. Continue pressing SET
and stop with the display showing
“PRESSURE SET UP”).
2 Press the Right Arrow button three times,
observe “COMP CONTROL” in the display,
or continue to press the Right Arrow button
until you do see it.
3 Press SET once, observe something like
“#1 LOCAL”, This would indicate that
compressor 1 is under its own (local)
control.
4 Press the Up or Down Arrow button to
toggle the compressor between LOCAL or SE-
QUENCE CONTROL, leaving the display at
the selected mode.
5 Press SET once to lock in the selected
mode for that compressor and to step to
the next compressor.
6 If there are more compressors to have their
control mode set, repeat steps 4 and 5
above. When the control of all compressors
has been set and confirmed correct, press
the SEQUENCER STATUS button to leave
the Set Points and return the display to
normal operation.
4.2.5 SEQUENCE ROTATION MODES
One sequence of compressors can be replaced by
another sequence through a process called “rotation”.
Rotating from one sequence to another can be initiated
automatically by the ISC or manually by the operator.
Automatic rotation occurs when the ISC is put in either
TIMED Mode or EVENT Mode. Manual rotation occurs
when the operator puts the ISC in MANUAL Mode.
The ROTATION SET UP Set Points can be accessed by
entering the Set Point routine while the ISC is either
stopped or running. All the Set Points for all three modes
can be entered, but the last mode selected is the one
that will begin to operate immediately upon exiting the
Set Point routine. While TIMED and EVENT modes are
two different ways to automatically rotate sequences,
they both use the same eight sequences, A through H.
(See Section 4.2.3 for set up of the sequences). The fol-
lowing sections detail how to select and enter the Set
Points for each mode, but only the Set Points for the
mode intended to be used need to be entered.
The Set Point Map (Figure 6.1) can be used as a quick
reference of how to get to the ROTATION SET UP Set
Points. Also, it is recommended that the ISC Set Up Log,
“Sequence Rotation Mode” Set Points, (Figure 6.7) be
used for writing down the desired Set Points before
entering them into the ISC. The Log is then available to
serve as a reference for checking what Set Points have
been entered.
TIMED ROTATION MODE
In TIMED rotation mode, the ISC rotates from the cur-
rently running sequence to the next one every time the
accumulated compressor running hours during the cur-
rent sequence equals the “Elapsed Run Time” hours set
point. “Compressor running hours” is defined as the time
accumulated when at least one compressor on the ISC
is running and when the ISC is in TIMED mode.
The order of rotation is always sequence A followed by
B, then C, etc. to the last sequence entered, then back
to A. This means that when the TIMED mode is selected
after making any change to any sequence, the ISC will
restart sequencing with sequence A and will reset the
accumulated compressor running hours to zero. On the
other hand, if TIMED mode was active, then replaced by
another mode, then reactivated with no changes having
been made to any sequences, ISC operation will resume
in the same sequence (rotating to it if necessary) and
with the same accumulated compressor running hours
that were present when TIMED mode was exited.
The only set up required that is unique to the TIMED
rotation mode is the entering of the Elapsed Run Time
Set Point. Perform the following steps to enter or change
the Elapsed Run Time, or use the Set Point Map (Figure
6-1) as a quick reference of how to get to the TIMED
rotation mode and the Set Points.
17
 Loading...

