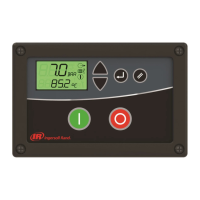
4.1.5 SET BUTTON
This button has numerous functions in the Set Point rou-
tine. It is used to enter the routine, to step through por-
tions of the routine and to “lock in” new set point values.
See appropriate portions of Section 4.2 for details of its
use.
A failure of the ISC’s pressure sensor is one reason for
the “Alarm” LED to light up. Pressing the SET button
when the sensor failure has been corrected will clear the
alarm and turn off the LED. See Section 4.6 for details
concerning all the alarm conditions that could cause the
“Alarm” LED to be on, and when it will go off.
4.1.6 UP AND DOWN ARROW BUTTONS
These are used when in the Set Point routine for chang-
ing Set Point values. They are also used in the Rotation
Set Up portion to select among modes.
Pressing both buttons simultaneously will calibrate the
pressure transducer when the display shows “READY TO
START”. See Section 3.7 for details on when and how to
calibrate.
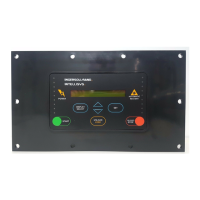
4.1.7 “POWER” LED
This LED lights to indicate there is power applied to the
ISC and that its power supply is working.
4.1.8 “SEQUENCING” LED
This LED lights to indicate the ISC SEQUENCER START
button has been pressed and the ISC is sequencing
compressors.
4.1.9 COMPRESSOR UNIT STATUS LED’s
There is a pair of status LED’s, “ Sequence” and
“Loaded”, for each compressor under the control of the
ISC. Each “Sequence” LED lights to indicate that com-
pressor is in Sequence mode through the communica-
tion channel to the ISC. Each “Loaded” LED lights to
indicate that compressor is running loaded.
4.1.10 “ALARM” LED
An alarm status from any of the compressors, a commu-
nication failure detected by the ISC or a system pressure
transducer failure detected by the ISC will turn on this
LED. See Section 4.6 for details of each alarm condition
and how each is cleared.
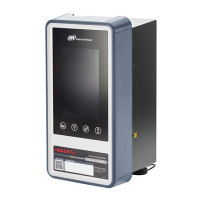
4.2 SETTING UP THE ISC
Setting up, or programming, the ISC is done by entering
chosen values for the ISC operating parameters, which
are called set points. Figure 6.1 is a map of all the ISC
set points and provides a quick reference of how to step
the display to each one. Figures 6.2 through 6.7 list the
set points, show the value limits for each one, and pro-
vide space for recording the values chosen for specific
air system requirements.
Before entering any set points, the following set up
instruction sections should be read and used for decid-
ing the exact set point values needed. While reading
these sections and deciding on values, record them in
the ISC Set Up Log, Figures 6.2 through 6.7 (or a copy
of it). Then, using the entries in the log as a guide, exe-
cute the steps listed below to enter each set point.
The following guidelines apply when viewing or changing
set point values.
1. Press the SET button to enter the set point routine
while the ISC is operating normally.
2. Press the Right Arrow (COMPRESSOR STATUS) but-
ton to step between set point groups, and press the SET
button to step between set points within each group. This
is described in detail in the following sections and is out-
lined by Figure 6.1.
3. Press Up or Down Arrow buttons to change set point
values.
4. Press the Right Arrow button to select characters with-
in set points, where appropriate. The selected character
will be indicated by an underline cursor in the display.

 Loading...