If the system pressure should ever rise above the “maxi-
mum pressure limit”, which is defined as 5 PSI above the
“upper pressure limit”, the ISC will tell all compressors to
unload at once. If the pressure then drops to the “upper
pressure limit” within one minute, the ISC will tell all pre-
viously loaded compressors, except the last one, to load
again. If however, it takes the pressure more than one
minute to drop to the “upper pressure limit”, the ISC will
tell only the first compressor in the sequence to load. In
either case, since the pressure will be within the Control
Band, the normal sequence logic will apply.
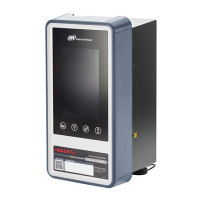
The Pressure Control Set Points can be accessed by
entering the Set Point routine while ISC is either stopped
or running. Perform the following steps to access each
item, or use the Set Point Map of Figure 6.1 as a quick
reference of how to get to the PRESSURE CONTROL
Set Points.
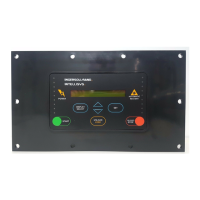
Step Action
1 While not in any Set Point routine, press the
SET button once and observe “PRESSURE
SET UP” in the display.
(NOTE: If you press SET more than once, the
display will cycle through the Pressure Set Up
Set Points. Continue Pressing SET
and stop with the display showing
“PRESSURE SET UP”).
2 Press the Right Arrow button once, observe
“PRESSURE CONTROL” in the display, or
continue to press the Right Arrow button until
you do see it.
3 Press SET once, observe “CONTROL
BAND___________.”
4 Press the Up or Down Arrows to set the width
of the pressure band the ISC is to use for
loading and unloading compressors. The
width is always even, with half of it above the
Target Pressure and half below the Target
Pressure.
(Note: See the beginning of this section for an explana-
tion of the Control Band, the Load Delay Time, and the
Unload Delay Time.)
5 Press SET once, observe “WAIT LOAD______
SEC”.
6 With the display showing “WAIT
LOAD _____SEC”, press the UP or Down
Arrow buttons to set the Load Delay Time in
seconds.
Step Action
7 Press SET once, observe
“UNLOAD _______SEC”.
8 With the display showing
“UNLOAD_______SEC”, press the Up or Down
Arrow buttons to set the Unload Delay Time
in seconds.
9 Press SET to step through each of the
PRESSURE CONTROL Set Points and
confirm that each is correct, or change any
as necessary.
10 Press the SEQUENCER STATUS button to
leave the Set Points and return the display
to normal operation.
4.2.3 SEQUENCE SET UP
The ISC can store up to eight user selected sequences,
called sequence “A” through sequence “H”, plus a ninth
called sequence “M”, which is used only when in Manual
mode. A sequence is a specified numerical order of
compressors which the ISC will follow when loading and
unloading compressors to maintain the system air pres-
sure at the preset Target Pressure. Each compressor’s
number corresponds to the communication channel
number it is plugged into inside the ISC enclosure. See
INSTALLATION Section 3.0 for details, and refer to the
“Compressor Control” setpoints (Figure 6.2) that was
completed as part of the installation procedure.
The same eight sequences, “A” through “H” are used by
both the Timed and the Event modes of rotating from
one sequence to the next. See Section 4.2.5, Sequence
Rotation Mode, for setting up the modes. It is important
to know that the Timed mode always rotates from one
sequence to the next in “alphabetical order”. This means
that when Timed mode is started, sequence “A” will
always run first, followed by “B” after the Elapsed Run
Time expires, followed by “C”, etc.
Timed mode rotation will loop from the last sequence
entered back to “A” and continue indefinitely.
Using the following rules, decide what sequences the
ISC is to use and write them in the appropriate section
of Figure 6.6. Then perform the steps that follow these
rules to enter the chosen sequences into the ISC.
15

 Loading...