7
Getting Started
7
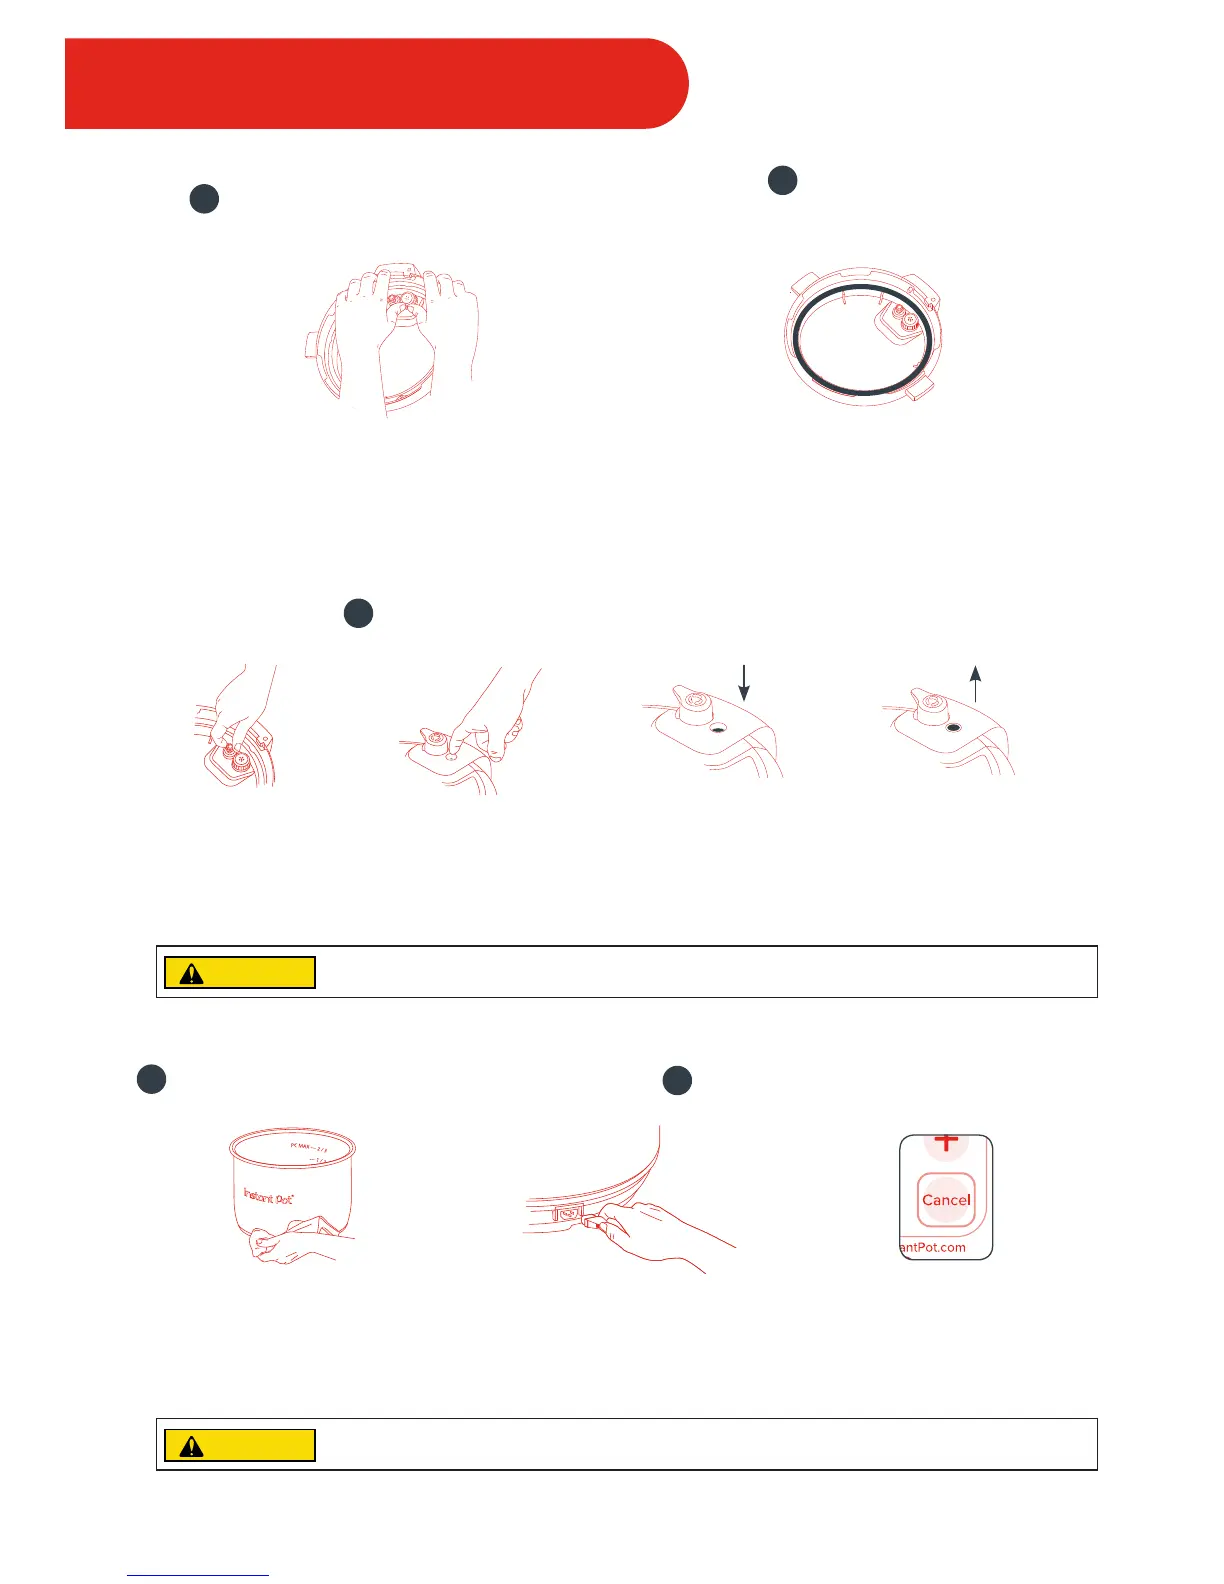
Remove & Install Float Valve & Silicone Cap
Remove: Detach
silicone cap from oat
valve and remove from
top. Do not discard.
Install: Drop oat valve into
top. Attach silicone cap to
bottom of oat valve.
Down: Cooker is
depressurized
Up: Cooker is
pressurized
8
Remove & Clean Inner Pot
9
Secure Power Cord
Remove inner pot from cooker base and
wash before rst use. Wipe outer surfaces
of inner pot and heating element to
ensure they are dry and free of debris.
Secure detachable power cord to
base power socket. Connect to a 120V
power source. Cooker will display
“OFF” to indicate Standby mode.
To disconnect, press Cancel then
remove plug from power source.
CAUTION
While oat valve is up, contents of cooker are pressurized. Do not attempt to remove lid. Refer to “Venting
Methods” for releasing pressure.
CAUTION
Do not pour food or liquid into cooker base. To avoid risk of personal injury and/or property damage, always
cook in inner pot.
5
Remove & Install Anti-Block Shield
6
Check Sealing
Ring & Sealing Ring Rack
Remove: Grip lid and press rmly against side
of anti-block shield (pressing towards side of lid
and up) until it pops off prongs underneath.
Install: Place anti-block shield over prongs
and press down until it snaps into position.
Remove: Pull sealing ring out from
behind sealing ring rack.
Install: Place sealing ring over sealing ring rack
and press into place. Ensure sealing ring is snug.
 Loading...