139
Multi Zone—Continued
There are two ways you can connect Zone 3 speakers:
1. Connect them directly to the AV receiver.
2. Connect them to an amp in Zone 3.
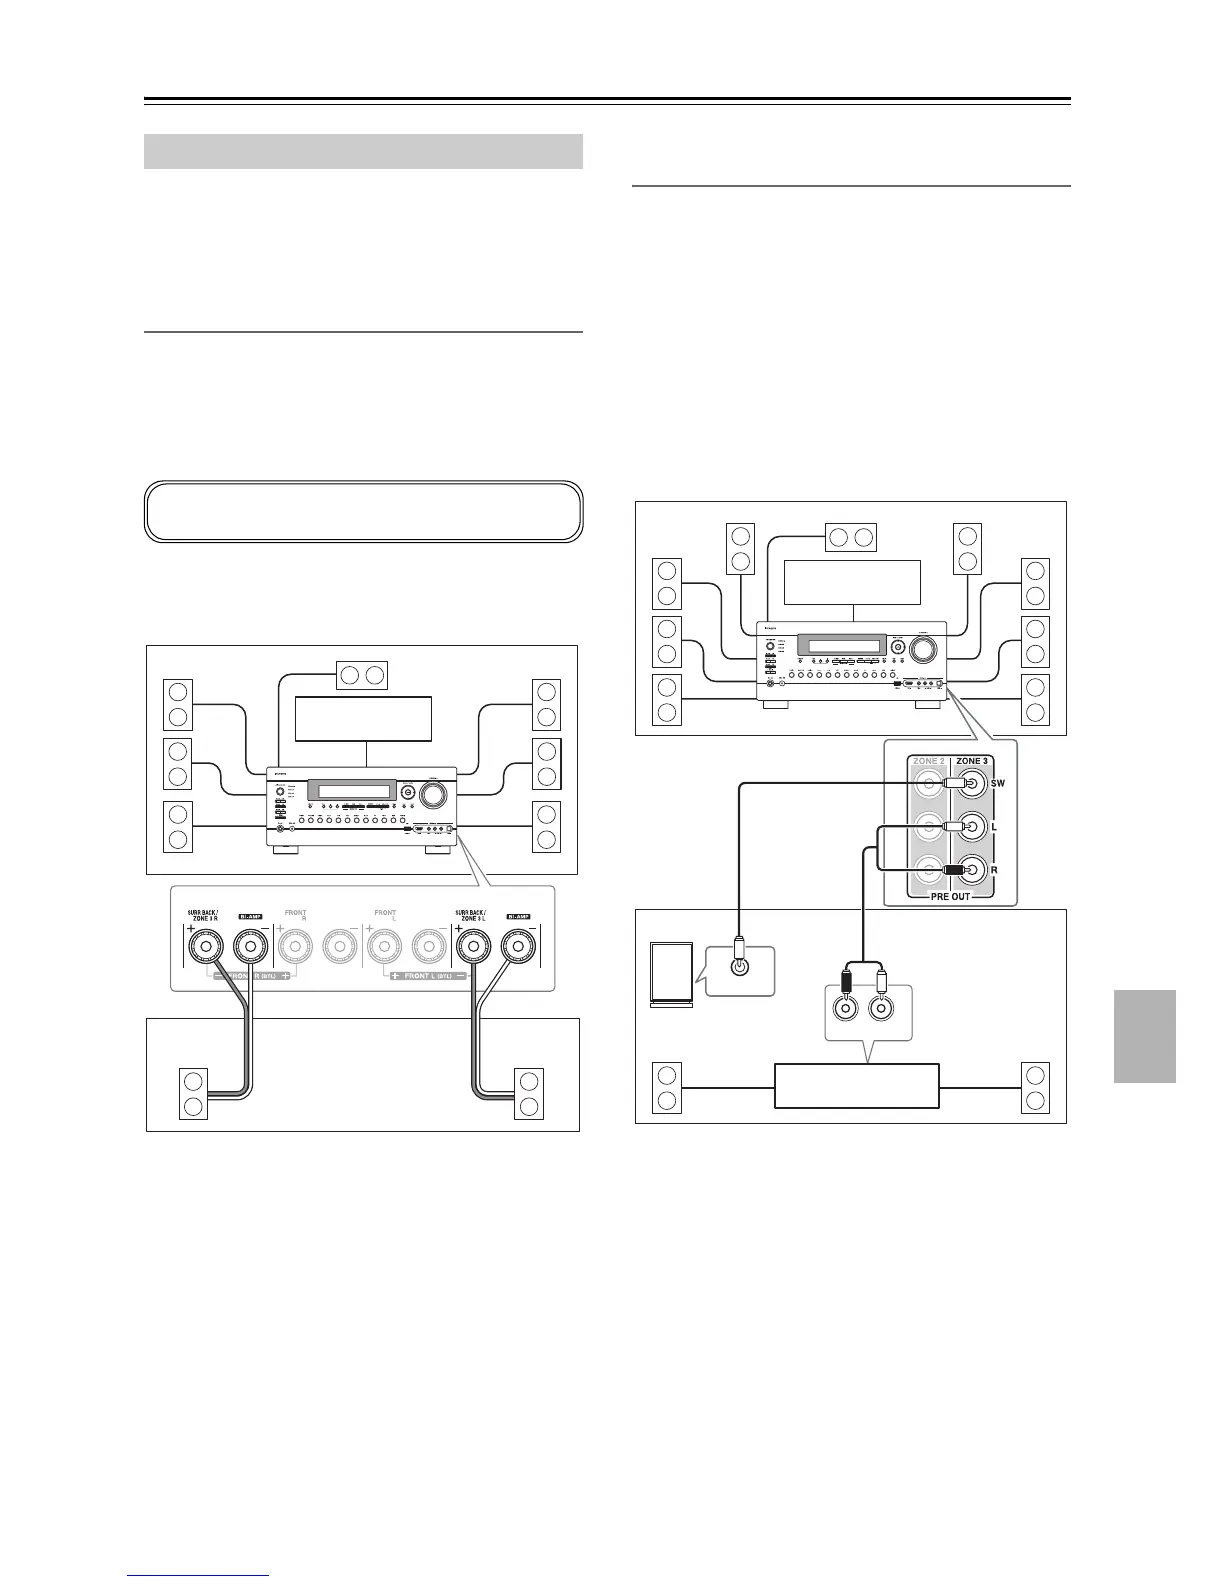
Connecting Your Zone 3 Speakers Directly
to the AV receiver
This setup allows 7.2-channel playback in your main
room and 2-channel stereo playback in Zone 3, with a
different source in each room. This is called Powered
Zone 3, as the Zone 3 speakers are powered by the AV
receiver.
Hookup
• Connect your Zone 3 speakers to the AV receiver’s
SURR BACK/ZONE 3 L/R speaker terminals.
Notes:
• With this setup, the Zone 3 volume is controlled by the
AV re c e iver .
• Powered Zone3 cannot be used if “Speakers
Type(Front)” is set to “Bi-Amp” or “BTL” (see
page 54).
Connecting Your Zone 3 Speakers to an
Amp in Zone 3
This setup allows 9.2-channel playback in your main lis-
tening room and 2-channel stereo playback in Zone 3,
with a different source in each room.
Hookup
• Use an RCA audio cable to connect the AV receiver’s
ZONE 3 PRE OUT L/R jacks to an analog audio input
on your Zone 3 amp.
• Use an RCA audio cable to connect the AV receiver’s
ZONE 3 PRE OUT SW jack to the line input on a
powered subwoofer in Zone 3.
• Connect your Zone 3 speakers to the speaker terminals
on your Zone 3 amp.
Note:
With the default settings, the Zone 3 volume must be set
on the Zone 3 amp. If your Zone 3 amp has no volume
control, set the “Zone3 Out” setting to “Variable” so that
you can set the Zone 3 volume on the AV receiver (see
page 142).
Connecting Zone 3
To use this setup, you must set the “Powered Zone3”
setting to “Act” (see page 141).
L R
Main room
Zone 3
TV
AV receiver
LR
LINE INPUT
R
L
IN
Main room
TV
Zone 3
AV receiver
Receiver/
integrated amp
Powered subwoofer