Intel
®
Galileo
March 2014 Board User Guide
Order Number: 330237-001US 15
Details and Specifications—Intel
®
Galileo Board
6. The serial console displays a list of Quark platforms. Select Galileo.
7. The serial console displays a user action menu. Disconnect the resistor pin shown
in Figure 5 from ground. Select the system recovery option.
The recovery procedure begins and the SPI flash is reprogrammed. This will take
about 5 minutes. The recovery completes with a system reboot.
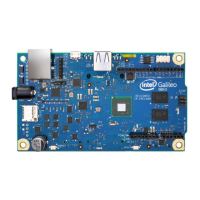
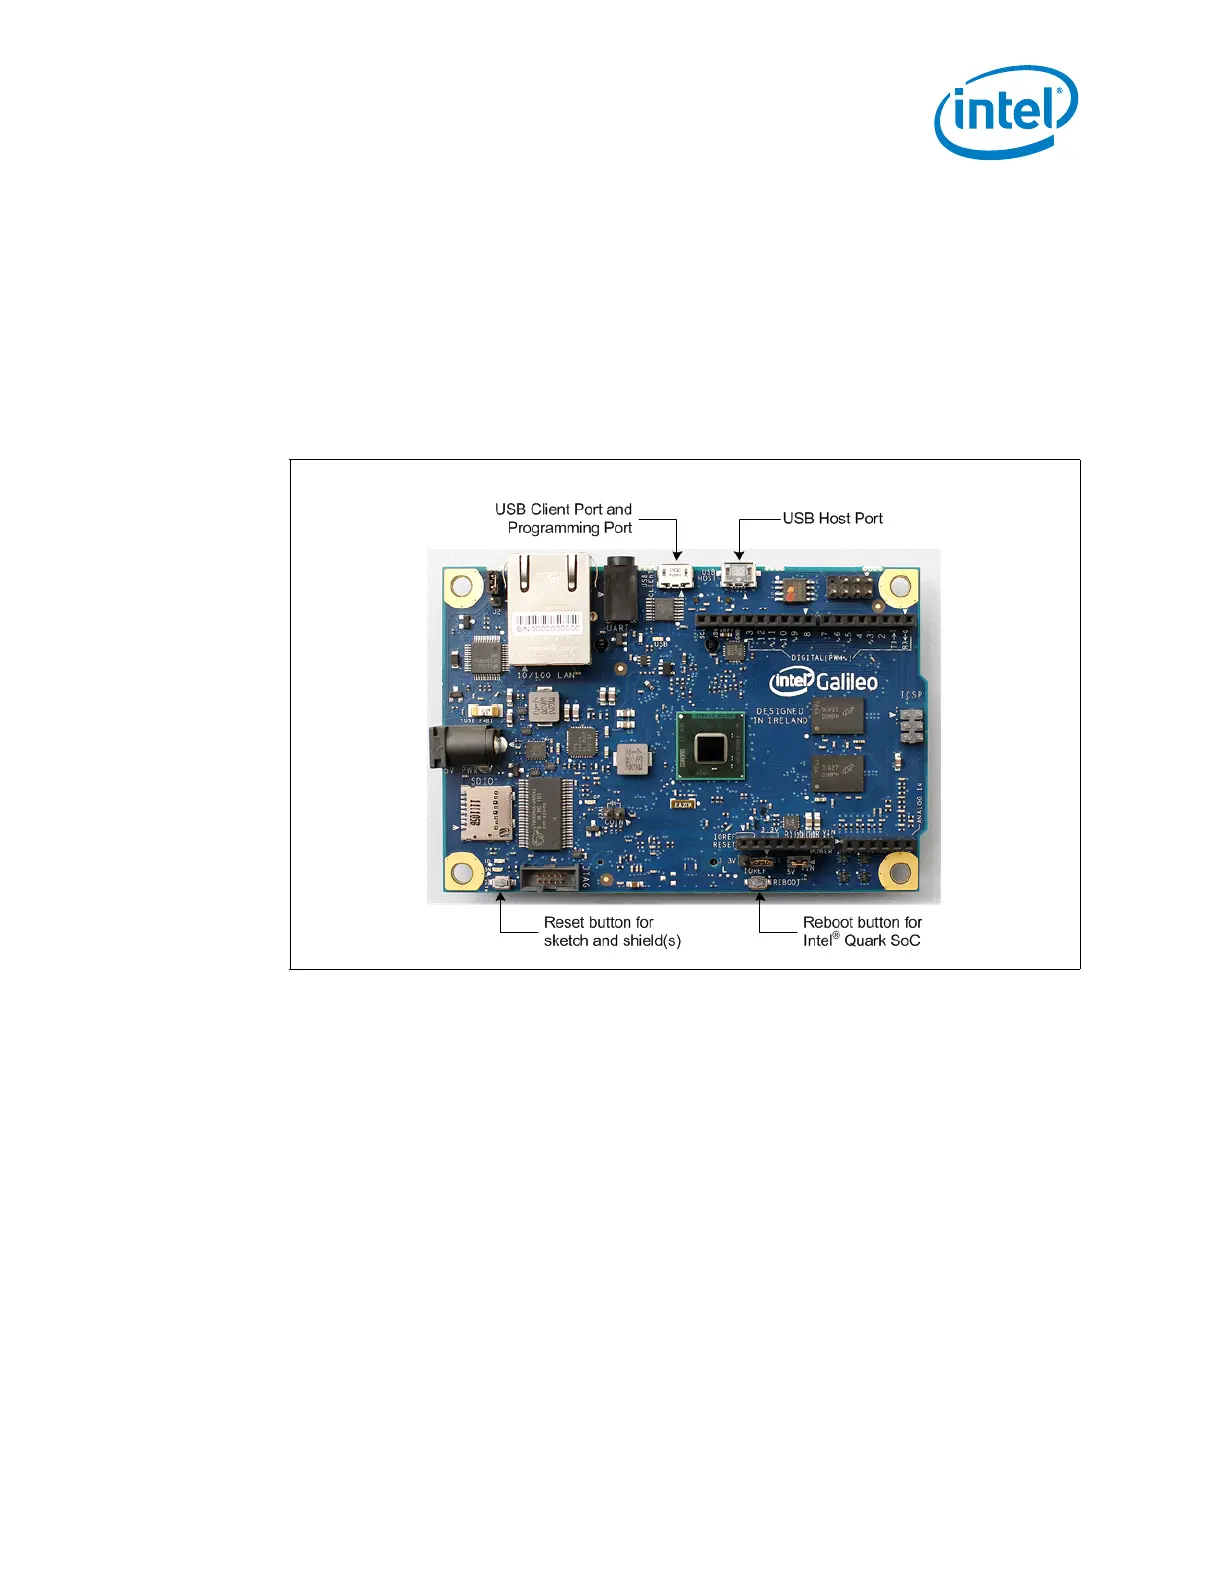
2.6 Buttons
There are two buttons on the Intel
®
Galileo Board, shown in Figure 6.
• Reset button:
To reset the currently running Arduino* sketch and any connected shield(s), press
the button marked Reset.
You can also reset the board in software (recommended for faster rebooting).
• Reboot button:
To reset the entire board, you can trigger a reboot of the Intel
®
Quark SoC X1000
by pressing the button marked Reboot. See the Note below.
Note: Using Reset versus Reboot
On an Arduino Uno, pressing the reset button resets the microcontroller and any
attached shields. This also resets the currently running sketch. On the Intel
®
Galileo Board, you don’t need to reboot the Intel
®
Quark SoC X1000 to reset the
sketch or any attached shields. If the SoC is rebooted each time a sketch is reset or
a new sketch is uploaded, it causes a full (and usually unnecessary) reboot of the
Linux operating system.
Instead, the Intel
®
Galileo Board provides a Reset button that can be used to reset
the sketch and any attached shields without triggering a reboot of the Intel
®
Quark
SoC X1000. If the SoC needs to be rebooted, you can do this by pressing the
Reboot button on the board.
Figure 6. Reset Button and Reboot Button