Disassembly
2 - 8 Removing the System Memory
2.Disassembly
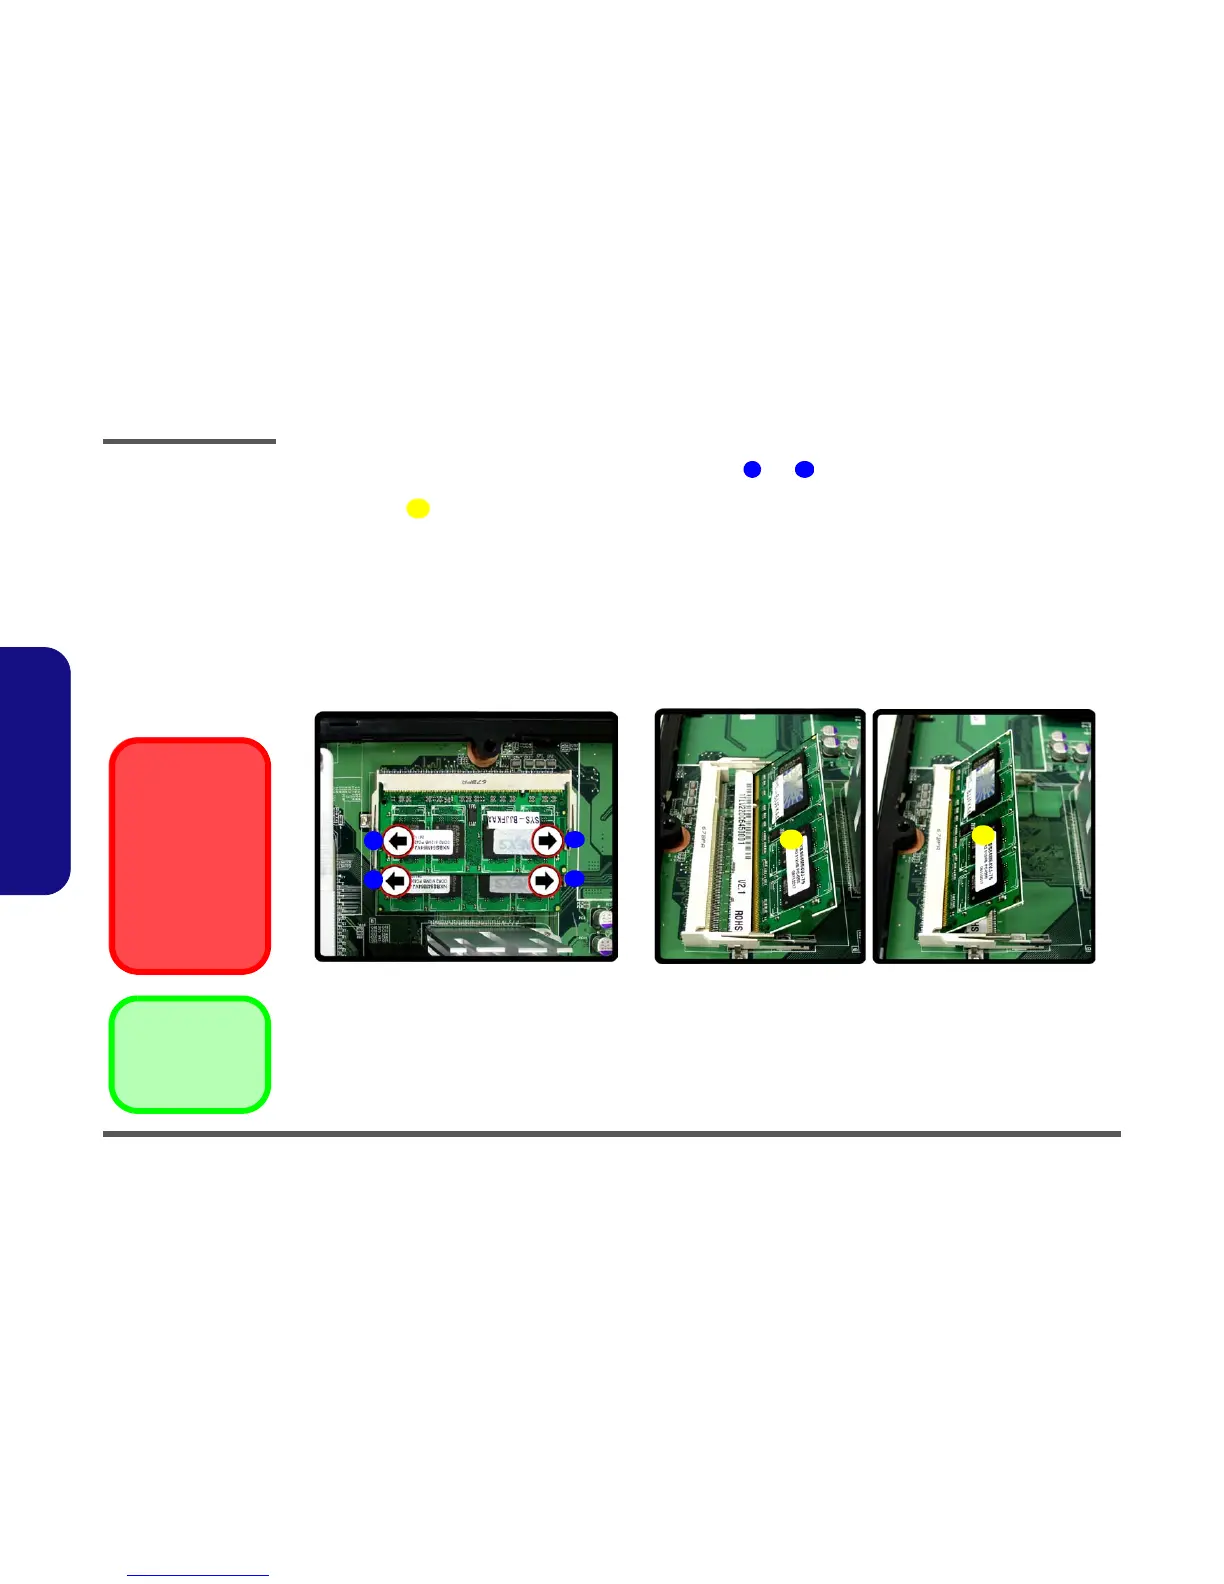
7. For each module you want to replace, gently push the latches and toward the sides of the socket to release the
module. Push the latches to release the second module if necessary.
8. The module will pop-up, and you can remove it.
9. Insert the new module. The module will only fit one way as defined by the pin alignment.
10. Make sure the module is seated as far into the slot as it will go (DO NOT FORCE IT). The latches will click into
place on the sides of the module. Make sure they are secure.
11. Reverse the procedures to put the computer back together (don’t forget to reconnect the fan cable), and do not
forget all the screws. When you restart the computer the new memory configuration should be registered.
12. If the system doesn’t properly detect the new memory, and you are sure they are properly “seated”, you may
need to run the Setup utility.
9 10
11
d. e.
9
10
9
10
11
11
14. Memory Module(s)
Figure 2 - 3
Memory Removal
Sequence
d. Pull the latch(es) on
the memory sockets to
release the module(s).
e. The module will pop-
up., and you can
remove the module.
Contact Warning
Be careful not to touch
the metal pins on the
module’s connecting
edge. Even the clean-
est hands have oils
which can attract parti-
cles, and degrade the
module’s perfor-
mance.