16
SL7D REAR SEAT VIDEO HEADREST SYSTEM Owner’s Manual
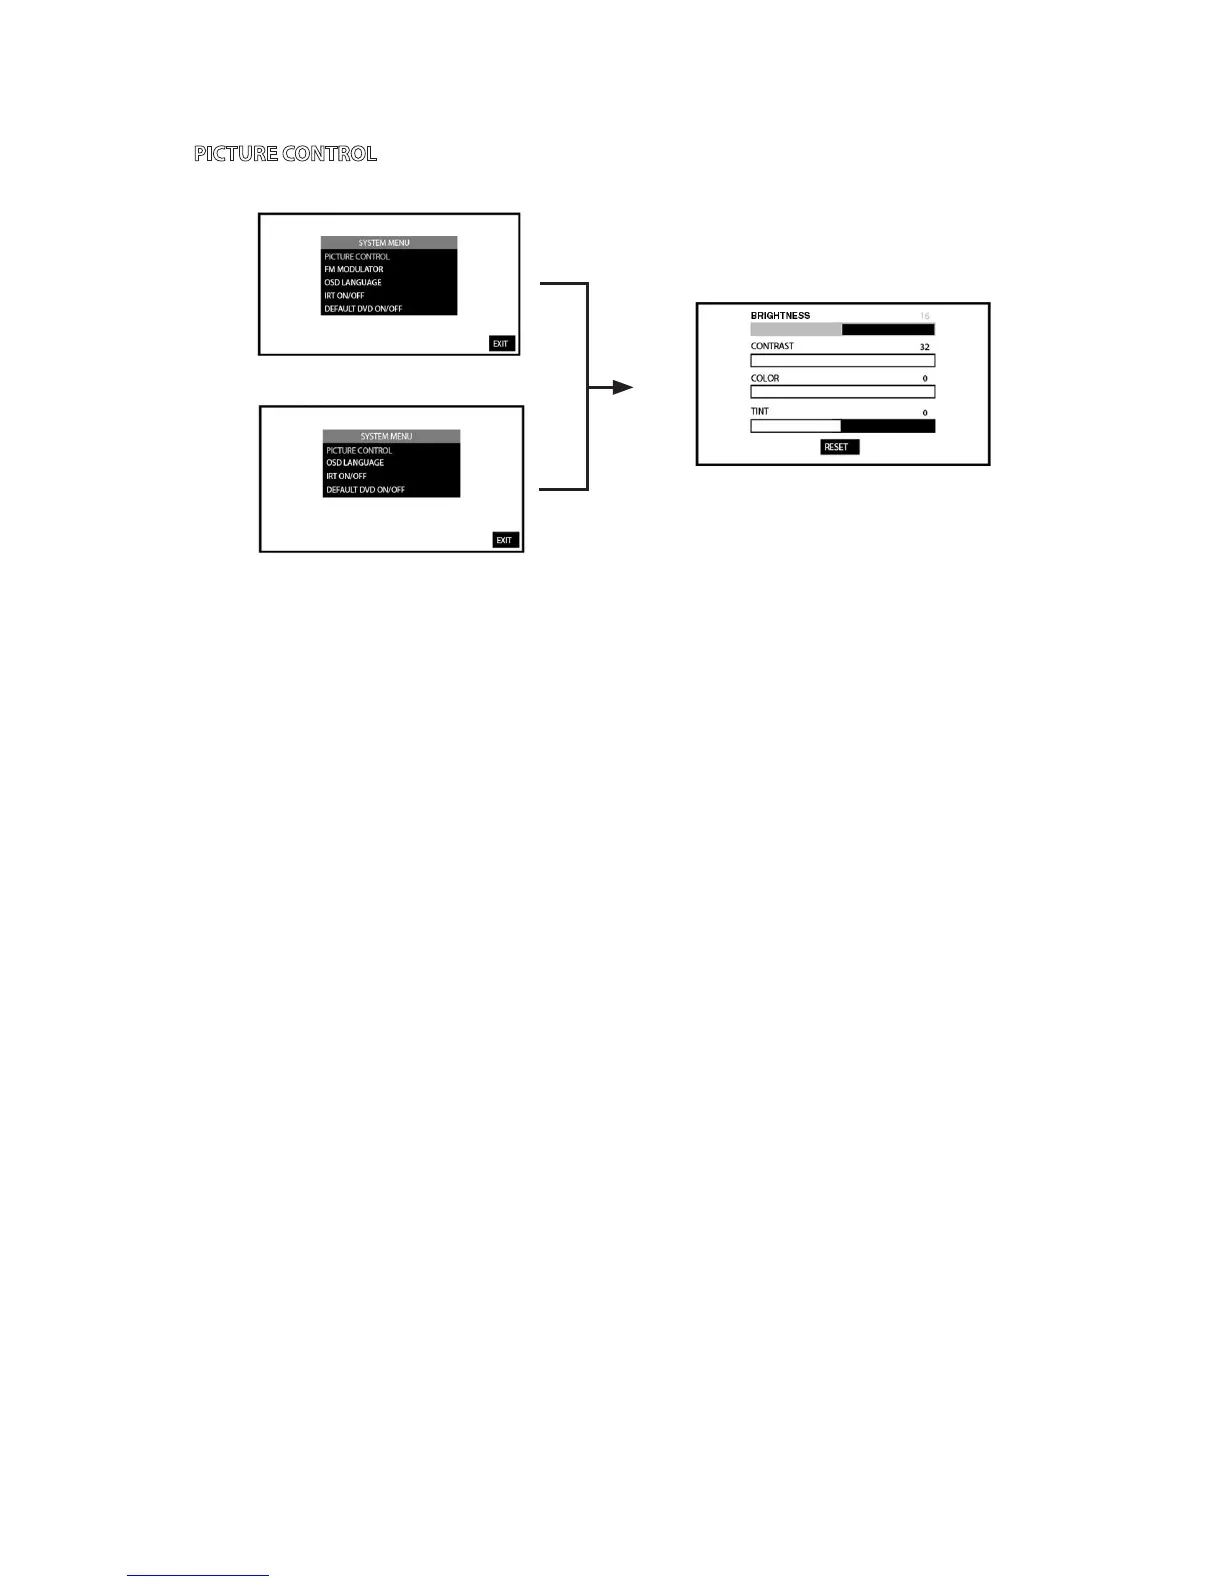
PICTURE CONTROL
PICTURE CONTROL FROM THE FRONT PANEL (M1 and M2) (Figure 13):
1� Press the MENU/SELECT button on the front panel of the system (Figure 12) to show the
System Menu� (Figure 13)
2� Use the UP or DOWN direction buttons to select Picture Control and press the
ENTER button to enter the sub-menu�
3� Use the UP or DOWN direction buttons to select one of the ve settings
in the Sub-Menu (Brightness, Contrast, Color, Tint and Reset)� Using the
LEFT/RIGHT direction buttons, adjust the level of the picture setting chosen�
NOTE: Levels are set from “0” to “32” for Brightness, Contrast and Color. The levels for Tint
is set from “-16” to “+16”. Tint Control is not available in PAL Mode.
4� After level setting(s) are made, the Picture Control sub-menu will automatically disappear
from main screen within 5 or 6 seconds, or press the Menu/Select button again to return
to the System Menu�
5� Select reset to return the picture setting control back to factory defaults�
PICTURE CONTROL from the Remote Control:
1� Depending on the monitor to be adjusted select “M1” or “M2” by pressing the M1 or M2
button�
2� Press the PIX button to select Picture Control
3� Use the UP or DOWN direction buttons to select one of the ve settings
in the Sub-Menu (Brightness, Contrast, Color, Tint and Reset)� Using the
LEFT/RIGHT direction buttons, adjust the level of the picture setting chosen�
NOTE: Levels are set from “0” to “32” for Brightness, Contrast and Color. The levels for
Tint is set from “-16” to “+16”. Tint Control is not available in PAL Mode.
4� After level setting(s) are made, the Picture Control sub-menu will automatically disappear
from main screen within 5 or 6 seconds, or press the PIX button again�
5� Select reset to return the picture setting control back to factory defaults�
Figure 13
SYSTEM SETUP SUBMENUS
SL7D(M1)
SL7D(M2)