Images & Illustrations
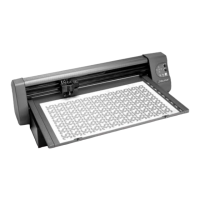
Figure 1. Front view of the 300 System and a close-up back of the machine . ........ xiv
Figure 2.
Unpacking the cutter . .......................................................................................... 15
Figure 3.
The 301 Software installation screen. ............................................................... 16
Figure 4.
The Ioline software icons will be placed on the desktop . ........................... 16
Figure 5.
Install the drivers, then insert the USB key into the PC . ............................. 16
Figure 6.
Locations of the power cord outlet, serial port and USB port ................. 17
Figure 7.
Rear view of the computer parallel and serial ports . ................................... 17
Figure 8.
Adhesive sheet and backing material guidelines ............................................ 18
Figure 9.
Align the adhesive sheet with the L-shaped Tray alignment marks ......... 18
Figure 10.
Apply the material on top of the Adhesive Sheet on the Tray ................. 19
Figure 11.
Blade selection guidelines ................................................................................... 20
Figure 12.
Installing the blade in the blade holder ............................................................ 20
Figure 13.
A properly adjusted blade .................................................................................. 20