3 DEVICE MANAGEMENT
3 DEVICE MANAGEMENT
3.4 Schedules
3.4 Schedules
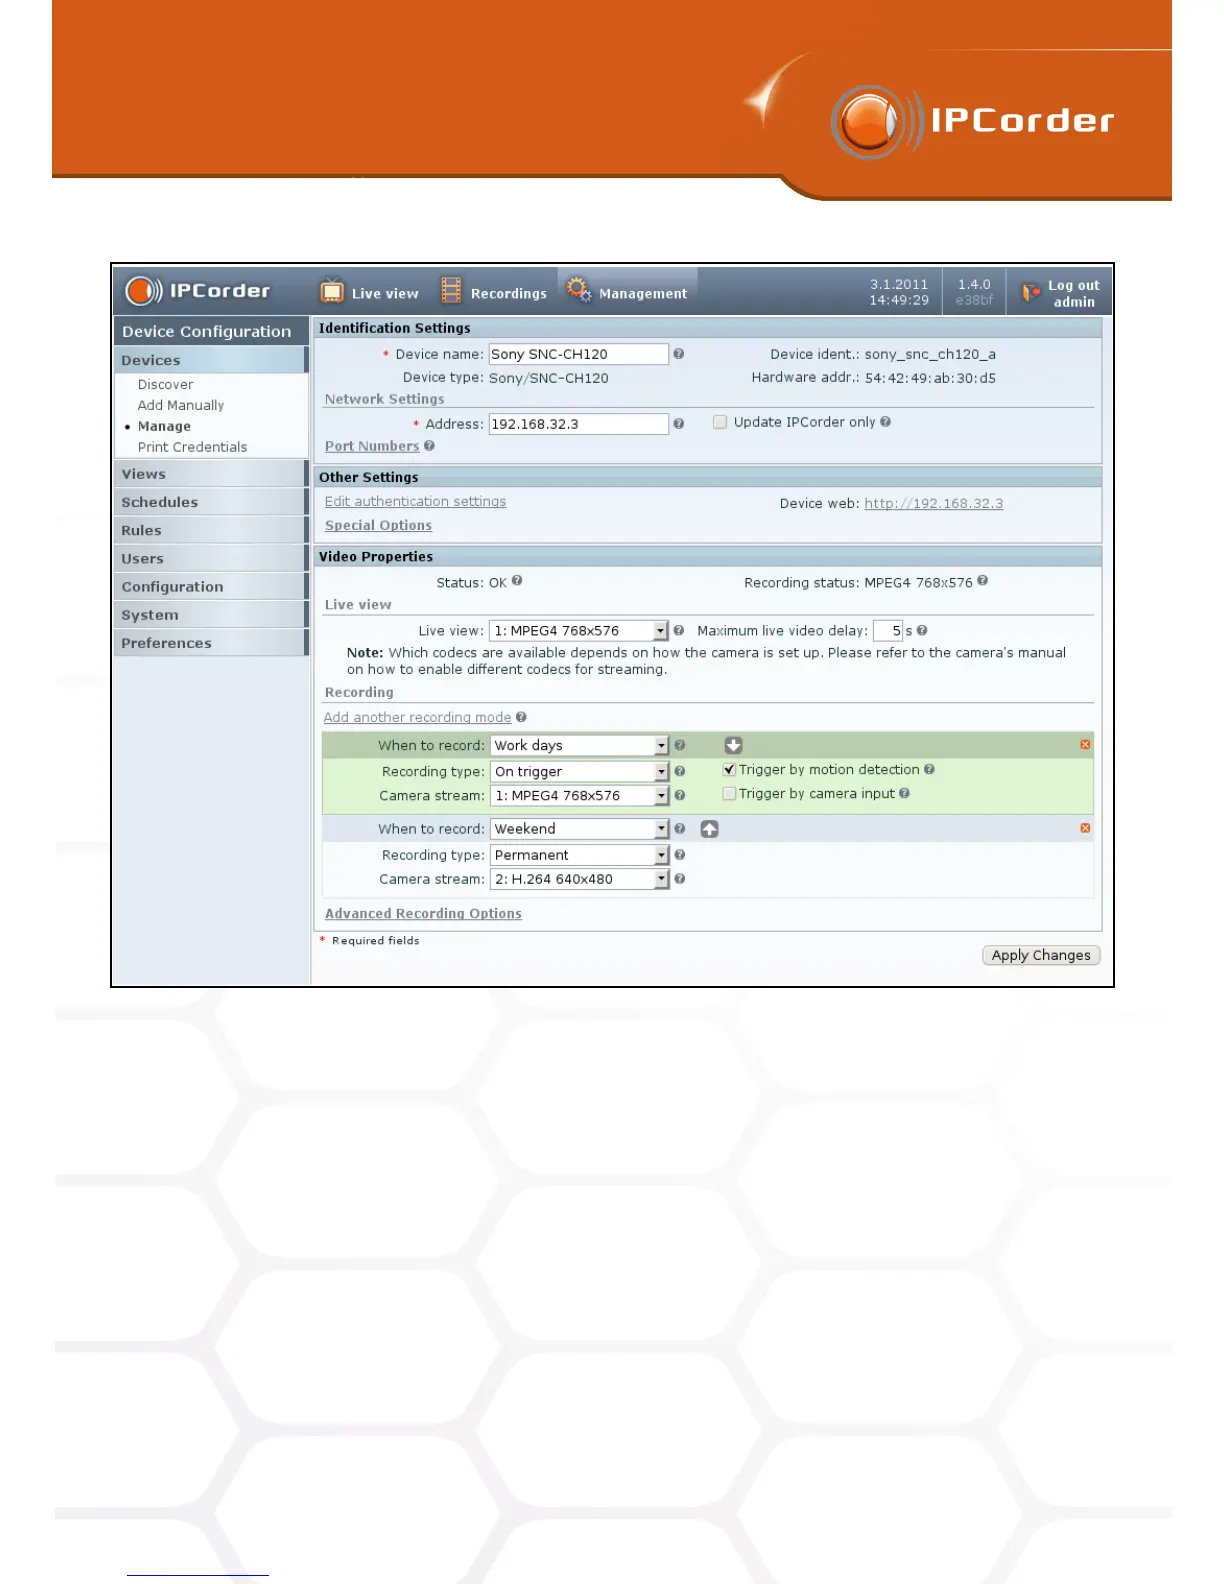
Figure 17: Setting up recording modes
You put the name of the schedule in box Schedule name. Under this name it will be available in other parts
of the system. Than you set into Period day in week and hours in that the schedule will be active. The button
Add Next can be used to add another period (25 periods is maximum). For deleting the period, use the Delete
button next to the selected line. You can use also the option Daily, Working days and Weekend to specify the
Period.
If you need to specify more than one recording period in one day (Figure 18), it is necessary to specify every
period individually. For instance if you want to have the schedule active on Monday from 9:00 to 12:00 and than
from 13:00 to 15:00 you have to use two lines.The first one for Monday From 8:00 To 12:00 and the second one
Monday From 13:00 To 18:00.
You add the Schedule by cicking on Create button.
The list of already existing schedules is available in Management – Schedules – Manage. The Schedule can
be set up by clicking on Manage next to its name. To confirm changes use Apply Changes button. In menu
26