4 RECORDING MANAGEMENT
4 RECORDING MANAGEMENT
4.1 Live View
4.1 Live View
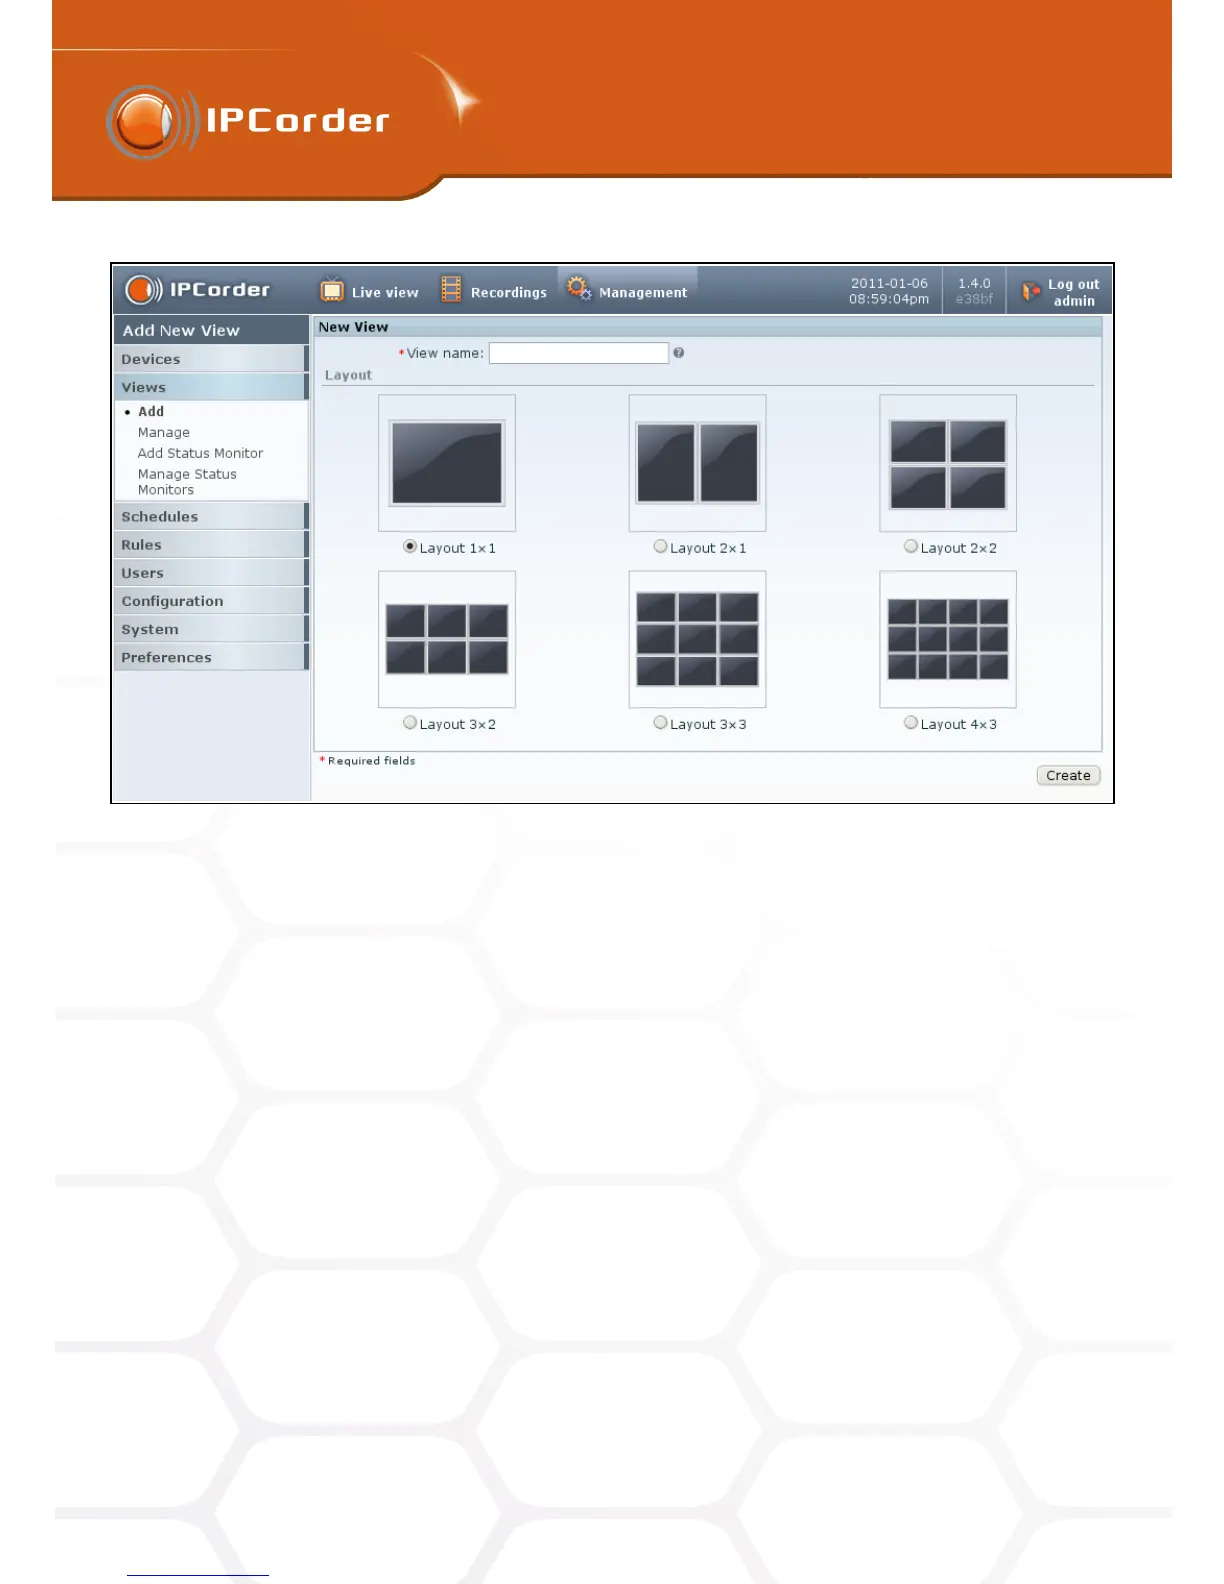
Figure 21: Adding a view – layout selection
It is then possible to define, in the Rules section (see the chapter 4.3 Rules), how the system should react when
it receives the particular signal (for example, start recording, switch on the light, send an e-mail etc.). You can
add more buttons by clicking Add a Button or erase them by the Delete button next to each button’s settings.
After confirming the settings by the Save Only button, the system will display the list of existing views. However,
if you use the Save and View button, the system saves the new view and immediately displays it on the Live
View page.
To change the view settings, go into the menu Management – Views – Manage or click the View Settings link
located just above the User Buttons on the Live View page.
The Settings link opens a page that allows editing of the parameters of the particular view. Only the content of
each segment and the settings of the buttons can be changed. The configuration is the same as when creating
a new view. The very layout of the view cannot be changed. In case you need to do so, it is necessary to create
a new view instead.
To delete a view, click the appropriate link in the menu Management – Views – Manage.
4.1.2 Status Monitors
Apart from the live stream from cameras, the IPCorder is also able to display a range of system variables as
well as up-to-date values from sensors and cameras (for example frames per second index or temperature from
31