18
Press P5 to start the selected cycle.
The DL5 LED turns on
The P1 , P2 , P3 , P4 , P9
keys are disabled.
5
The cycle changes automatically depending on
whether the Core probe is inserted or not.
Core probe inserted:
• the AUTOMATIC mode starts: chill blasting logic
in based on the internal temperature of the product
Core probe NOT inserted:
• the MANUAL mode starts: the chill basting logic
is based on a set time
6A
AUTOMATIC MODE
Insert the Core probe into the product
7A
Close the door of the blast chiller
8A
The cycle starts
On DS1 the cell temperature is displayed
On DS2 the product temperature is displayed
Blast chiller cycle selection and start-up
DescriptionPhase
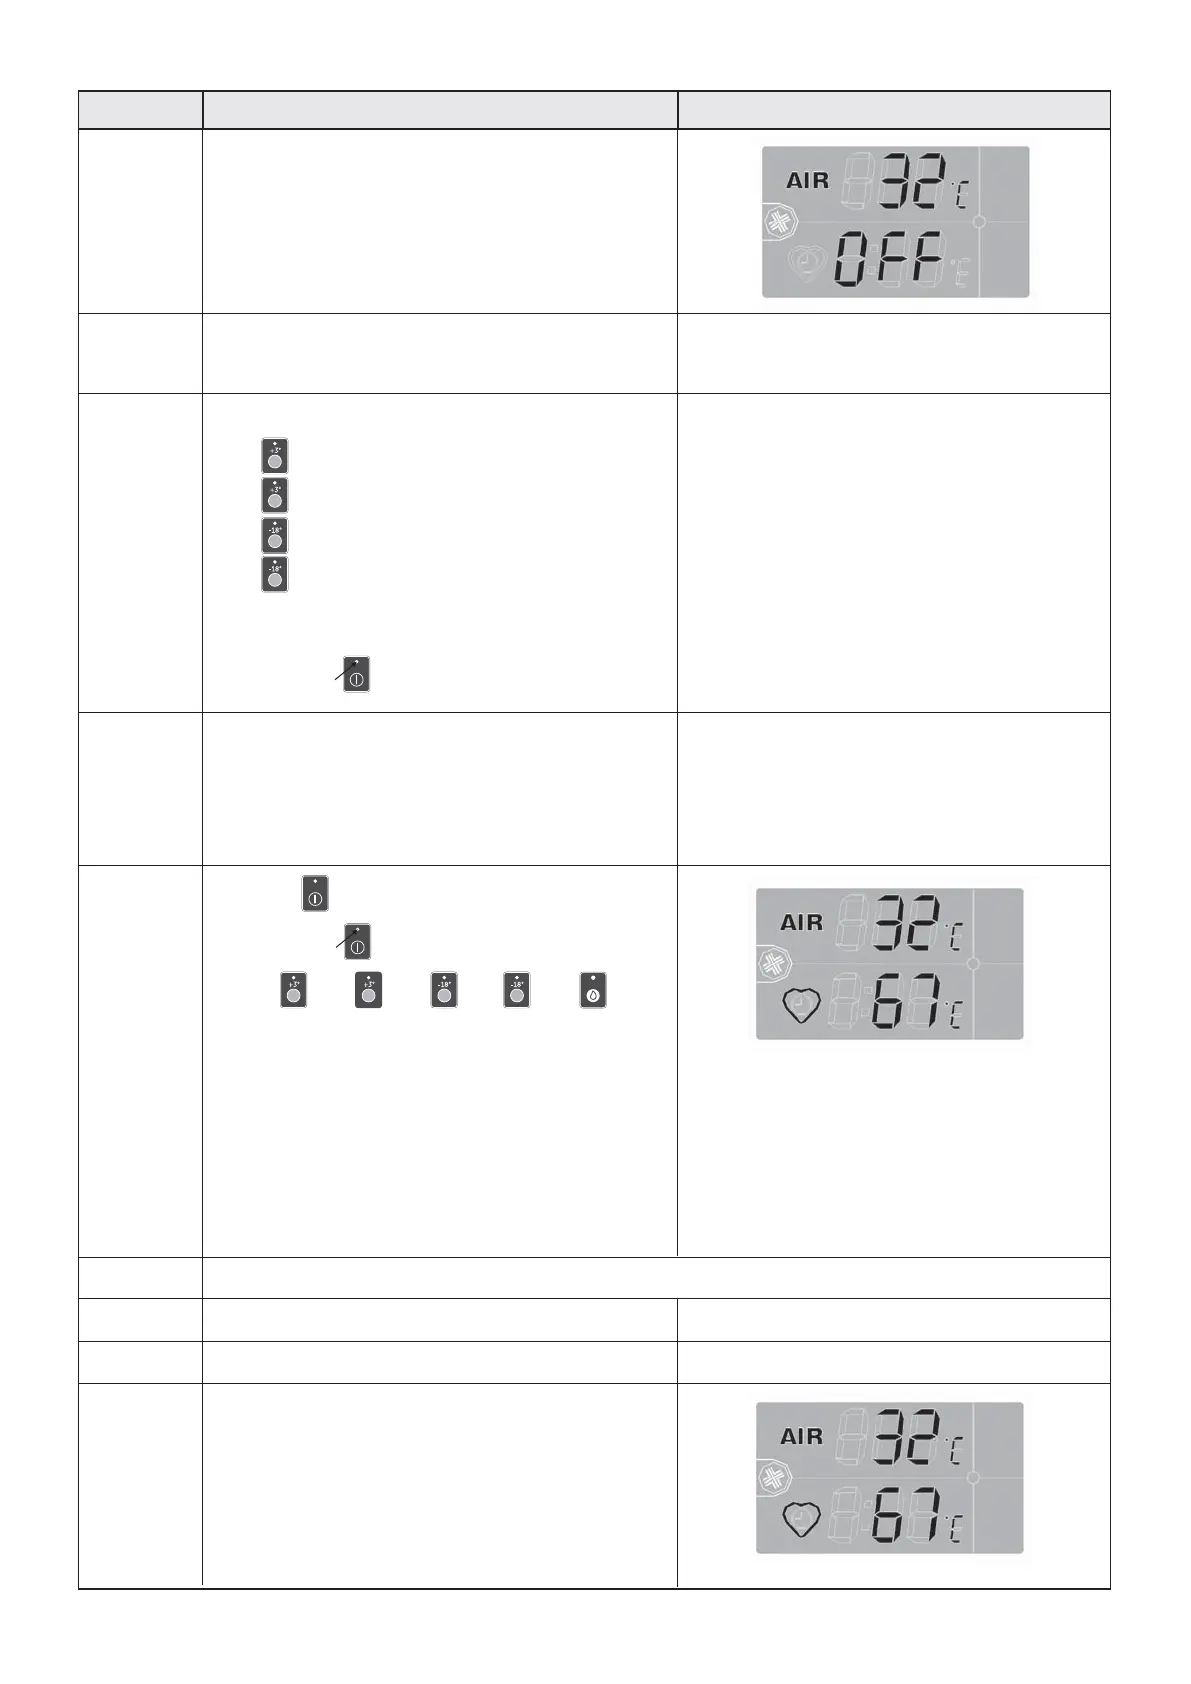
1
When the blast chiller is powered, on the display
appears:
• Internal chamber temperature
• Blast chiller "OFF" status
The DL1, DL2, DL3, DL4 LEDs flash waiting for
selection of the cycle
Front panel screen
2
Select the cycle pressing:
• P1 for the DELICATE CHILLING cycle
• P2 for the STRONG CHILLING cycle
• P3 for the DELICATE FREEZING cycle
• P4 for the STRONG FREEZING cycle
The LED of the selected cycle turns on, while the
others turn off.
The DL5 LED starts to flash
3
If the wrong cycle is selected
press the key of the correct cycle
The cycle LED which was previously selected
will turn off.
The selected cycle LED will turn on
4