124
TR10K009 RE / 02.2016
16
17
0 sec. 5-7 sec.
1×
15
4×
17.1
17.2
24 V/10 W
B(a) 15s
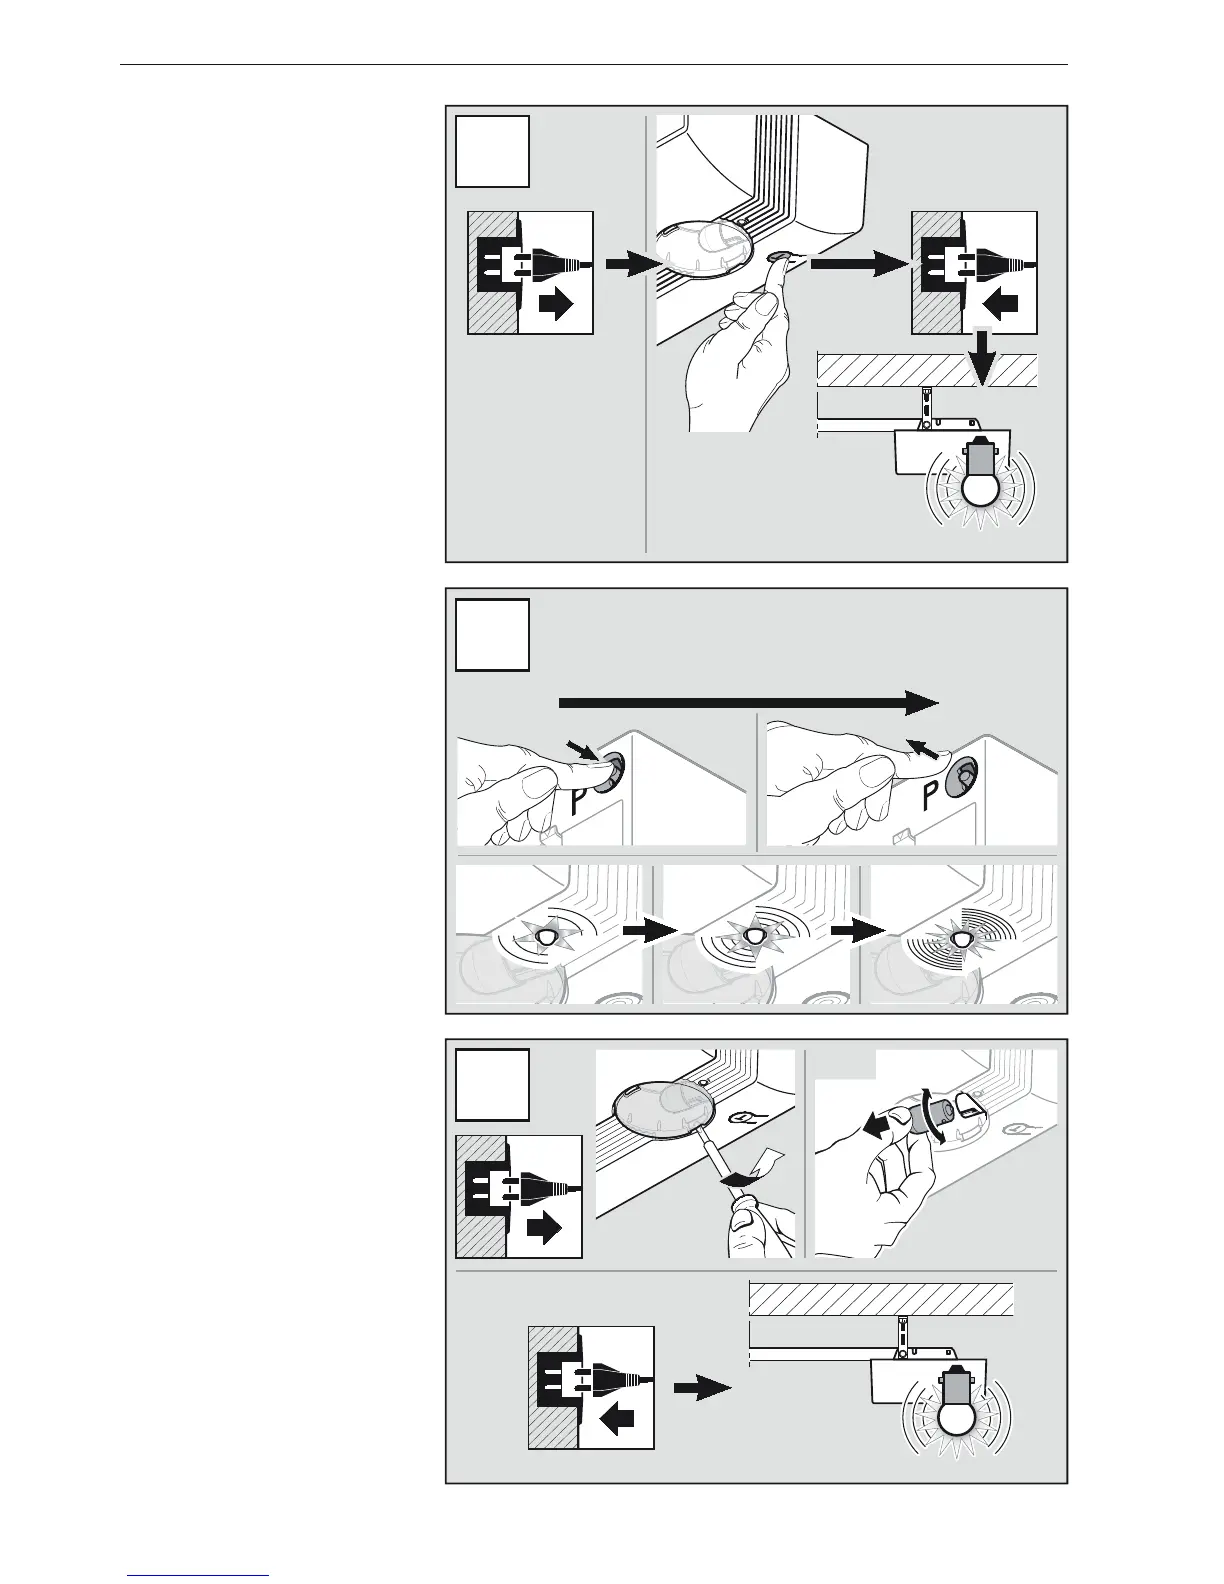
11.2 Tordaten löschen
1. Ziehen Sie den Netzstecker.
2. Drücken und halten Sie den
TasterT.
3. Stecken Sie den Netzstecker ein.
4. Wenn die Antriebs beleuchtung 1 ×
blinkt, den TasterT loslassen (siehe
Bild15).
11.3 Funk-Speicherplätze
löschen
1. Drücken und halten Sie den
TasterP.
Die rote LED blinkt erst langsam
dann schneller.
2. Wenn die LED sehr schnell blinkt,
den Taster P loslassen
(siehe Bild16).
11.4 Lampenwechsel
▶
Beachten Sie die
Sicherheitshinweise aus Kapitel 2.6.
▶
Siehe Bild17
11.2 Deleting door data
1. Disconnect the mains plug.
2. Press and hold the T button.
3. Plug in the mains plug.
4. If the operator light flashes 1 ×,
release the T button (seeFigure15).
11.3 Deleting the radio memory
spaces
1. Press and hold the P button.
The red LED flashes slowly at first
and then faster.
2. If the LED flashes very quickly,
release the P button (seeFigure 16).
11.4 Exchanging the bulb
▶
Note the safety instructions in
section2.6.
▶
See Figure17
11.2 Suppression des
spécifications de porte
1. Retirez la fiche secteur.
2. Maintenez la toucheT enfoncée.
3. Branchez la fiche secteur.
4. Si la lampe de motorisation clignote
1 ×, relâchezlatoucheT
(voir figure15).
11.3 Suppression
d’emplacements mémoire
sans fil
1. Maintenez la toucheP enfoncée.
La LED rouge clignote d’abord
lentement, puis plus rapidement.
2. Si la LED clignote très rapidement,
relâchez la toucheP (voir figure16).
11.4 Changement d’ampoule
▶
Respectez les consignes de
sécurité du chapitre2.6.
▶
Voir figure17
DEUTSCH / ENGLISH / FRANÇAIS