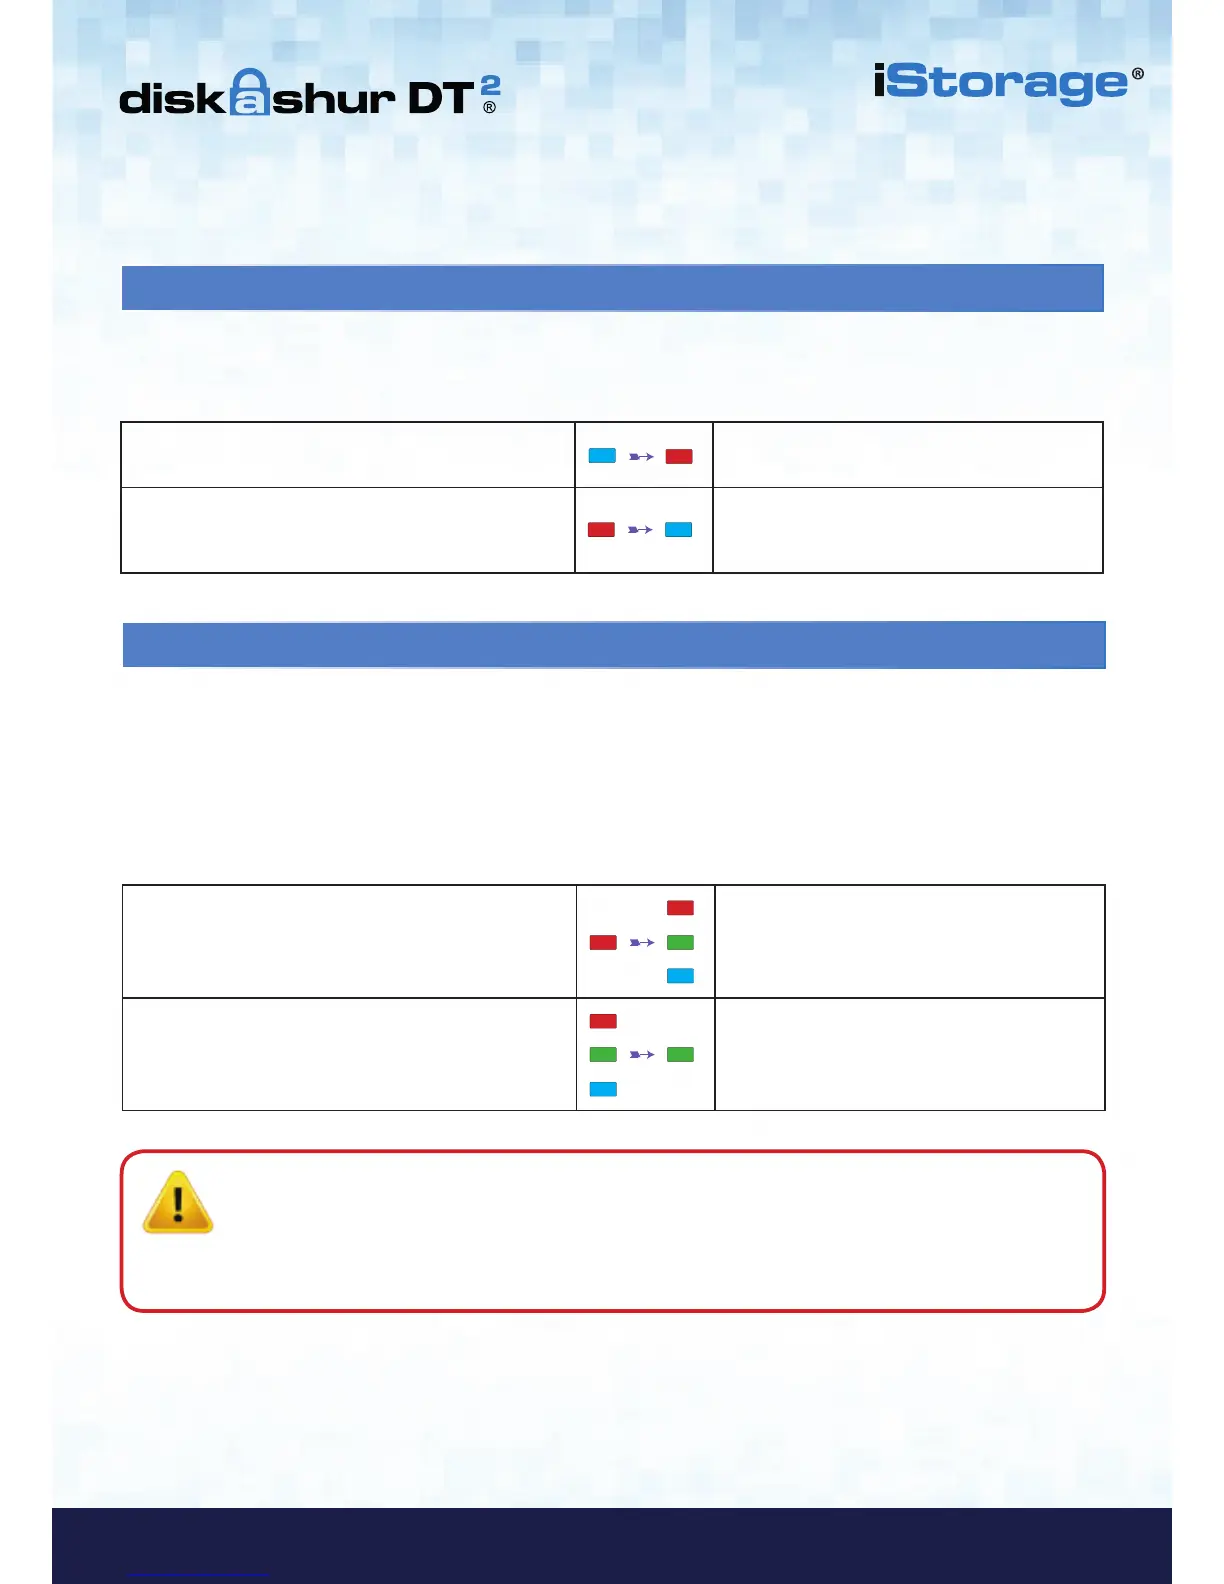
1. In standby state, press the “UNLOCK” button
RED LED switches to all LEDs, RED, GREEN &
BLUE blinking on and off
2. Enter your Self-Destruct PIN and press the
“UNLOCK” button
RED, GREEN and BLUE blinking LEDs will
change to GREEN and BLUE LEDs alternating
on and off for approximately 15 seconds and
finally shifts to a solid GREEN LED
16. How to Unlock with the Self-Destruct PIN
When used, the self-destruct PIN will delete the encryption key, ALL data, Admin/User PINs and then unlock the
drive. Activating this feature will cause the Self-Destruct PIN to become the new USER PIN and the diskAshur DT
2
will
need to be partitioned and formatted before any new data can be added to the drive.
To activate the Self-Destruct mechanism, the drive needs to be in the standby state (solid RED LED) and then proceed with the
following steps.
15. How to Delete the Self-Destruct PIN
1. In Admin mode, press and hold down
“SHIFT + 6” buttons
Solid BLUE LED will change to a blinking RED
LED
2. Press and hold down “SHIFT + 6” buttons again
Blinking RED LED will become solid and then
change to a solid BLUE LED indicating the
Self-Destruct PIN was successfully deleted
To delete the Self-Destruct PIN, first enter the “Admin Mode” as described in section 7. Once the drive is in Admin Mode
(solid BLUE LED) proceed with the following steps.
Important: When the Self-Destruct mechanism is activated, all data, the encryption key and the Admin/User
PINs are deleted. The Self-Destruct PIN becomes the User PIN. No Admin PIN exists after
the Self-Destruct mechanism is activated. The diskAshur DT
2
will need to be reset (see ‘How to
perform a complete reset’ Section 25, on page 16) first in order to create an Admin PIN with full
Admin privileges including the ability to create a User PIN.
 Loading...