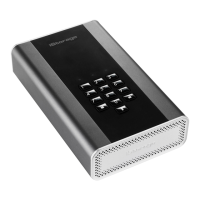
22. Set Read-Only in User Mode
To set the diskAshur DT
2
to Read-Only, first enter the “User Mode” as described in section 20. Once the drive is in User
Mode (solid GREEN LED) proceed with the following steps.
1. In User mode, press and hold down “7 + 6”
buttons. (7=Read + 6=Only)
Solid GREEN LED will change to blinking
GREEN and BLUE LEDs
2. Release 7+6 buttons and press “UNLOCK”
GREEN and BLUE LEDs will change to a solid
GREEN LED indicating the drive is configured
as Read-Only
Note: 1. This setting is activated the next time the drive is unlocked.
2. If a User set the drive as Read-Only, Admin can override it by setting the drive as Read/Write in
Admin mode.
3. If Admin set the drive as Read-Only, the User cannot set the drive as Read/Write
23. Enable Read/Write in User Mode
To set the diskAshur DT
2
to Read/Write, first enter the “User Mode” as described in section 20. Once the drive is in User
Mode (solid GREEN LED) proceed with the following steps.
1. In User mode, press and hold down “7 + 9”
buttons. (7=Read + 9=Write)
Solid GREEN LED will change to blinking
GREEN and BLUE LEDs
2. Release 7+9 buttons and press “UNLOCK”
GREEN and BLUE LEDs will change to a solid
GREEN LED indicating the drive is configured
as Read/Write
Note: 1. This setting is activated the next time the drive is unlocked.
2. If a User set the drive as Read-Only, Admin can override it by setting the drive as Read/Write in
Admin mode.
3. If Admin set the drive as Read-Only, the User cannot set the drive as Read/Write
Important: If data has just been copied to the diskAshur DT
2
, make sure to properly disconnect the drive
first by clicking ‘Safely Remove Hardware/Eject’ the diskAshur DT
2
from the Operating System before
reconnecting and setting the diskAshur DT
2
as ‘Read-Only/Write-Protect’.

 Loading...