This document is an Installation and Operation Manual for Jandy Sand Filters, providing comprehensive information for their safe and effective use in pool and spa filtration systems.
Function Description
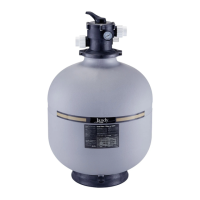
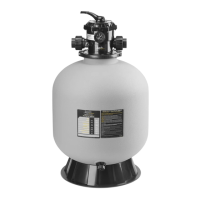
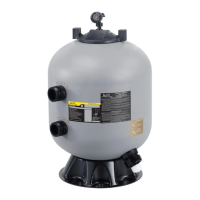
Jandy Sand Filters are designed to collect debris from pool and spa water. The filtration process begins when water flows through the multiport valve (MPV) into the filter's top bulkhead. Dirty water is directed downward onto the sand bed within the tank, where debris is trapped. Clean water then flows through laterals and lower piping at the bottom of the filter, up into the lower bulkhead, and back into the MPV before being returned to the pool. As debris accumulates, the filter's pressure rises, and water flow diminishes, necessitating a backwash procedure to clean the filter. The manual emphasizes that a filter removes dirt and suspended particles but does not sanitize the pool; proper chemical balance and sanitization are crucial for clear water. The filtration system should be designed to turn over the total volume of pool water at least two to four times within a 24-hour period.
The multiport valve (MPV) controls the water flow through the sand filter and offers six positions:
- FILTER: For normal filtration and vacuuming.
- BACKWASH: Cleans the filter by reversing the water flow.
- RINSE: Used after backwash to flush dirt from the valve.
- WASTE: Bypasses the filter; used for vacuuming to waste or lowering water level.
- RECIRCULATE: Bypasses the filter for circulating water to the pool.
- CLOSED: Shuts off all flow to the filter and pool.
Important Technical Specifications
The manual provides dimensions and sand requirements for various Jandy Sand Filter models, categorized into SF-T, ST-T, and SF-S series.
Maximum Working Pressure:
- SF-T & SF-S filters: 50 psi
- ST-T filters: 35 psi
- The manual explicitly warns against operating the filter system at more than 50 psi, as exceeding this pressure can cause the filter lid to blow off, leading to severe injury or death.
Sand Requirements:
- Type: #20 Silica Sand (for pool filter use only).
- Size Range: 0.40-0.55mm.
- Recommended Sands:
- Wedron Silica/Best Sand Co. (Sand Grade: 0.45-0.55mm, Effective Size: 0.46mm)
- U.S. Silica/Silurian Filter Sand (Sand Grade: 0.45-0.55mm, Effective Size: 0.48mm)
Sand Quantity (in lbs):
- SF-T Series:
- SF28-T: 450 lbs
- SF30-T: 500 lbs
- SF32-T: 600 lbs
- SF36-T: 800 lbs
- ST-T Series:
- ST20-T: 200 lbs
- ST24-T: 300 lbs
- SF-S Series:
- SF24-S: 300 lbs
- SF30-S: 450 lbs
- SF36-S: 800 lbs
Dimensions (in inches):
- ST-T Series (ST20-T, ST24-T):
- Height (A): 33.5"
- Width (B): 23.5"
- Base Diameter (C): ST20-T: 21.75", ST24-T: 25.75"
- SF-T Series (SF28-T, SF30-T, SF32-T, SF36-T):
- Height (A): 39.5" to 47.25"
- Width (B): 30.25" to 38.5"
- Base Diameter (C): 29" to 37"
- Inlet/Outlet Height (D): 2.5"
- Waste Port Height (E): 2.5"
- Drain Plug Height (F): 4.5" to 5.5"
- SF-S Series (SF24-S, SF30-S, SF36-S):
- Height (A): 32.5" to 43"
- Width (B): 34" to 49.5"
- Base Diameter (C): 24.75" to 36.75"
- Inlet/Outlet Height (D): 23.5" to 29.25"
- Waste Port Height (E): 21.25" to 26"
Piping Recommendations:
- 2" (minimum) piping is recommended to reduce pressure losses.
- Use barrel unions supplied with the filter; do not use Teflon tape or pipe dope on unions.
Usage Features
Installation:
- Location: Select a well-drained area that won't flood, avoiding damp, non-ventilated spaces. Install on a level concrete slab or solid concrete blocks to prevent settlement. Do not use sand for leveling.
- Clearance: Maintain at least 6" minimum clearance around the filter for visual inspection. Electrical controls should be at least five feet from the filter.
- Water Level: If the system is above water level, it can be raised 2.5 ft without affecting pump efficiency; a check valve on the suction line is recommended. If below water level, valves on both suction and return lines are needed to prevent backflow.
- Plumbing: Make all connections according to local codes. Filter connections use an O-ring seal; avoid pipe joint compound, glue, or solvent on bulkhead connections. Support inlet/outlet pipes independently to prevent strain on the valve.
- Pressure Relief: If there's doubt about system pressure, install an ASME-approved automatic Pressure Relief Valve or Regulator.
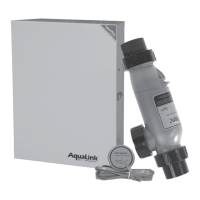
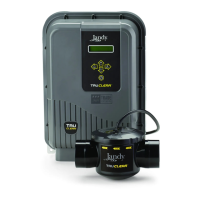
- Chlorinators/Devices: Install any additional devices (e.g., chlorinators) according to manufacturer instructions and existing standards to avoid voiding the warranty.
Start-Up and Operation (New Pool and Seasonal Start-Up):
- Turn pump off, set MPV to "Backwash."
- Remove hair/lint pot lid, fill with water, and replace lid.
- Open pressure release valve on filter or MPV.
- Start pump (standing clear of filter) to circulate water backward to waste.
- Close pressure release valve when a steady stream of water flows.
- Run pump for approximately five minutes or until waste water is clear to purge fine particles.
- Turn pump off, set MPV to "Rinse."
- Start pump (standing clear) and circulate water for 10 seconds.
- Turn pump off, set MPV to "Filter."
- Start pump (standing clear).
Normal Operation:
- With pump off, set MPV to "Filter."
- Fill hair/lint pot with water.
- Open filter pressure release valve, stand clear, and turn pump on.
- Close pressure release valve when a steady stream of water flows.
- Record initial pressure gauge reading. Backwash when reading is 10-12 psi above initial.
Backwashing:
- Turn pump off.
- Set MPV handle to "Backwash."
- Open pressure release valve.
- Start pump (standing clear) to circulate water backward to waste.
- Close pressure release valve when a steady stream of water flows.
- Backwash until water is clear.
- Turn off pump, set MPV to "Rinse."
- Start pump (standing clear) and run for one minute.
- Turn off pump, set MPV to "Filter."
- Restart system following "Normal Operation" steps.
- Warning: Never change the control valve handle while the pump is running to avoid equipment damage and personal injury.
- Waste Water: Be aware that 100 gallons or more of pool water will be discharged during backwashing; ensure disposal meets local codes and won't cause flooding or damage.
Winterizing:
- Turn off the pump.
- Open pressure release valve and move the MPV handle to a position between two ports to allow air flow.
- Remove all drain plugs from the filter.
- Drain all water from system piping.
- Cover the system with a tarpaulin or plastic sheet for weather protection.
Maintenance Features
General Maintenance:
- Cleaning: Wash the filter exterior with mild detergent and water, then rinse with a hose. Do not use solvents, as they can damage plastic components.
- Sand Bed Inspection: Inspect the sand bed at least once a year and remove any foreign material not backwashed out.
- Pressure Check: Check pressure during operation at least once a week.
- Skimmer Basket: Remove any debris from the skimmer basket.
- Leak Check: Check the pump and filter for leaks. If leaks occur, turn off the pump and call a qualified pool service technician.
Pressure Gauge:
- The pressure gauge is the primary indicator of filter operation. Maintain it in good working order.
- Check for air or water leaks at least twice a week.
- If a problem with the gauge is suspected, contact a qualified service technician.
Filter Disassembly/Assembly (for sand replacement or internal inspection):
- Backwash the filter (omit for new filter filling).
- Stop pump, disconnect power.
- Open pressure release valve to release air pressure.
- Remove filter drain plug and drain water.
- Unscrew and remove the multiport valve (top-mount) or top cap (side-mount).
- Ensure correct sand grade and quantity are used (see Section 2D).
- Visually check laterals for damage; replace if necessary.
- Before pouring sand, cover funnels and breather tube assembly to prevent sand entry into laterals.
- Fill tank with enough water to cover laterals to prevent stress. Pour sand slowly.
- Wash sand and debris from filter tank threads. Uncover funnels.
- When reassembling top cap or MPV, check O-ring for cracks/tears; replace if necessary.
- Thread top cap or MPV into filter tank. Hand tighten only.
Troubleshooting Guide:
The manual includes a troubleshooting guide for common issues:
- Water not clear: Insufficient disinfectant, incorrect pool chemistry, heavy bathing/dirt loads, incorrect flow, insufficient running times, dirty filter.
- Low water flow: Debris in strainer baskets, air leaks on suction side, restrictions/blockage in suction/return lines, filter needs backwashing, low pool water level, pump not primed, blocked pump impeller vanes, unused/uncleaned strainer baskets, pump operating under speed.
- Short filter cycles: Presence of algae, incorrect pH/total alkalinity, pump output exceeds design flow rate, ineffective backwash.
- High pressure on start-up: Small eyeball fitting in pool/spa, partially closed valve on return line, too large of pump.
- Sand returns to pool line: Incorrect connections into multiport valve, damaged/leaky drain plug, external source of sand, broken laterals.
For technical service, users are advised to call a qualified service technician.