35
e) Adjust the hand declutching by means of the hand clutch adjusting screw on
the handlebars so that the handlebar clutch lever has a little free movement,
f) Smear both the automatic clutch cam (6) and the roller (5) slightly with grease.
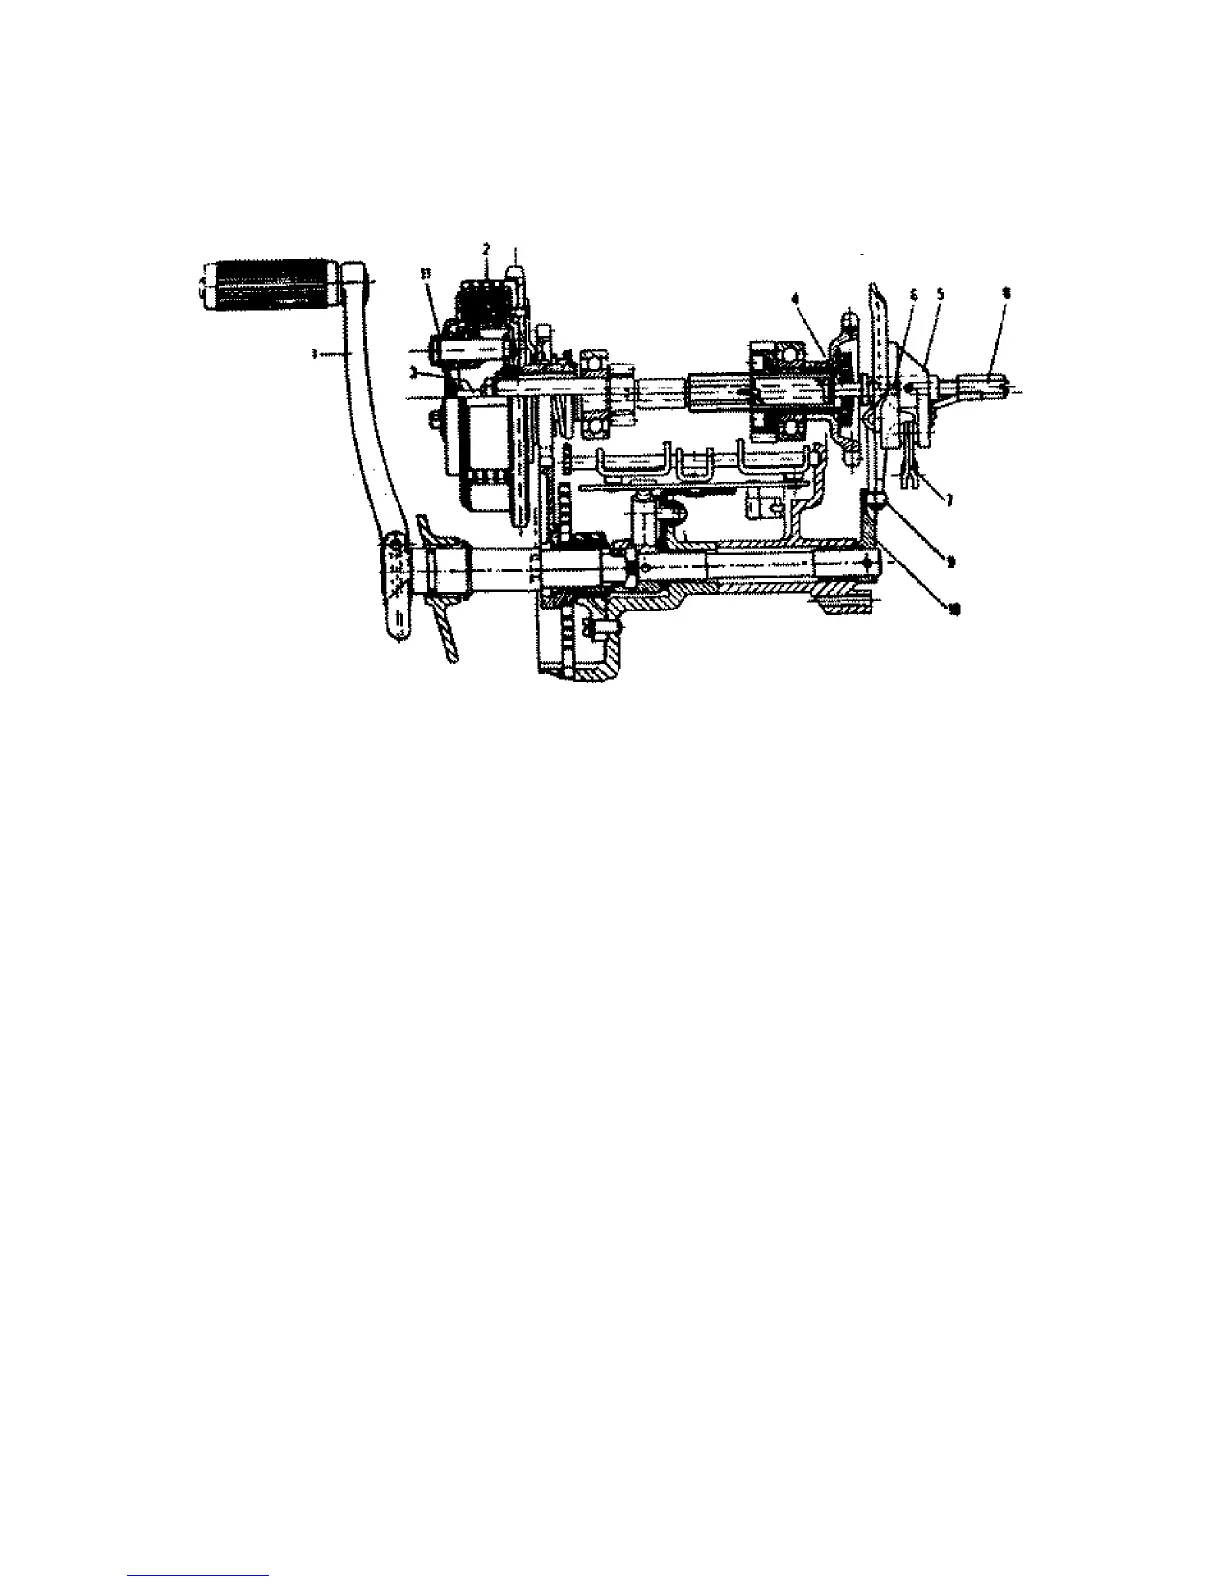
Fig. 19. Clutch operation (automatic) diagram
1. Foot gear change lever 6. Ball
2. Clutch 7. Clutch and lever
3. Clutch operating rod with thrust washer 8. Automatic clutch adjusting screw
4. Clutch operating rod 9. Automatic clutch roller
5. Clutch control carrier 10. Automatic clutch cam
11. Cup
7 CARBURETTER
The carburetter has been correctly set in the works. The jet and the throttle valve
have been selected by trail. Therefore, do not try to adjust the carburetter, clean
it only from time to time. To start the engine easily the idling speed has to be set
correctly. This is done by the pilot air screw. To obtain a poorer mixture, unscrew
it, to obtain a richer mixture, screw it in. With a poor mixture the engine is difficult
to start, has a tendency to back fire heats up and loses output. The exhaust pipe
acquires a slight colour tint. Too rich a mixture manifests
 Loading...