112
4. Open the “low point drains” by turning, then pulling the handles
up. They are installed at the lowest point of the water lines. A label
is placed on the outside of the RV to indicate where the drains are
located. The drains will need to be operated from inside the RV. Once
the label is found on the exterior sidewall, the drains will be found at
a corresponding location in the interior.
5. Drain the sink by removing the drain cap.
6. Turn ON the water pump and allow it to run as needed.
7. If the RV water heater has bypass valves: Set them to the BYPASS
conguration (refer to the Water Heater Bypass section).
8. Operate the toilet ush lever until water stops owing.
9. Relieve the water pressure using the P&T valve BEFORE removing
the water heater drain plug. If there is any water pressure present,
the water will spray out of the opening when the drain plug is
removed.
When you are nished draining the fresh water system, reverse these steps and dump the
grey and black water holding tanks. It is normal for some liquid to remain in the fresh water
tank after drainage procedure.
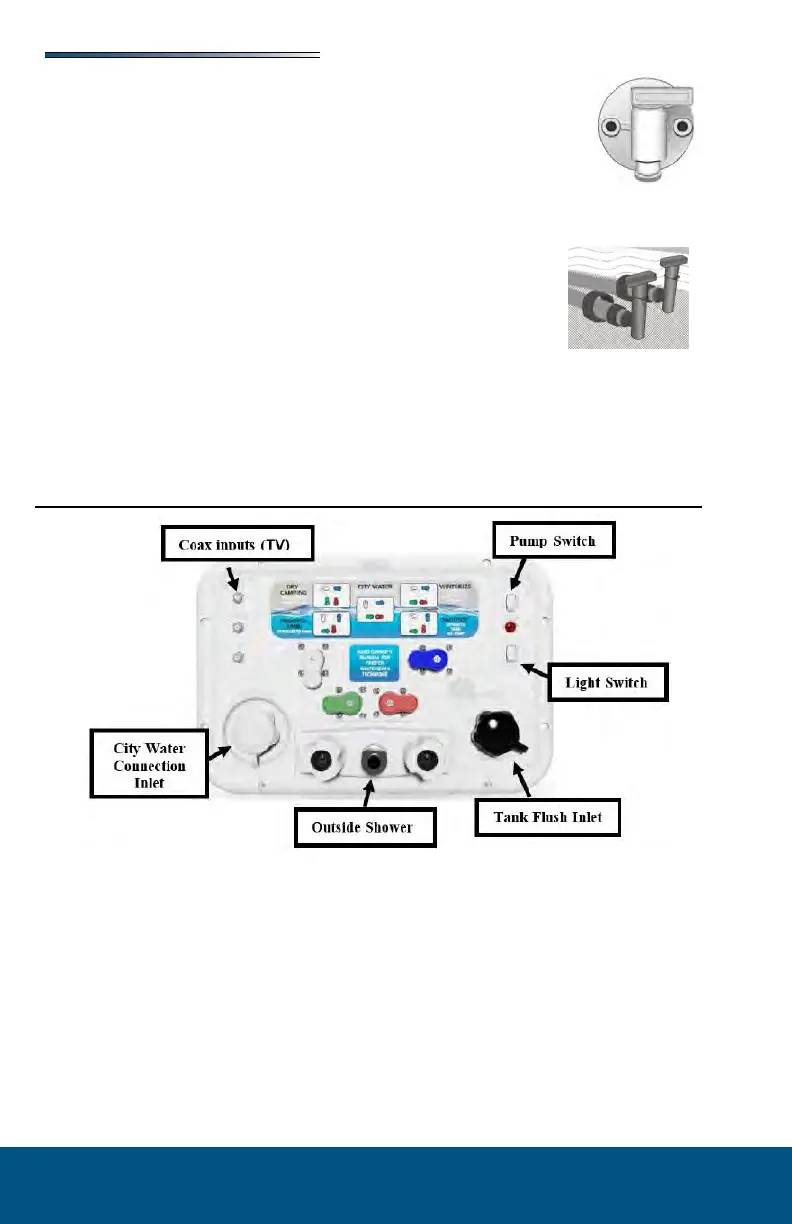
Nautilus P3 Uni-Dock Utility Center
The is located in an exterior compartment and allows you to
perform the following functions:
Power ll the fresh water tank for remote or dry camping
Use the pump to supply water to xtures from the fresh water tank
Use the pump to siphon ll or sanitize the fresh water tank from a bucket
Connect to city water at the camp site to supply water to RV xtures
Winterize the plumbing lines and xtures
Bypass the hot water heater when winterizing to avoid damage to the water heater
Rinse the black tank to help control odors and prevent waste buildup
Rinse o items outside the unit with hot/cold faucet
Connect up to (3) coax lines with satellite, cable and auxiliary