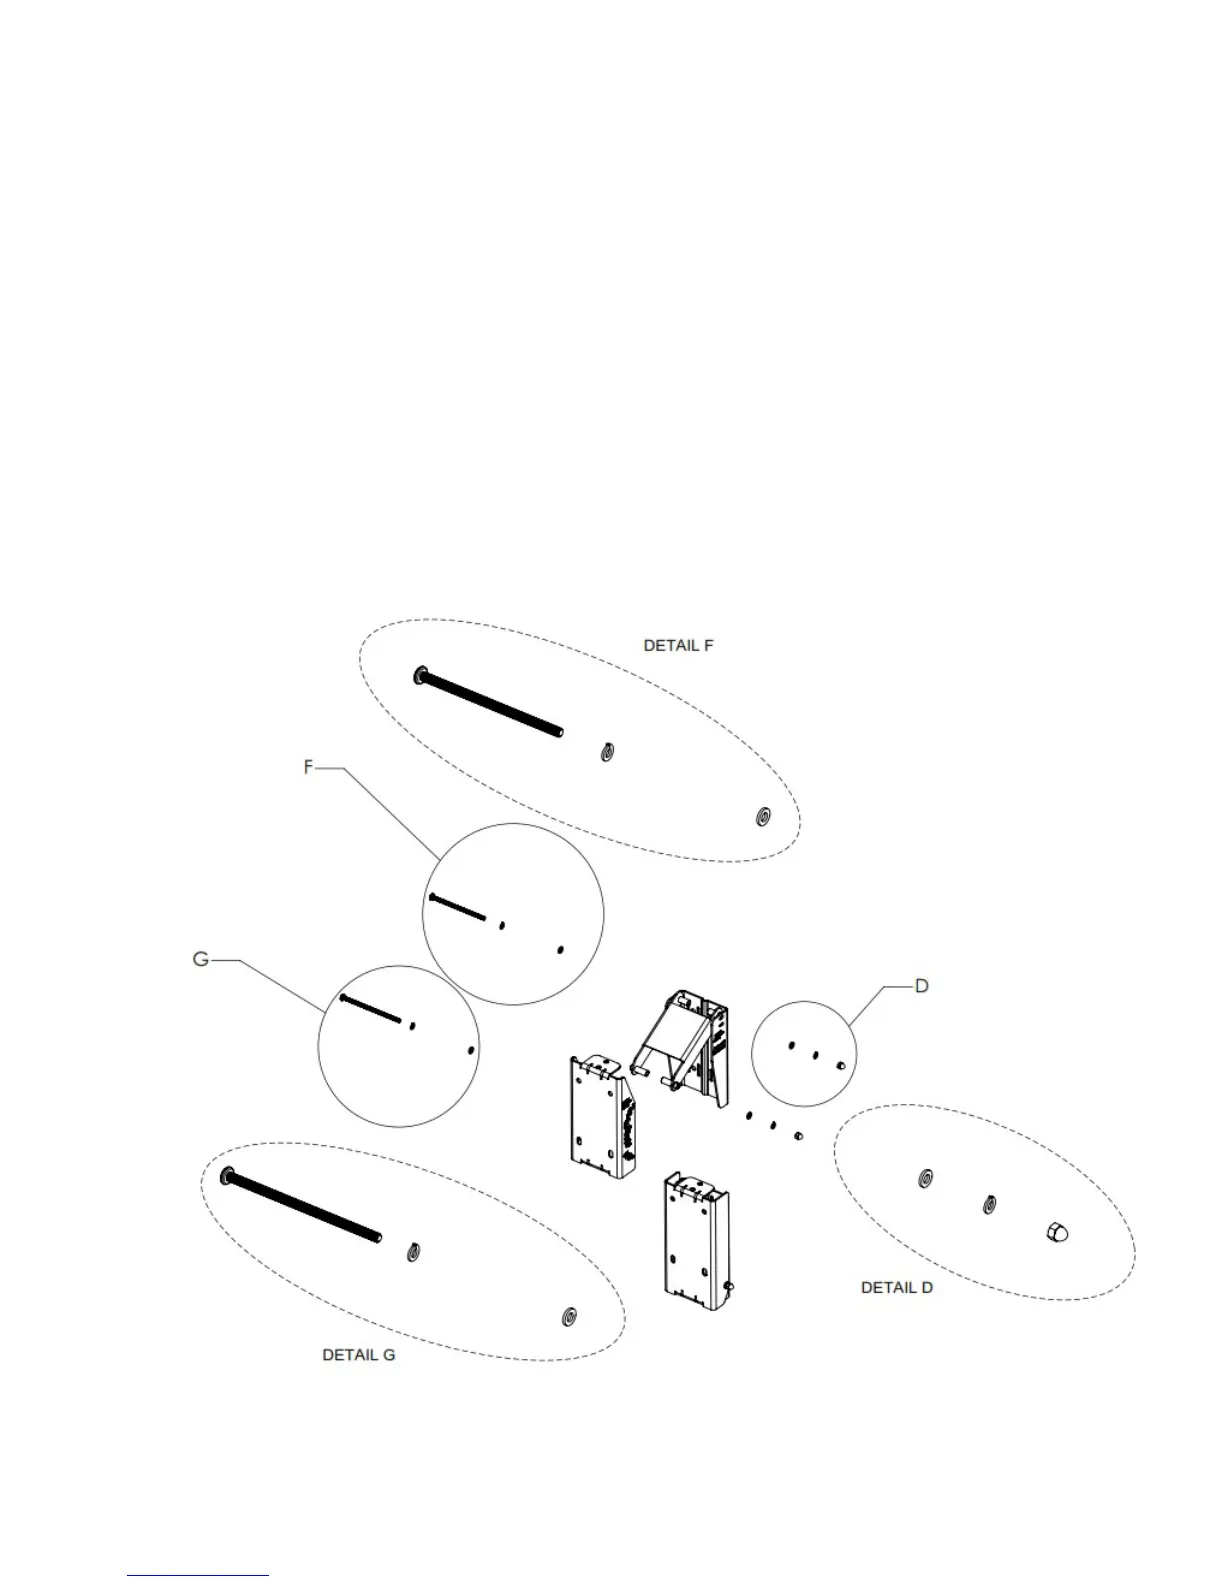
6b) For Setting Larger Tilt Angles (-4° to -15° for CBT1000; -1.25° to -5.25° for CBT1000+E
System), Use ARM LINK.
Loosely attach the ARM LINK to the WALL BRACKET using the M6 x 115 mm bolt in hole A or B
(depending on desired tilt angle -- refer to TILT ANGLE SETTINGS DIAGRAM). Use LOCK WASHER
and FLAT WASHER on head and FLATWASHER, LOCK WASHER, and CAP NUT on end of bolt.
IMPORTANT: Do not tighten yet (leave loose).
Attach the other end of ARM LINK to SPEAKER BRACKET. Slide the M6 x 125 mm BOLT into
labeled hole for desired down-tilt angle through the holes in the lower end of the ARM LINK. Use
LOCK WASHER and FLAT WASHER on head and FLATWASHER, LOCK WASHER, and CAP NUT
on end of bolt.
Tighten all bolts.
M6 x 115 mm BOLT
M6 LOCK WASHER
M6 FLAT WASHER
M6 LOCK WASHER
M6 FLAT WASHER
M6 CAP NUT
M6 x 125 mm BOLT
M6 LOCK WASHER
M6 FLAT WASHER
ARM LINK is to be used for tilt angles greater than 3° (CBT 1000)
or 0.9° (CBT 1000 + 1000E System). ARM LINK is to be installed
to WALL BRACKET rst before setting angle.
For clarity, shown without SPEAKER BRACKET
(and SWIVEL BRACKET, if used), and shown
with brackets in the down-tilt orientation.
17