ES
5
INICIO
(3) Vuelva a colocar la puerta del compartimiento de baterías.
NOTA: Use únicamente baterías de marca reconocida para garantizar una vida útil más larga y el
mejor desempeño.
Advertencia:
- Las baterías no deben exponerse al calor excesivo, como los rayos solares, fuego o similares.
- Asegúrese de instalar correctamente las baterías. La polaridad equivocada podría dañar la unidad.
- No combine baterías viejas y nuevas.
- No combine baterías alcalinas, estándar (carbono-zinc) o recargables (níquel-cadmio).
- Se recomienda usar únicamente baterías iguales o equivalentes.
- Si no va a usar la unidad por un tiempo prolongado, quítele las baterías.
- No elimine las baterías en el fuego ya que podrían derramarse o hacer explosión.
- Existe riesgo de explosión si se colocan las baterías en forma incorrecta.
Control Remoto
La unidad de control remoto funciona con una batería de litio de “CR2025” (Incluida). Para activar el
control remoto, quite la pestaña de aislamiento insertada en el compartimiento de las baterías. Cuando
el funcionamiento del control remoto sea intermitente o poco satisfactorio,
reemplace la batería original con una batería nueva de 3 voltios.
1.) Deslice el porta-baterías hacia afuera del control remoto.
2.) Reemplace la batería de 3V CR2025. Asegúrese de instalar la batería
correctamente. El control remoto no trabajará si la batería está instalada con la
polaridad equivocada.
PRECAUCIÓN: Hay riesgo de explosión si la batería se reemplaza en forma
incorrecta. Reemplácela solo con el mismo tipo de batería.
3.) Vuelva a insertar el porta-baterías en la ranura de la batería.
NOTA: Use únicamente baterías de marca reconocida para garantizar una vida útil
más larga y el mejor desempeño.
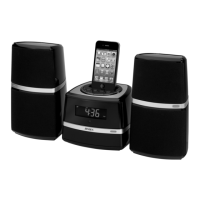
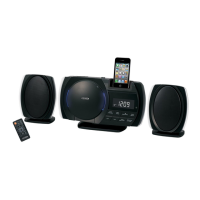
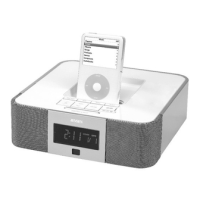
Conexión de los altavoces
Desempaque cuidadosamente la unidad. Los cables del altavoz ya están conectados a la unidad
principal. Maneje los cables con cuidado para evitar dañarlos. Coloque el altavoz izquierdo del lado
izquierdo de la unidad principal y coloque el altavoz derecho del lado derecho de la unidad principal.
Conexión del adaptador AC-DC
El suministro de corriente de la unidad pasa a través de un Adaptador de corriente alterna a corriente
directa (AC-DC), con salida de 12V DC / 2000mA. (Incluido)
(1) Inserte la espiga de salida de corriente directa (DC) del adaptador en el conector de entrada DC
situado en la parte posterior de la unidad.
(2) Enchufe el adaptador en un tomacorriente principal AC.
NOTA: La unidad no tiene pantalla magnética y podría causar distorsión en las imágenes de algunos
televisores y monitores de video. Para evitarlo, podría necesita alejar la TV o monitor si hay cambios
de color no naturales o si hay distorsión de imagen.
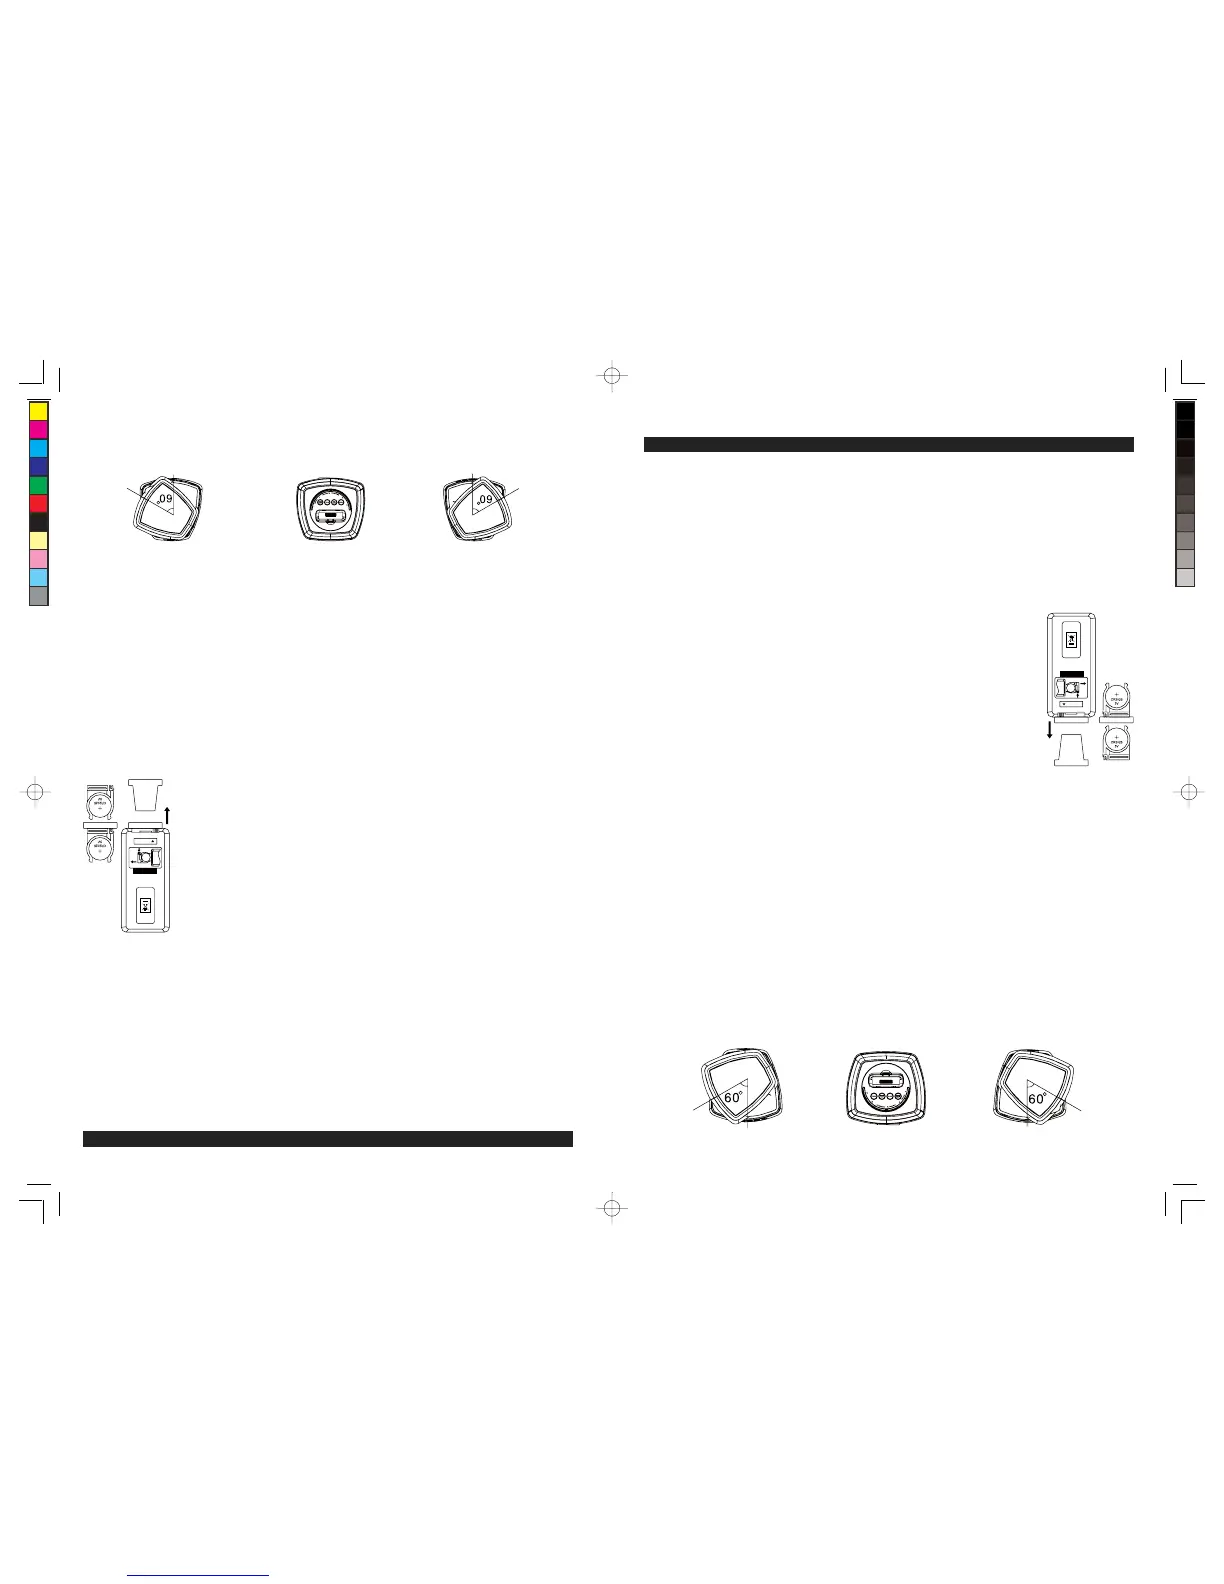
Montaje de los altavoces giratorios
La parte superior de ambos altavoces está diseñada para girar hacia la izquierda o derecha para
encauzar el sonido en diferentes direcciones. Puede girar la parte superior del altavoz a un ángulo
máximo de 60 grados en cualquiera de las direcciones para obtener un mayor campo de sonido
alrededor del cuarto.
Gire la parte superior del
altavoz izquierdo
Gire la parte superior delUnidad principal
altavoz derecho
CR2025
RELEASE
OPEN
PUSH
MADE IN CHINA
GB
5
GETTING STARTED
Clock setting battery back-up
The battery back-up compartment is located on the bottom of the unit.
(1) Remove the battery compartment door.
(2) Follow the polarity diagram shown inside the compartment and install 2 x AAA (UM-4) batteries (notincluded).
(3) Replace the battery compartment door.
NOTE: Only use a well-known brand of battery to ensure the longest life and best performance.
Warnings:
- Batteries shall not be exposed to excessive heat such as sunshine, fire or the like.
- Be sure that the batteries are installed correctly. Wrong polarity may damage the unit.
- Do not mix old and new batteries.
- Do not mix alkaline, standard (carbon-zinc) or rechargeable (nickel- cadmium) batteries.
- Only batteries of the same or equivalent type as recommend are to be used.
- If the unit is not to be used for an extended period of time, remove the battery.
- Do not dispose of batteries in fire, battery may explode or leak.
- Danger of explosion if battery is incorrectly replaced.
Remote Control
The remote control operates on one CR2025 battery (included). To activate the
remote control, remove the insulation tab inserted in the battery compartment.
When the operation of the remote control becomes intermittent or unsatisfactory
replace the original battery with a new 3-volt lithium battery.
1.) Slide out the battery holder from the remote control case.
2.) Replace the 3V CR2025 battery. Be sure the battery is installed correctly. The
remote will not work if the battery is installed with the wrong polarity.
CAUTION: Danger of explosion if the battery is replaced incorrectly. Replace only with the same type battery.
3.) Insert the battery holder back into the battery slot.
NOTE: Only use a well-known brand of battery to ensure the longest life and best performance.
Speaker Connection
Unpack the unit carefully. The speaker wires are already attached to main unit. Handle with care to
avoid damaging the wires. Place the left speaker on the left side of the main unit and place the right
speaker on the right side of the main unit.
AC-DC Adaptor connection
The unit is powered by an external AC-DC Power Adaptor (included) with output DC12V / 2000mA.
(1) Insert the adaptor’s DC output plug into the DC IN jack at the back of the unit.
(2) Plug the adaptor into an ac main outlet.
NOTE: This unit is not magnetically shielded and may cause color distortion on the screen of some TVs
or video monitors. To avoid this, you may need to move the unit further away from the TV or monitor if
unnatural color shifts or image distortion occurs.
Pivoting Speaker Set-up
The top part of both speakers are designed to pivot to the left or right and direct the sound in different
directions. You can twist the upper part of the speaker to a maximum angle of about 60 degrees in
either direction to obtain a wider sound field around the room.
Top
Left-Speaker Main Unit Twist Upper Part o
Right-Speaker
CR2025
RELEASE
OPEN
PUSH
MADE IN CHINA
W166-R(JiMS-252i)_GB_ES IB.indd5 18 - 325 2012-2-28 8:36
size:148x210mm,80gms book paper,BK+BK.
 Loading...