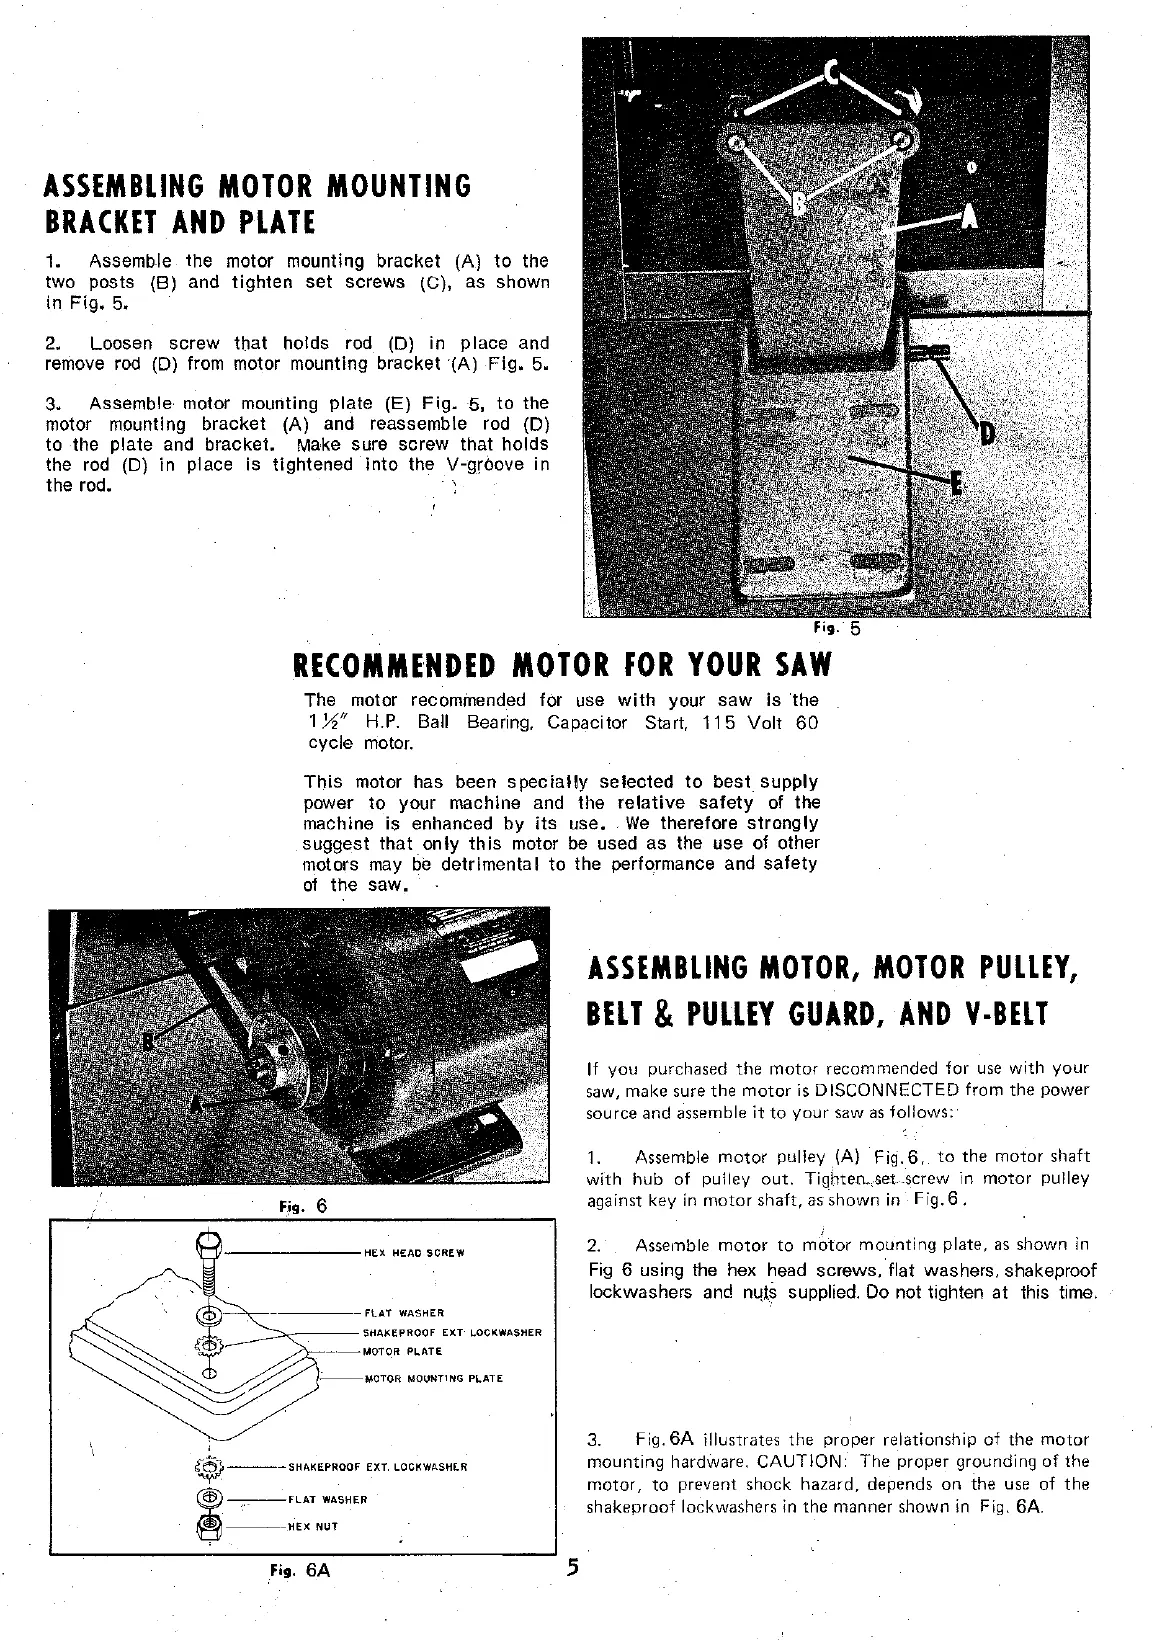
ASSEMBLING
MOTOR
MOUNTING
BRACKET
AND
PLATE
1. Assemble the motor mounting bracket (A)
to
the
two posts (B) and
tighten
set screws (C), as shawn
in
Fig.
5.
2. Loosen screw
thal
holds rod (D) in place and
remove rod (D) from motor mounting bracket '(A)
Fig.
5.
3. Assemble motor mounting plate (E)
Fig.
5,
to
the
motor mounting bracket (A) and reassemble rod (D)
to
the plate and bracket. Make sure screw
thal
holds
the rod (D) in place is
1ightened
into
the V·grùove
in
the rad.
RECOMMENDED
MOTOR
FOR
YOUR
SAW
The motor recommended for use
with
your saw is the
1 Y,"
H,P,
Bali
Bea
ring,
Capacitor Start.
115
Volt
60
cycle
motor.
This
motor has been
specially
seleoted
to
best
supply
power
to
your machine and the
relative
safety
of the
machine
is
enhanced
by
its
use.
We
therefore strongly
suggest
thal
only
this
motor
be
used as the use of other
motors
may
lie detrimental
to
the performance and
safety
of
the saw.
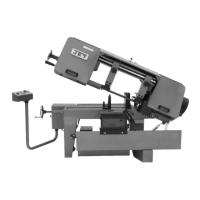
Fig. 6
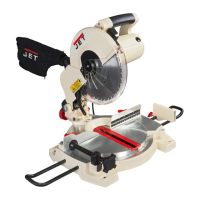
--MOTOR
MOIJNTING PLATE
~
---
SHAKEPROOF EXT. LOCKWASHf..R
~-;
__
--FLAT
WASHER
~----HEX
NUT
5
ASSEMBLING
MOTOR,
MOTOR
PULLEY,
BELT
&
PULLEY
GUARD,
AND
V-BELT
If
you
purchased
the
motor
recommended
for
use
with
your
saw,
make
sure
the
mot
oris
DISCONNECTED
from
the
power
source
and
assemble
it
toy
our
saw
as
follows:
L
Assemble
motor pulley (A)
Fig,6,
to
the motor shaft
with
hub
of
pulley
out.
Tighten._set ..
screw
in
motor
pulley
against
key
in
motor
shaft,
as
shawn
in
Fig.
6.
2. Assemble
motor
to
m~tor
mounting
plate,
as
shawn
in
Fig
6 using the hex head screws,
flat
washers, shakeproof
lockwashers and
n4!s supplied,
Do
not tighten at this lime.
3. Fig.
6A
îllustrates
the
proper
relationship
of
the
mo
tor
mounting
hardware.
CAUTION:
The
proper
grounding
of
the
mot
or,
ta
prevent
shock
hazard,
depends
on
the
use
of
the
shakeproof
lockwashers
in
the
manner
shawn
in
Fig. 6A.