9
• Connect unit to an earthed outlet.
• Do not use voltage adapter or
extension cable.
Shock and electrocution hazard.
S400 Assembly
1
2
4
5
6
7
10
T
he treadmill has been assembled and tested at the
factory, so you shouldn’t have any problem putting
all the parts together. Components are designed
to t together, and only basic tools are required for the
assembly process. Inside the box you will nd a tool pack
(Allen key, screwdriver, nuts and bolts) which will make
easy-peasy to assemble the treadmill. All you need to
do is add the console unit to a running deck by a pair of
frames.
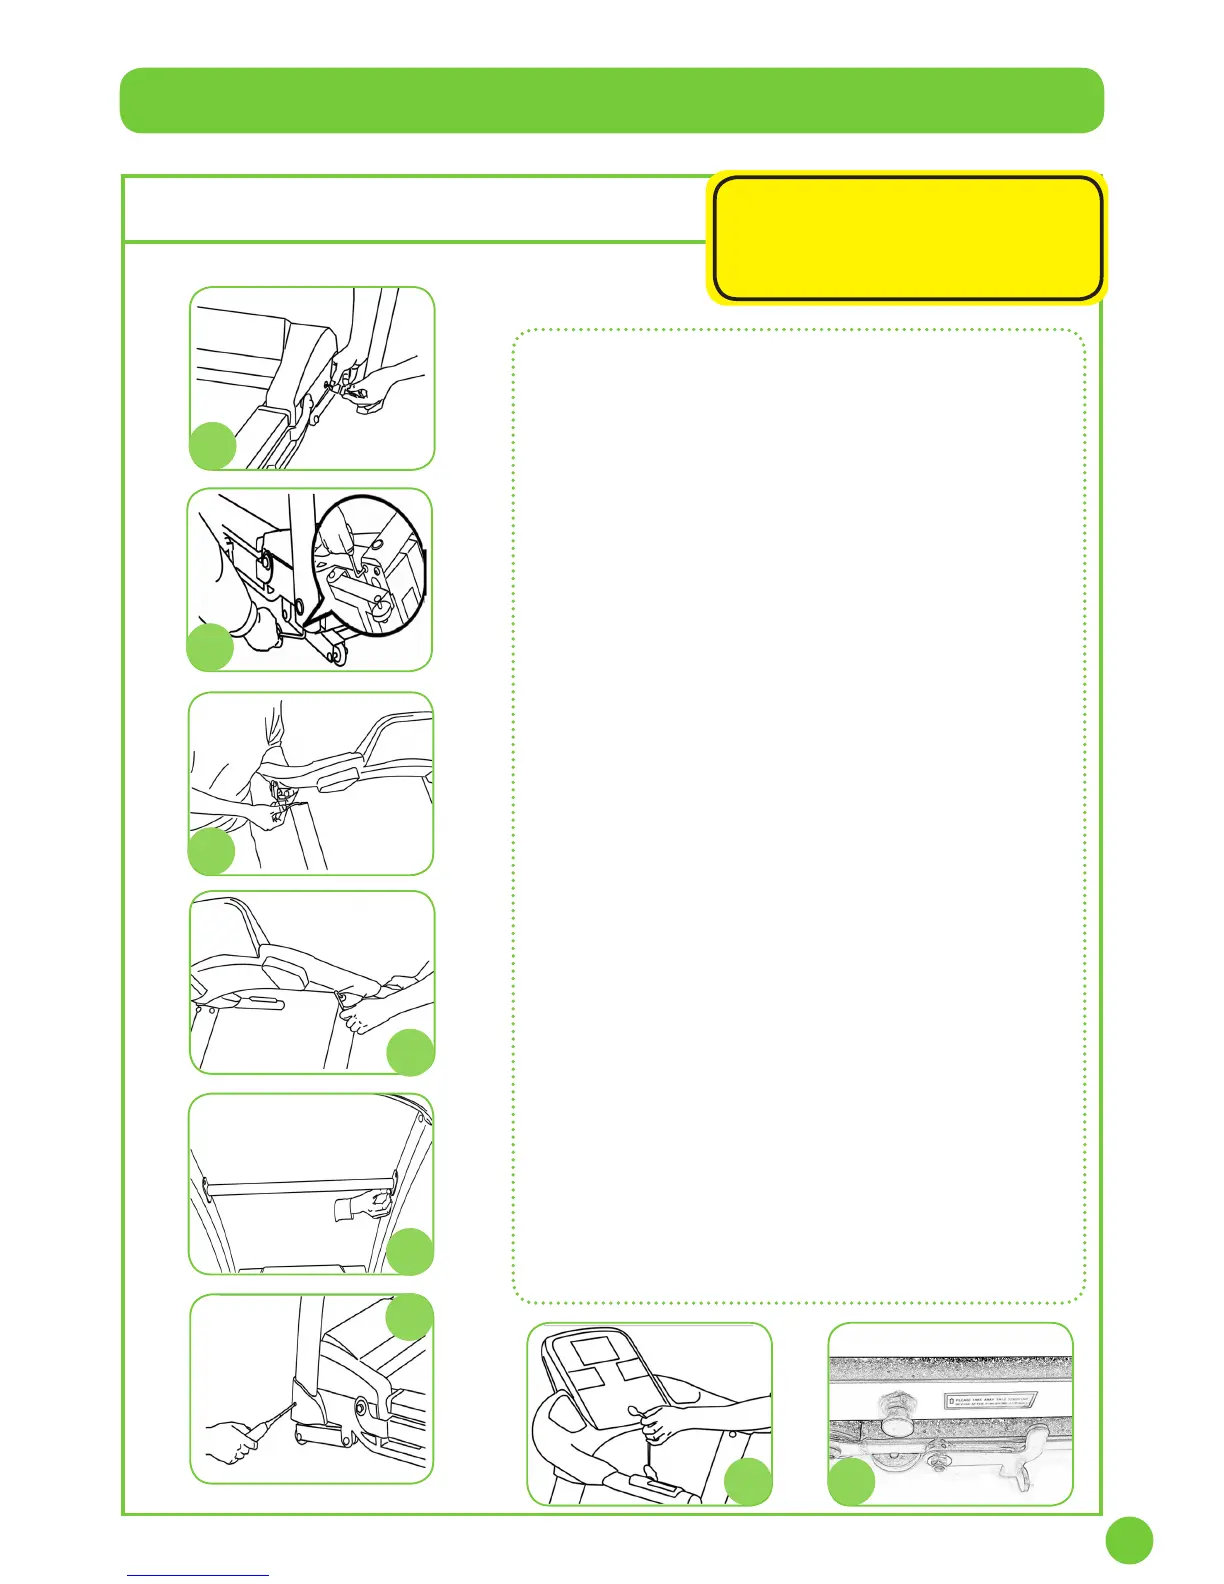
Follow this easy steps:
1. Connect the cable placed on the right hand side of the
running deck with the vertical frame bar.
2. Screw the running deck to the two vertical frames:
• Use 1 black allen head bolt (M10x50), 1 split lock
washer (M10) and 1 at washer (M10) to tight the
bolts at the bottom side of each vertical frame.
• Use 2 black allen head bolts (M8x15) and 2 silver at
washers (M8) to tight the bolts under each vertical
frame.
3. Insert the console into the upper end of the vertical
frame bars.
4. Connect the control wire on the right hand side of the
console and the handrail through the plastic clip
provided, then push the excess wire into the handrail
frame. DO NOT squeeze the wire.
5. Screw the console to the vertical frame bar. Use 2 black
allen head bolts (M8x15), 1 black arc washers (M8) and
1 black at washers (M8) for each side. NOTE: You may
have to loose the bolts at the bottom of the vertical frame
to help introduce the console into the vertical frame bars.
6. Fasten the support crossbar on the vertical frames. Use 2
black allen head bolts (M8x15) and 2 silver at washers
(M8) on each side.
7. Install the 2 frame covers at the bottom of each vertical
frame. Use the 2 tapping screw (ST 4x20).
8. Adjust the pad under the running deck and keep the
treadmill in a horizontal position.
9. Level the treadmill.
10. Insert the safety key.
11. Set the secure lock on both sides of the running deck.
12. Plug the treadmill into the wall outlet and start
enjoying the exercise!
www.jlltness.co.uk www.jllelectronics.co.uk
11