– 10 –
①
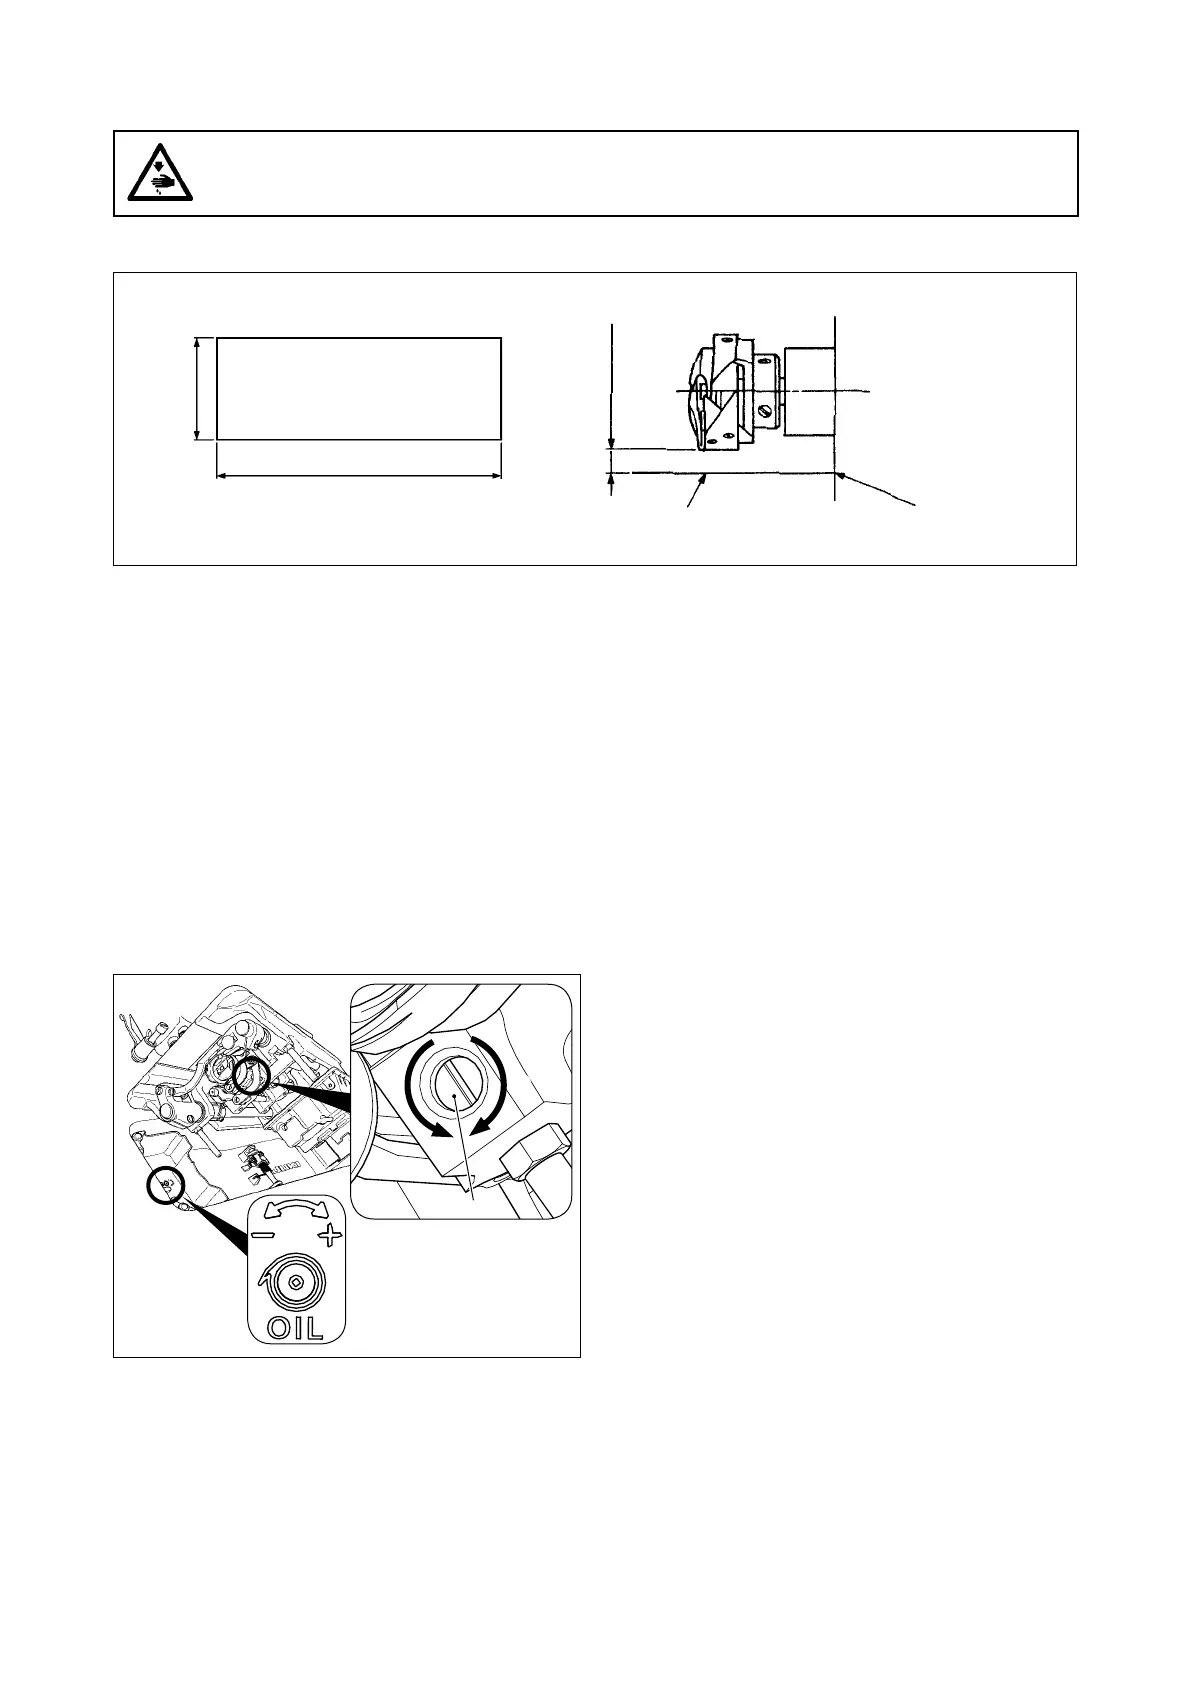
Amount of oil (oil splashes) conrmation paper
②
Position to conrm the amount of oil (oil splashes)
Closely t the paper against the wall
surface of the bed.
Oil splashes conrmation paper
3 - 10 mm
25 mm
* When carrying out the procedure described below in 2), remove the slide plate and take extreme caution
not to allow your ngers to come in contact with the hook.
1) If the machine has not been sufciently warmed up for operation, make the machine run idle for approxi-
mately three minutes. (Moderate intermittent operation)
2) Place the amount of oil (oil spots) conrmation paper under the hook immediately after the machine stops
running.
3) Check to be sure that the oil surface in the oil shield rests in the range between the "MAX. line" and the
"MIN. line".
4) Conrmation of the amount of oil should be completed in ve seconds. (Check the period of time with a
watch.)
WARNING :
Be extremely careful about the operation of the machine since the amount of oil has to be checked
by turning the hook at a high speed.
11. Adjusting the amount of oil (oil splashes)
(1) Conrmation of the amount of oil in the hook
1) Tilt the sewing machine. Turn oil amount adjust-
ment screw ❶, which is mounted on the front
bushing of lower shaft, in the "+" direction (direc-
tion A) to increase the oil amount (oil spots), or
in the "-" direction (direction B) to decrease it.
* The oil-amount +/- indication mark is shown on
the underside cover.
2) After the amount of oil in the hook has been
properly adjusted with the oil amount adjustment
screw ❶, make the sewing machine run idle for
approximately 30 seconds to check the amount
of oil in the hook.
(2) Adjusting the amount of oil (oil spots) in the hook
70 mm
❶
A
B
 Loading...


