Do you have a question about the JUKI MS-1261A-DWS and is the answer not in the manual?
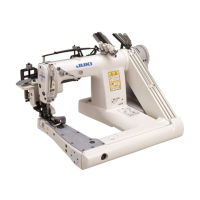
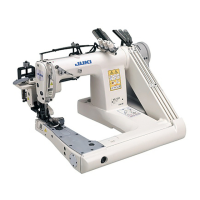
Details about the sewing machine head's technical specifications.
Details about the control box's technical specifications.
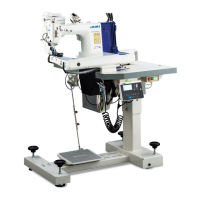
Steps for setting up the sewing machine on the floor. Includes adjusting head height and panel position.
Steps for assembling and installing the thread stand device onto the sewing table.
Instructions for filling the oil tank and draining/changing the oil for machine maintenance.
Guide on how to properly attach the needle to the sewing machine, ensuring correct orientation.
Step-by-step instructions for threading the needle and looper threads on the machine head.
How to adjust both the needle thread and looper thread tension for optimal sewing.
Procedures for adjusting the stitch length of the sewing machine and cloth puller.
Instructions on adjusting the needle guard's clearance and vertical position relative to the needle.
How to adjust the looper thread cam for proper thread drawing and alignment.
Steps to adjust the feed dog height to ensure proper material feeding.
How to adjust the take-up thread tension control lever to set the needle thread loop size.
Adjusting the intermediate tension release lever and needle thread tension controller for proper thread path.
Procedures for adjusting the cloth puller belt, its position, and inclination for optimal feed.
Operation and intensity adjustment of the LED hand light for illuminating the needle entry area.
Procedures for replacing parts like feed dog, throat plate, and needle thread guide for different materials.
A table listing replaceable gauges, their part numbers, and specifications for different models.
How to adjust the material edge detector for proper material sensing.
Steps to adjust the needle cooler's blow pipe position and air flow.
Adjusting the air flow for the chain-off thread cutter's suction function.
Detailed explanation of each button and function on the operation panel.
Initial setup steps, including language selection and basic operations.
Instructions on how to select a sewing pattern using the operation panel keys.
Overview of how to modify sewing parameters, including step/free patterns and teaching.
How to access and manage memory switch data, counters, patterns, and settings.
Information on the simple lock function.
A catalog of error codes, their causes, and troubleshooting checks.
Instructions for data transfer using USB and NFC communication.
Checking the oil level in the oil tank for daily maintenance.
How to lubricate the chain off thread cutter as part of routine maintenance.
Instructions on how to replace the cloth puller belt when it shows signs of wear.
Procedures for cleaning dust from various parts of the sewing machine.
Steps for safely replacing the fuse in the control box.
| Lubrication | Automatic lubrication |
|---|---|
| Thread Tension | Adjustable |
| Type | Lockstitch sewing machine |
| Lubricating oil | JUKI machine oil |
| Reverse feed | Manual |
| Work Clamp | Standard |
| Motor | AC servo motor |