– 6 –
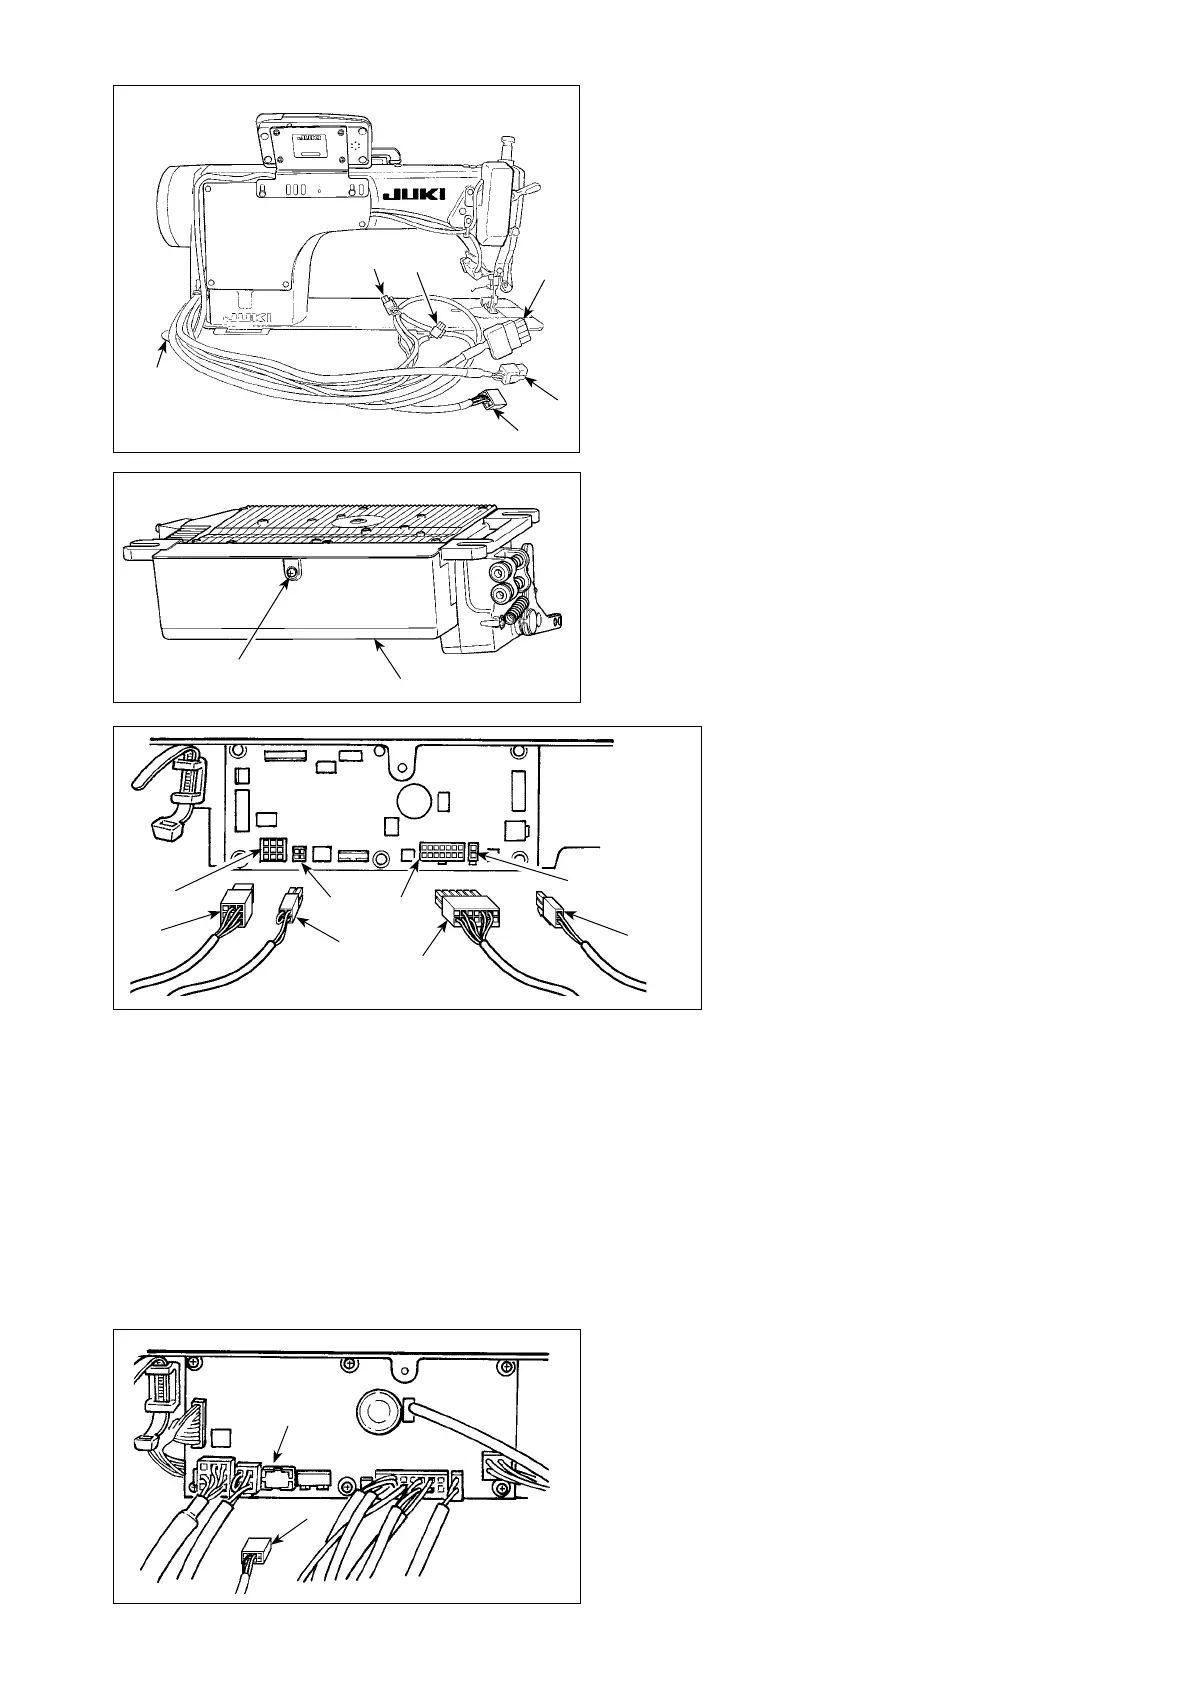
3) Connect 14P code
❸
coming from
the machine head to connector
❻
(CN36).
4) When the optional AK device is
attached, connect 2P connector
❹
coming from the AK device to con-
nector
❼
(CN37).
5) Connect connector
❺
coming from
the motor to connector
❽
(CN30) on
the circuit board.
6) Insert 4P cord
❾
coming from the ma-
chine head into connector
(CN48).
(Caution) 1. When using the AK device, set whether to use the AK device after conrming how to select the
auto-lifter function. (Refer to “
III-11. Setting of the auto lifter function” p.39.)
2. Be sure to securely insert the respective connectors after checking the inserting directions since
all connectors have the inserting directions. (When using a type with lock, insert the connectors
until they go to the lock.) The sewing machine is not actuated unless the connectors are inserted
properly. In addition, not only the problem of error warning or the like occurs, but also the sewing
machine and the control box are damaged.
[Connecting the connector for the operation panel]
The SC-920 is provided with a connector for the op-
eration panel. Fully insert connector
into connector
(CN38)
on the PWB until it locks without fail while
carefully checking the orientation of connector
.
(Caution) Be sure to turn OFF the power before con-
necting the connector.
1) Pass cords
❶
of the thread trimming solenoid,
reverse-stitching solenoid, etc. and the cord from
the motor through hole
A
in the table to route them
down under the machine table.
2) Loosen screw
B
in cover
❷
with a screwdriver to
open the cover.
❷
B
❼
❹
❺
❽
❸
❻
❾
❶
A
❶
❶
❶
❶