EasyManuals Logo

Juniper SRX380 User Manual

Juniper SRX380
11 pages
To Next Page IconTo Next Page
To Previous Page IconTo Previous Page
Page #5 background imageLoading...
Page #5 background image
RJ-45 cable
DB-9 adapter
USB cable
Power cord
Power cord retainer clip
Rack mounting kit containing the following:
6 flat-head 4-40 mounting screws
12 flat-head M4x6-mm Phillips mounting screws
Four mounting brackets (includes two 2-inch-recess brackets) that attach to the mounting rails
One pair of mounting rails
One pair of mounting blades
To install the SRX380 in a rack:
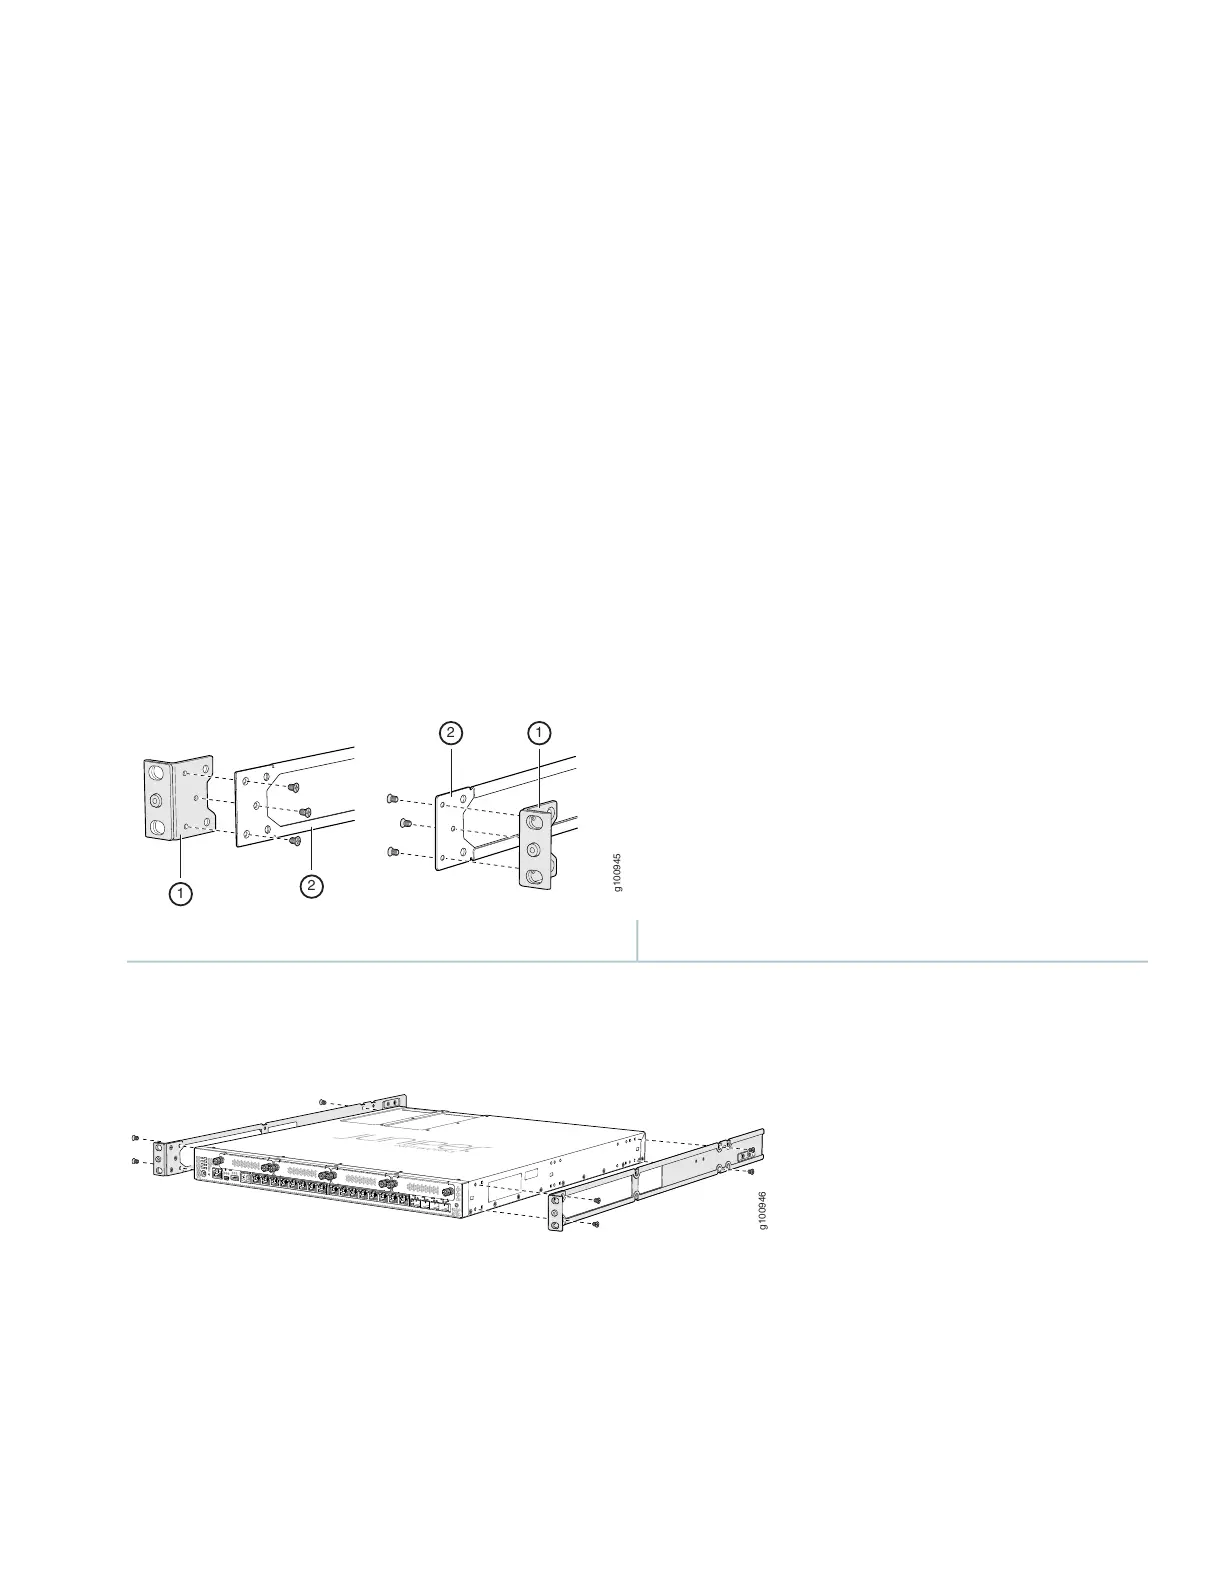
1. Secure the front-mounting brackets to the side-mounting rails using the six flat-head mounting screws.
g100945
1
2
12
21 Mounting-railMounting bracket
2. Secure the mounting rails to the sides of the SRX380 using the M4x6-mm Phillips flat-head mounting screws.
g100946
3. Lift the SRX380 and position it in the rack. Line up the bottom hole in each mounting bracket with a hole in each rack
rail, making sure the SRX380 is level.
5

Other manuals for Juniper SRX380

Questions and Answers:

Question and Answer IconNeed help?

Do you have a question about the Juniper SRX380 and is the answer not in the manual?

Juniper SRX380 Specifications

General IconGeneral
Firewall Throughput20 Gbps
IPSec VPN Throughput4 Gbps
Memory8 GB
MTBF200, 000 hours
Form Factor1U
Concurrent Sessions1, 000, 000
Interfaces16 x 1GbE, 4 x 10GbE
Power SupplyDual redundant AC or DC
Operating Temperature32° to 104° F (0° to 40° C)
Storage Temperature-4° to 158° F (-20° to 70° C)
Humidity5% to 90% non-condensing

Related product manuals