6. If the AC power source outlet has a power switch, set it to the OFF (0) position.
7. Insert the power cord plug into an AC power source outlet.
8. If the AC power source outlet has a power switch, set it to the ON (|) position.
If the power supply is installed correctly and functioning normally, the LED on the faceplate of the power supply glows
solid green.
The device starts automatically as the power supply completes its startup sequence. The PWR LED lights up during
startup and remains on when the device is operating normally.
NOTE: After the power supply is turned on, it can take up to 60 seconds for status indicators—such as the
STAT and PWR LEDs—to show that the power supply is functioning normally. Ignore error indicators that
appear during the first 60 seconds.
Configure Root Authentication
To configure root authentication:
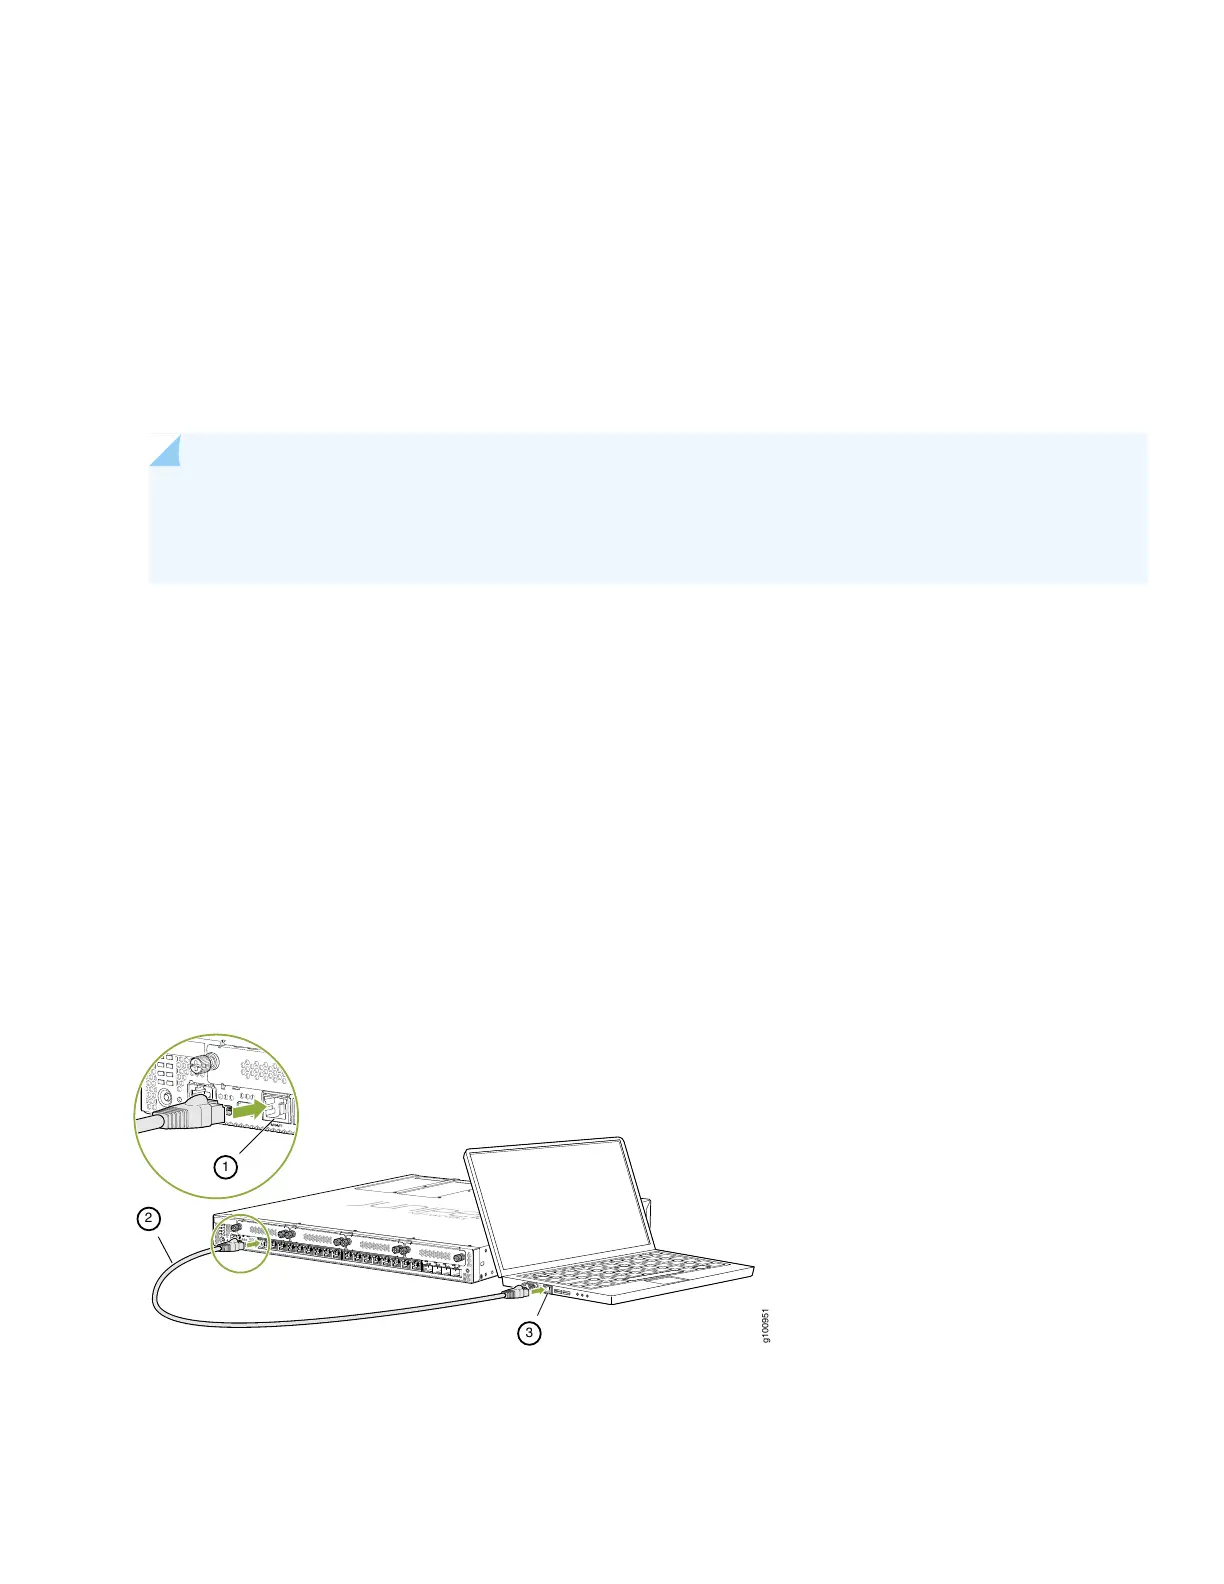
1. Connect one end of the Ethernet cable to the management port (labeled MGMT) on the device.
2. Connect the other end of the Ethernet cable to the management device.
Figure 5: Connecting the SRX380 to a Management Device
The SRX380 functions as a DHCP server and automatically assigns an IP address to the laptop.
3. Ensure that the laptop acquires an IP address on the 192.168.1.0/24 network.
8