Ensure that you have the following parts and tools available:
•
3 mounting screws rated to support up to 2.8 lb (12.7 kg) (not provided)
•
Phillips (+) screwdriver, number 2
To install the controller on a wall:
1. Remove the controller from the shipping carton (see “Unpacking WLC100 Wireless
LAN Controllers” on page 28).
NOTE: Wireless controllers are shipped with rubber feet attached. The
rubber feet are necessary to stabilize the controllers on the desk or other
level surface.
2. Place the controller on a flat and level surface with the Juniper Networks logo
embossed on the top cover facing up.
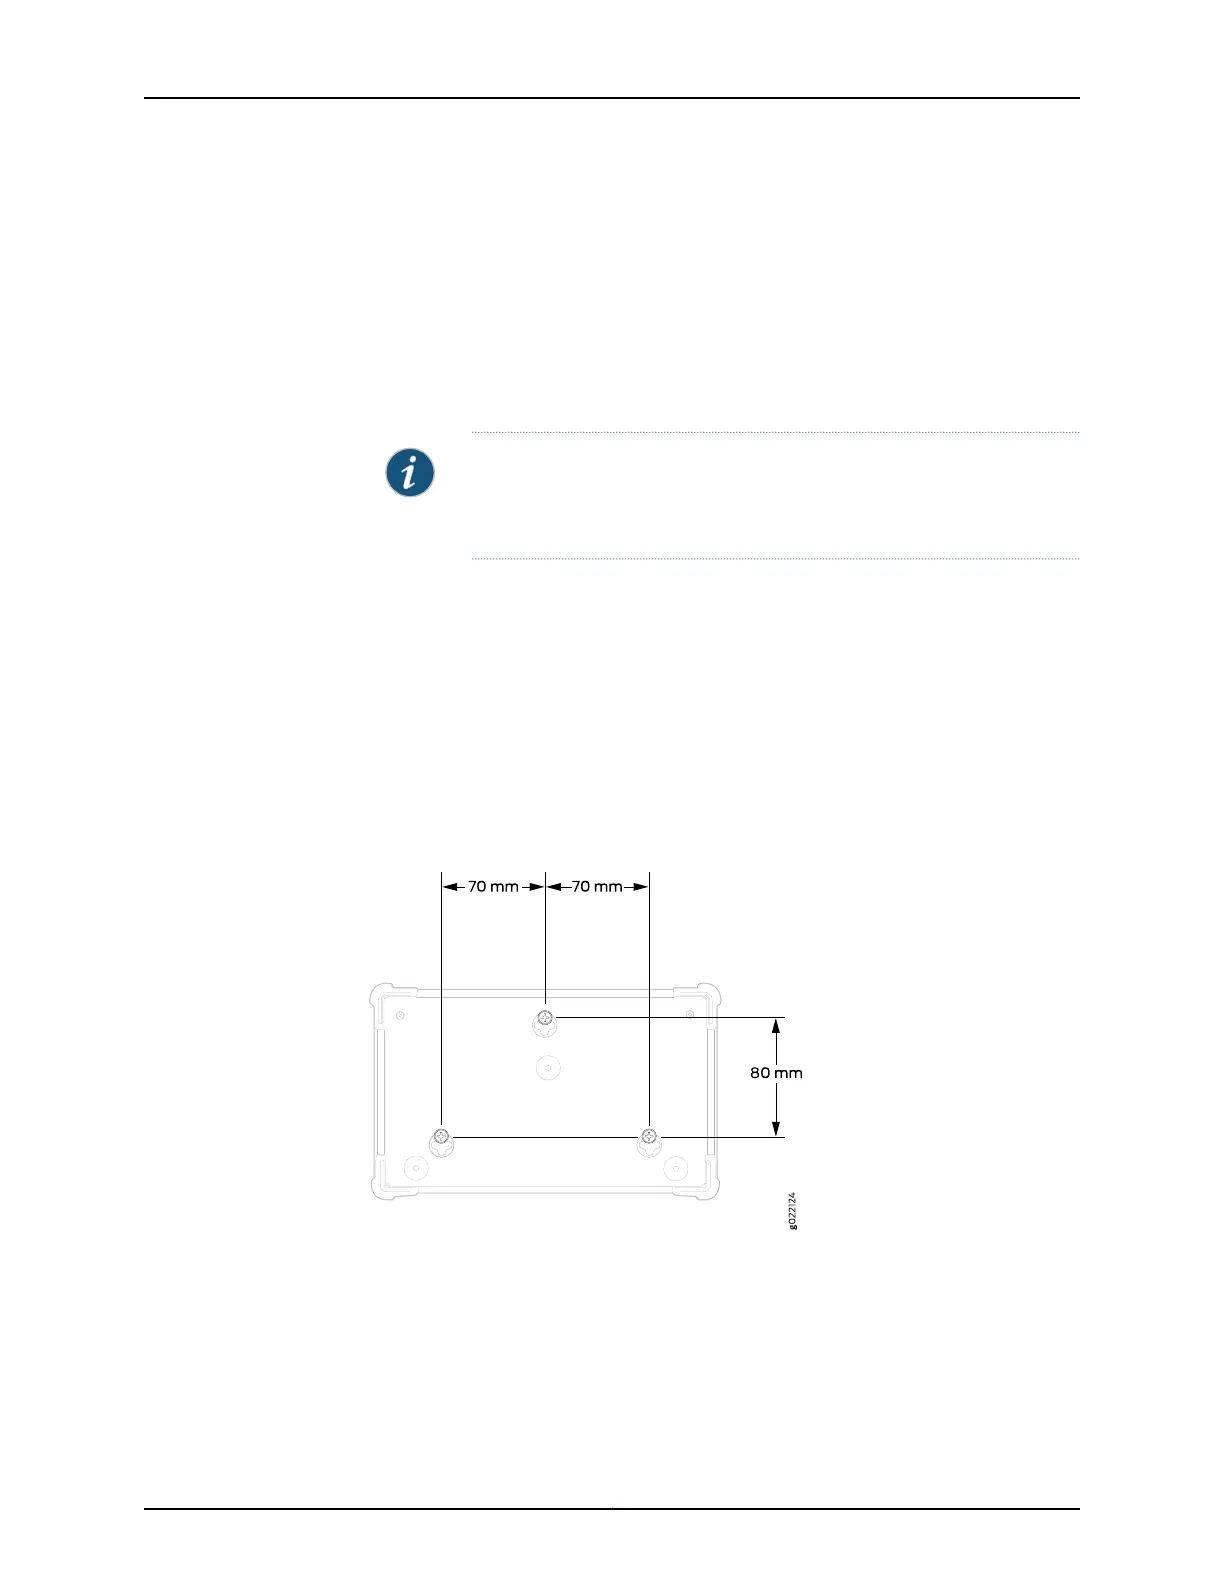
3. Drill three holes on the wall as shown in Figure 6 on page 34 and install mounting
screws in them.
•
Use mounting screws that have a diameter of less than 4.5 mm and are rated to
support up to 2.8 lb (12.7 kg).
•
Turn the screws only part way in, leaving about 1/4 in. (6 mm) between the head
of the screw and the wall.
Figure 6: Measurements for Installing Mounting Screws
4. Grasp the sides of the controller, lift it, and position it over the mounting screws
installed on the wall.
5. Mount the controller on the mounting screws facing front panel upward, and slide it
downward until it locks in place as shown in Figure 7 on page 35.
Copyright © 2013, Juniper Networks, Inc.34
Complete Hardware Guide for WLC100 Wireless LAN Controller