EN11
– – – – –6– – – – –
DEC 25 ’ 98
: 30
4
REC MODE
WIDE MODE OFF
X40ZOOM
GAIN UP
TO DATE / TIME MENU
TO SYSTEM MENU
END
AGC
SP
SP LP
– – – – –6– – – – –
DEC 25 ’ 98
: 30
4
REC MODE
WIDE MODE OFF
OFF
64X
SP
ZOOM
GAIN UP
END
AGC
TO SYSTEM MENU
TELE MACRO
TO DATE / TIME MENU
– – – – –
6– – – – –
DEC 25 ’ 98
: 30
4
REC MODE
WIDE MODE OFF
64X
SP
ZOOM
GAIN UP
TO DATE / TIME MENU
TO SYSTEM MENU
END
AGC
OFFTELE MACRO
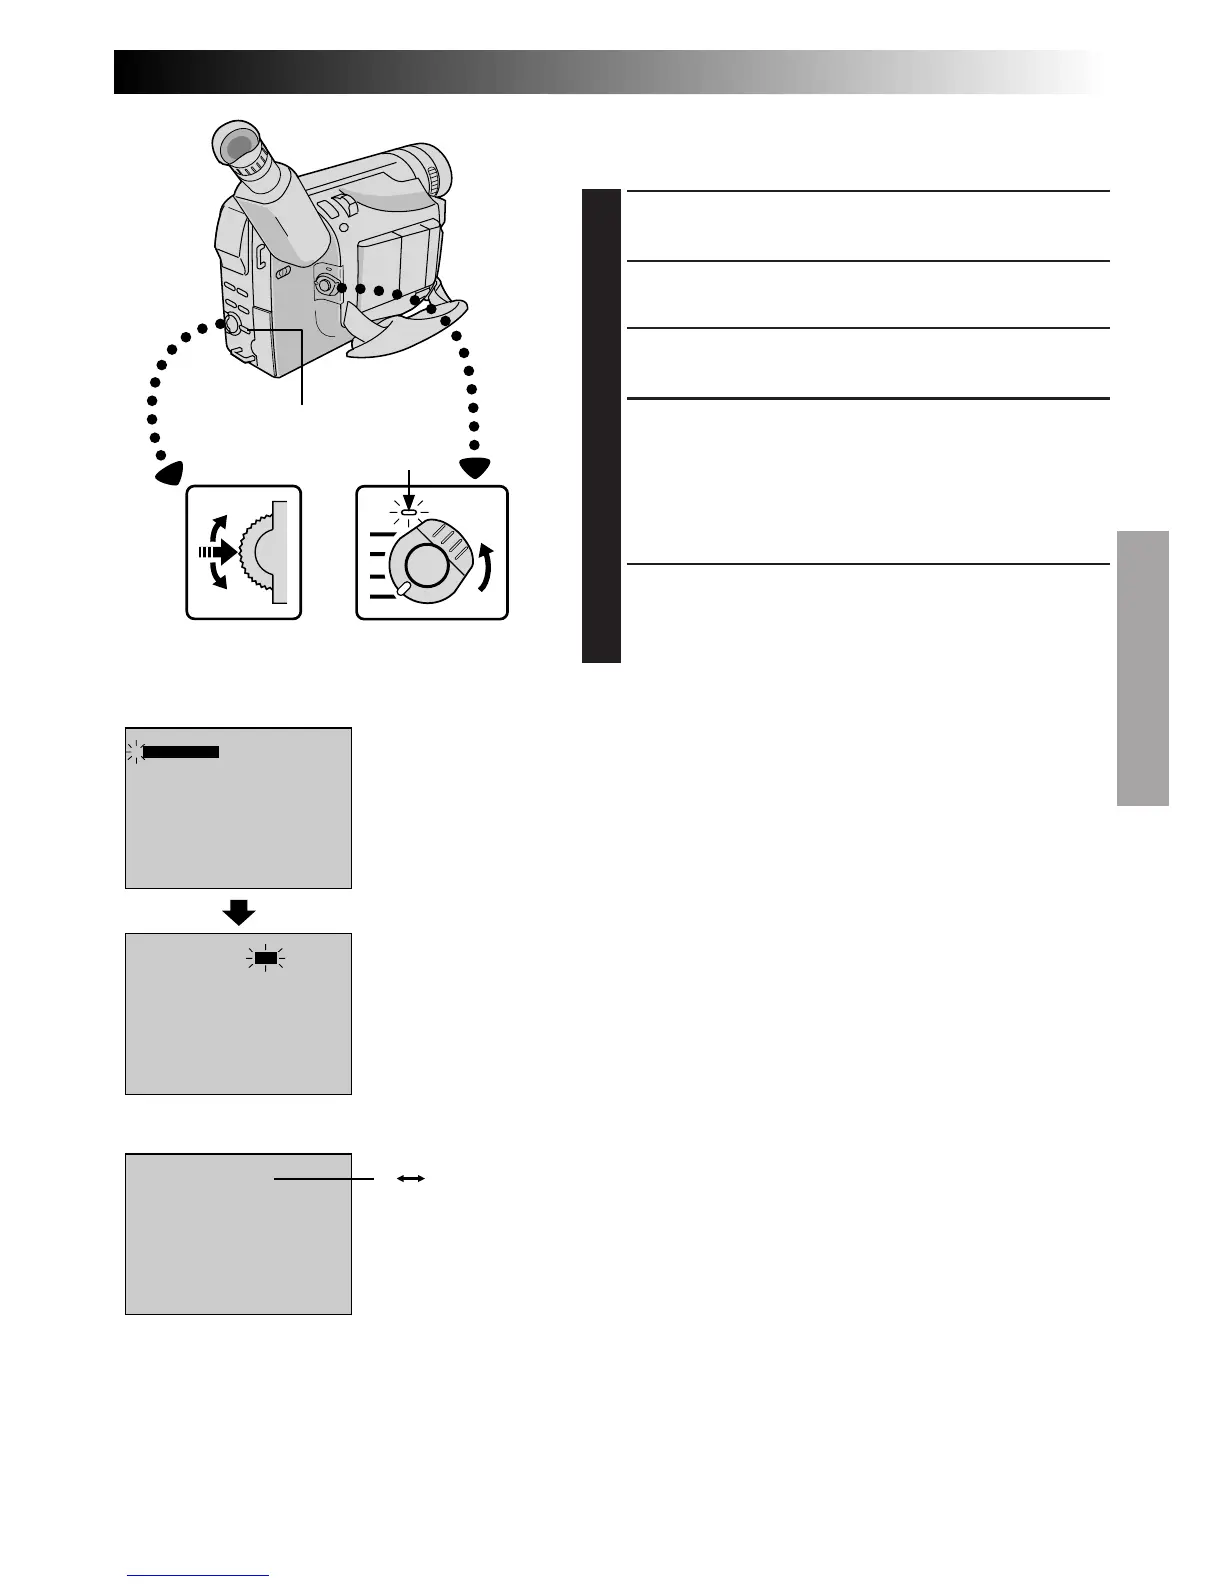
Recording Mode Setting
Set depending on your preference.
1
SELECT OPERATION MODE
Set the Power Switch to “PRO.”.
•The power lamp comes on and the camcorder is
turned on.
2
ACCESS RECORDING MENU
Press MENU. The Recording Menu appears.
3
SET RECORDING MODE
First move the highlight bar to “REC MODE” by
rotating the Select Dial. Press the Select Dial and the
parameter “SP” or “LP” is highlighted. Select “SP” or
“LP” by rotating the Select Dial. Press the Select Dial
twice to exit from the Recording Menu.
•“LP” (Long Play) is more economical, providing 1.5
times the recording time.
•Audio Dubbing is impossible on a tape recorded in
the LP mode.
NOTES:
●
If the recording mode is switched during recording, the
playback picture will be blurred at the switching point.
●
It is recommended that tapes recorded in the LP mode
on this camcorder be played back on this camcorder.
●
During playback of a tape recorded on another
camcorder, blocks of noise may appear or there may be
momentary pauses in the sound.
Power lamp
Recording Menu
Display
Recording mode indicator
Select Dial
MENU Button
Power Switch