1-12 (No.MB191)
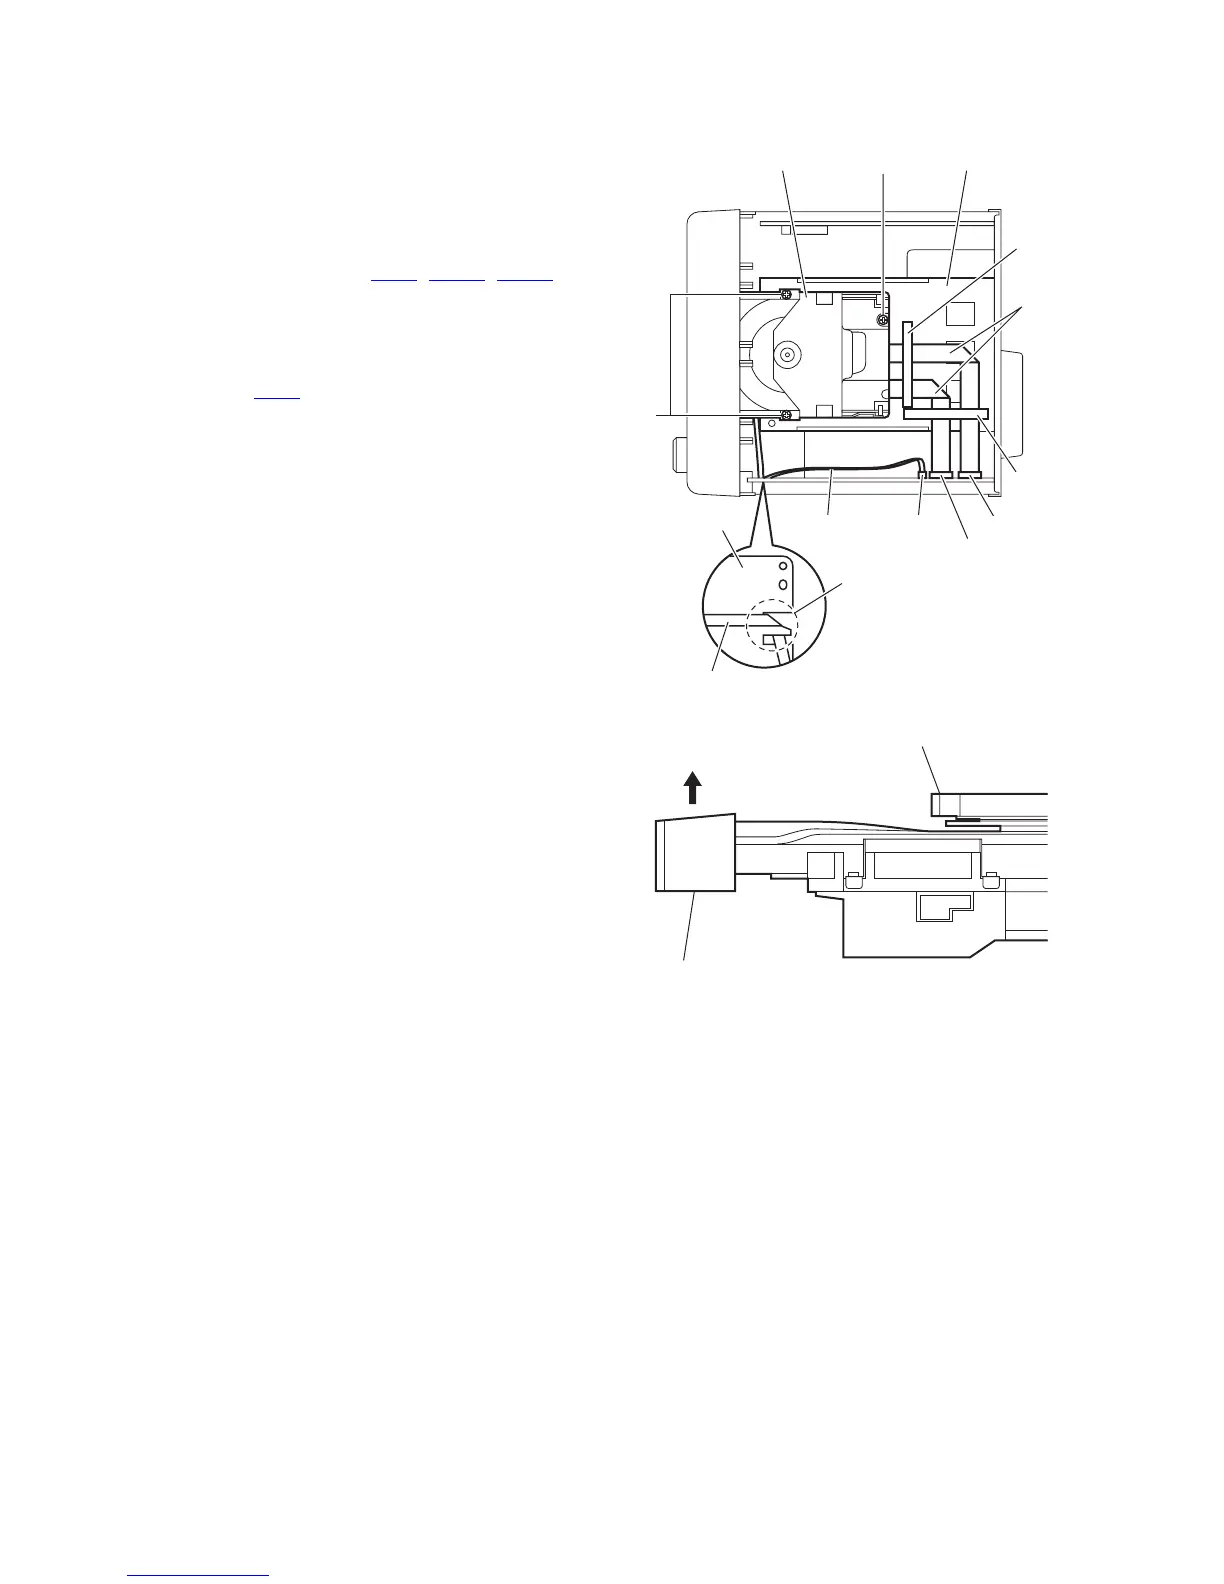
3.1.6 Removing the DVD mechanism assembly
(See Figs.12 and 13)
• Prior to performing the following procedures, remove the metal
cover, tuner and video board.
(1) From the top side of the main body, remove the three
screws M attaching the DVD mechanism assembly on the
center chassis. (See Fig.12.)
(2) From the forward side of the main board, disconnect the
card wires from the connectors (CN11
, CN511, CN513).
(See Fig.12.)
Reference:
When reassembly, pass the card wire through the sec-
tion f of the main board before connecting the card wire
to the connector CN11
. (See Fig.12.)
(3) Remove the spacers fixing the card wires. (See Fig.12.)
Reference:
After connecting the card wires, fix them with the spacers
as before. (See Fig.12.)
(4) From the inside of the main body, take out the DVD mech-
anism assembly.
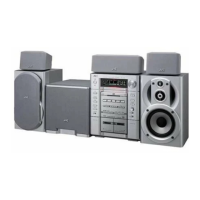
(5) Remove the tray fitting from the DVD mechanism assembly
in the direction of the arrow. (See Fig.13.)
Fig.12
Fig.13
DVD mechanism assembly
M
M
Center chassis
Space
Space
CN513CN11
CN511
Card
wires
Card wire
Main board
Card wire
f
DVD mechanism assembly
Tray fitting