1-24 (No.MB191)
3.3 Cassette mechanism assembly section
• Prior to performing the following procedures, remove the cassette mechanism assembly.
(See "3.1.16 Removing the cassette mechanism assembly".)
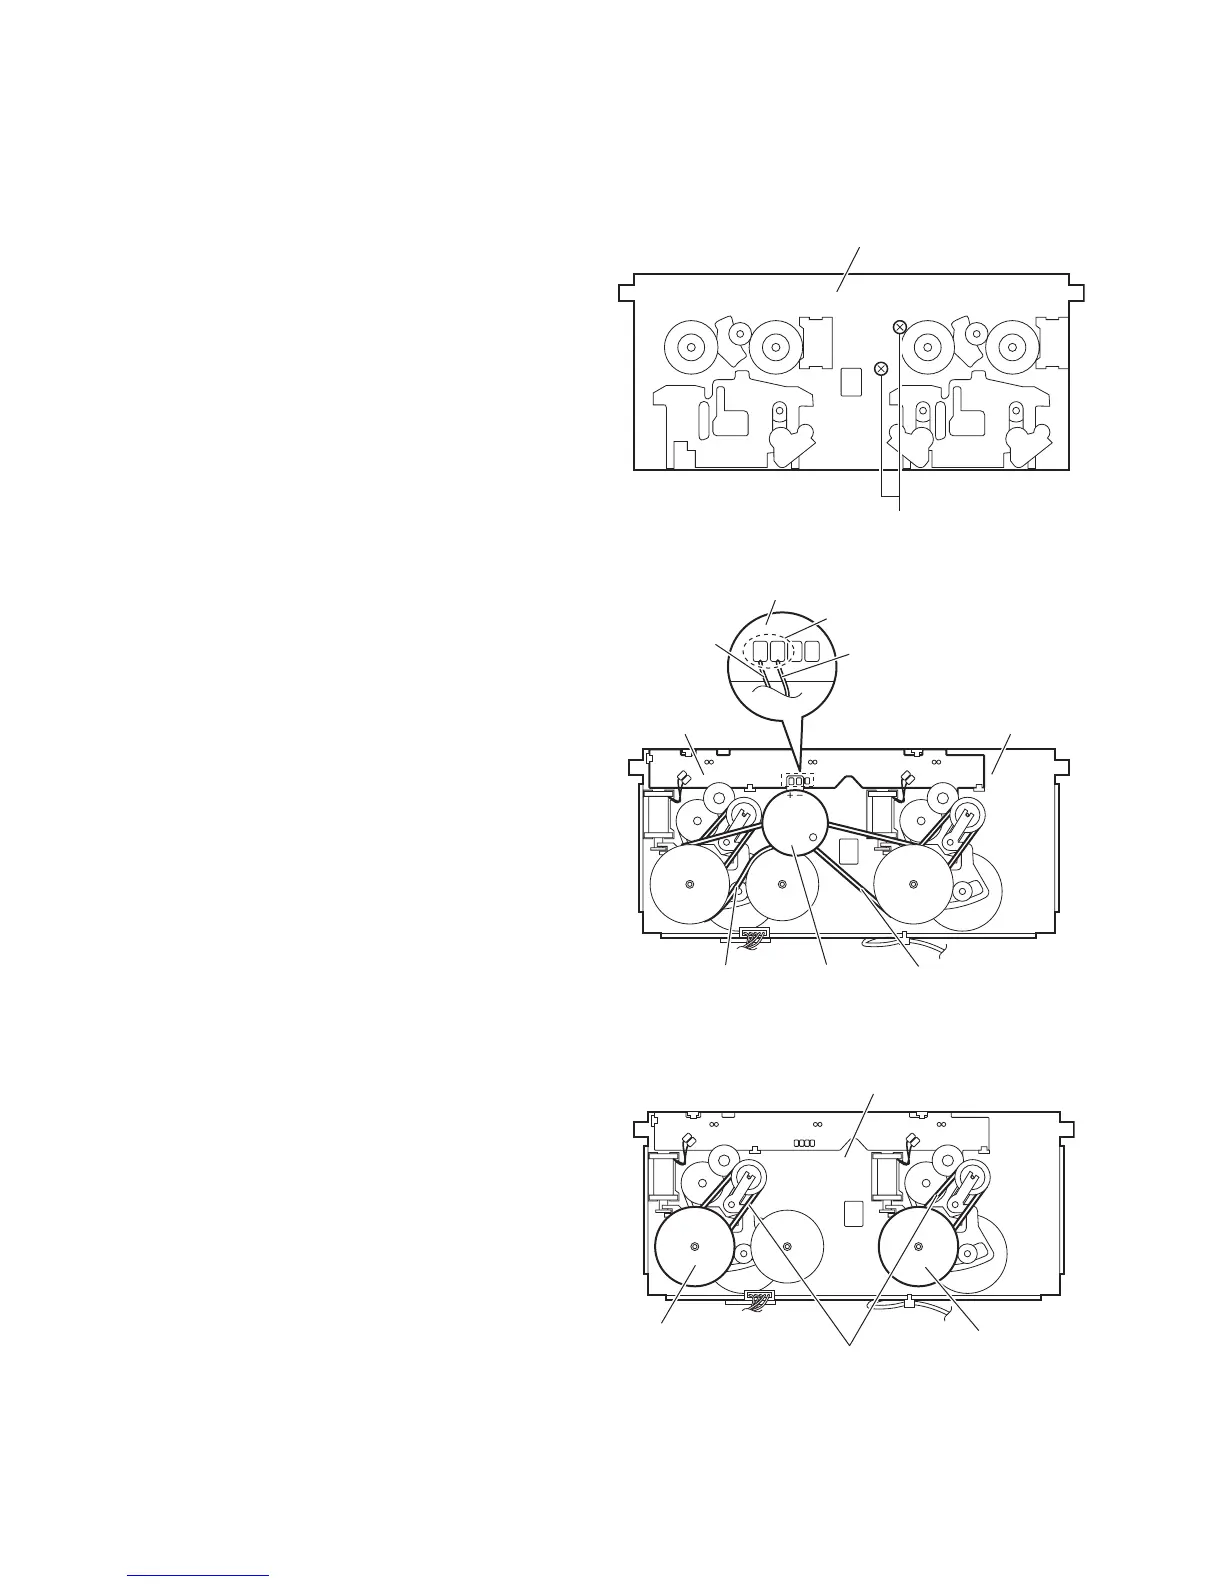
3.3.1 Removing the main motor and replacing the main belts
(See Figs.1 and 2)
(1) From the front side of the cassette mechanism assembly,
remove the two screws A attaching the main motor. (See
Fig.1.)
(2) From the back side of the cassette mechanism assembly,
remove the wires from the soldered sections a on the
switch board. (See Fig.2.)
Caution:
After reassembling, check the direction of the main mo-
tor and polarity of the wires. (See Fig.2.)
(3) Remove the main motor and main belts. (See Fig.2.)
Note:
When attaching the main belts, take care not to attach grease
on the main belts.
Fig.1
Fig.2
3.3.2 Replacing the F/R belts
(See Fig.3)
• Prior to performing the following procedures, remove the main
motor and main belts.
• Remove the wires of the main motor as required.
From the back side of the cassette mechanism assembly, re-
move the F/R belts from the flywheel 1 and flywheel 2.
Fig.3
Cassette mechanism assembly
A
Main belt
Main belt
Main motor
Cassette mechanism assembly
Switch board
Wire (Black)
Wire (Red)
Switch board
a
F/R belts
Flywheel 2
Flywheel 1
Cassette mechanism assembly