Do you have a question about the JVC RX-5022VSL and is the answer not in the manual?
Provides warnings and precautions to prevent electrical shock, fire, and damage from moisture.
Guidelines for unit placement to ensure adequate ventilation and prevent overheating.
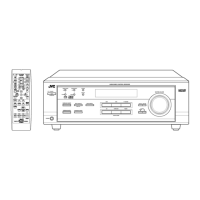
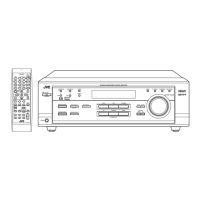
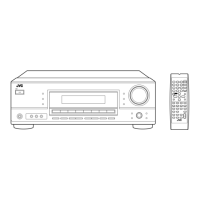
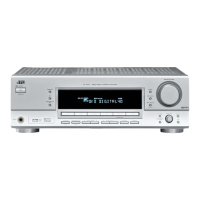
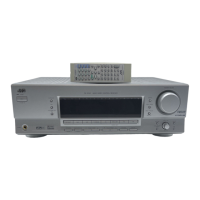
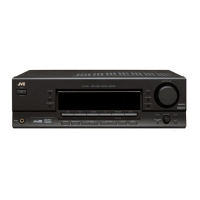
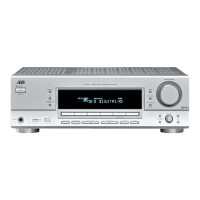
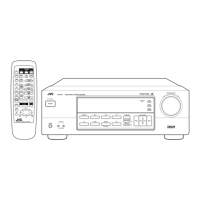
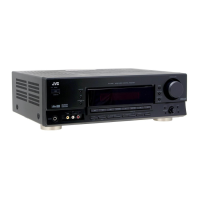
Details and labels for all controls and connectors on the front panel of the receiver.
Identification and description of buttons and functions on the supplied remote control.
Essential precautions, location advice, and handling instructions before setting up the unit.
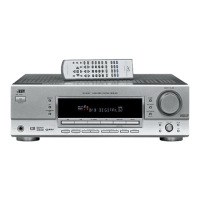
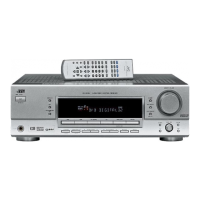
Lists all accessories that should be included with the product for verification.
Instructions on how to properly insert batteries into the remote control.
Instructions for connecting the AM loop antenna and an optional external wire for improved reception.
Guidance on connecting the supplied FM antenna and an optional outdoor FM antenna.
Detailed steps for connecting front, center, rear, and subwoofer speakers to the receiver.
Instructions for connecting a powered subwoofer using the SUBWOOFER OUT jack.
Diagrams and instructions for connecting audio and video components using analog RCA cables.
Guidance on making digital connections using coaxial and optical cables for improved audio quality.
Instructions for safely connecting the power cord to the receiver and an AC outlet.
Steps for powering the receiver on and off, including standby mode operation.
How to select different audio and video sources for playback.
Instructions for using headphones, including speaker deactivation.
Methods for adjusting the audio volume using the front panel controls and the remote.
How to temporarily silence the audio output using the Muting function.
Instructions for setting the sleep timer to automatically turn off the receiver.
Explanation of the various signal and speaker indicators displayed on the unit.
Configuring which components are connected to the DIGITAL IN terminals for proper source recognition.
Switching between analog and digital input modes for selected sources.
Registering speaker configurations like subwoofer presence, size, and distance for optimal sound.
Setting the size of front, center, and rear speakers for accurate sound reproduction.
Configuring the unit of measurement and distance for each speaker from the listening position.
Adjusting the crossover frequency to reallocate bass to larger speakers when using small speakers.
Adjusting the LFE channel signal level to prevent bass distortion.
Reducing the input signal level for analog sources to prevent sound distortion.
Adjusting the output balance between the left and right front speakers for even sound.
Customizing the bass and treble frequencies to personal preference.
Modifying the output level of the connected subwoofer.
Manual tuning procedures for selecting FM or AM radio stations by frequency.
Storing and recalling favorite radio stations using preset memory channels.
Switching between AUTO and MONO modes for optimal FM reception quality.
Explanation of Dolby Surround, Pro Logic II, and Dolby Digital modes for immersive audio.
Information on using DTS Digital Surround for enhanced multichannel audio playback.
Details on Digital Acoustic Processor modes for simulating different acoustic environments.
Explanation of the All Channel Stereo mode for a wider stereo soundstage.
Guidance on how speaker configurations (channels) affect the availability and performance of surround modes.
Steps to activate and adjust Dolby Pro Logic II, Dolby Digital, and DTS Digital Surround modes.
How to adjust speaker output levels and effect levels for DAP and All Channel Stereo modes.
Explanation of automatic power management and synchronized recording features with COMPU LINK.
Using the remote control for sound adjustments, tuner operations, and CD player functions.
Instructions for operating VCRs, TVs, and DVD players using the receiver's remote control.
Guide to changing remote control signals to operate TVs and CATV converters from other brands.
Instructions for setting manufacturer codes to operate VCRs and DVD players from other brands.
A chart detailing common problems, their possible causes, and solutions for the receiver.
Technical specifications for the amplifier section, audio inputs, outputs, and tone controls.
Technical details for the FM/AM tuner section and general unit specifications like power and dimensions.
Information on how to find authorized JVC service centers for repairs and support.
Details of the product's limited warranty, coverage, exclusions, and customer responsibilities.