1-18 (No.22036)
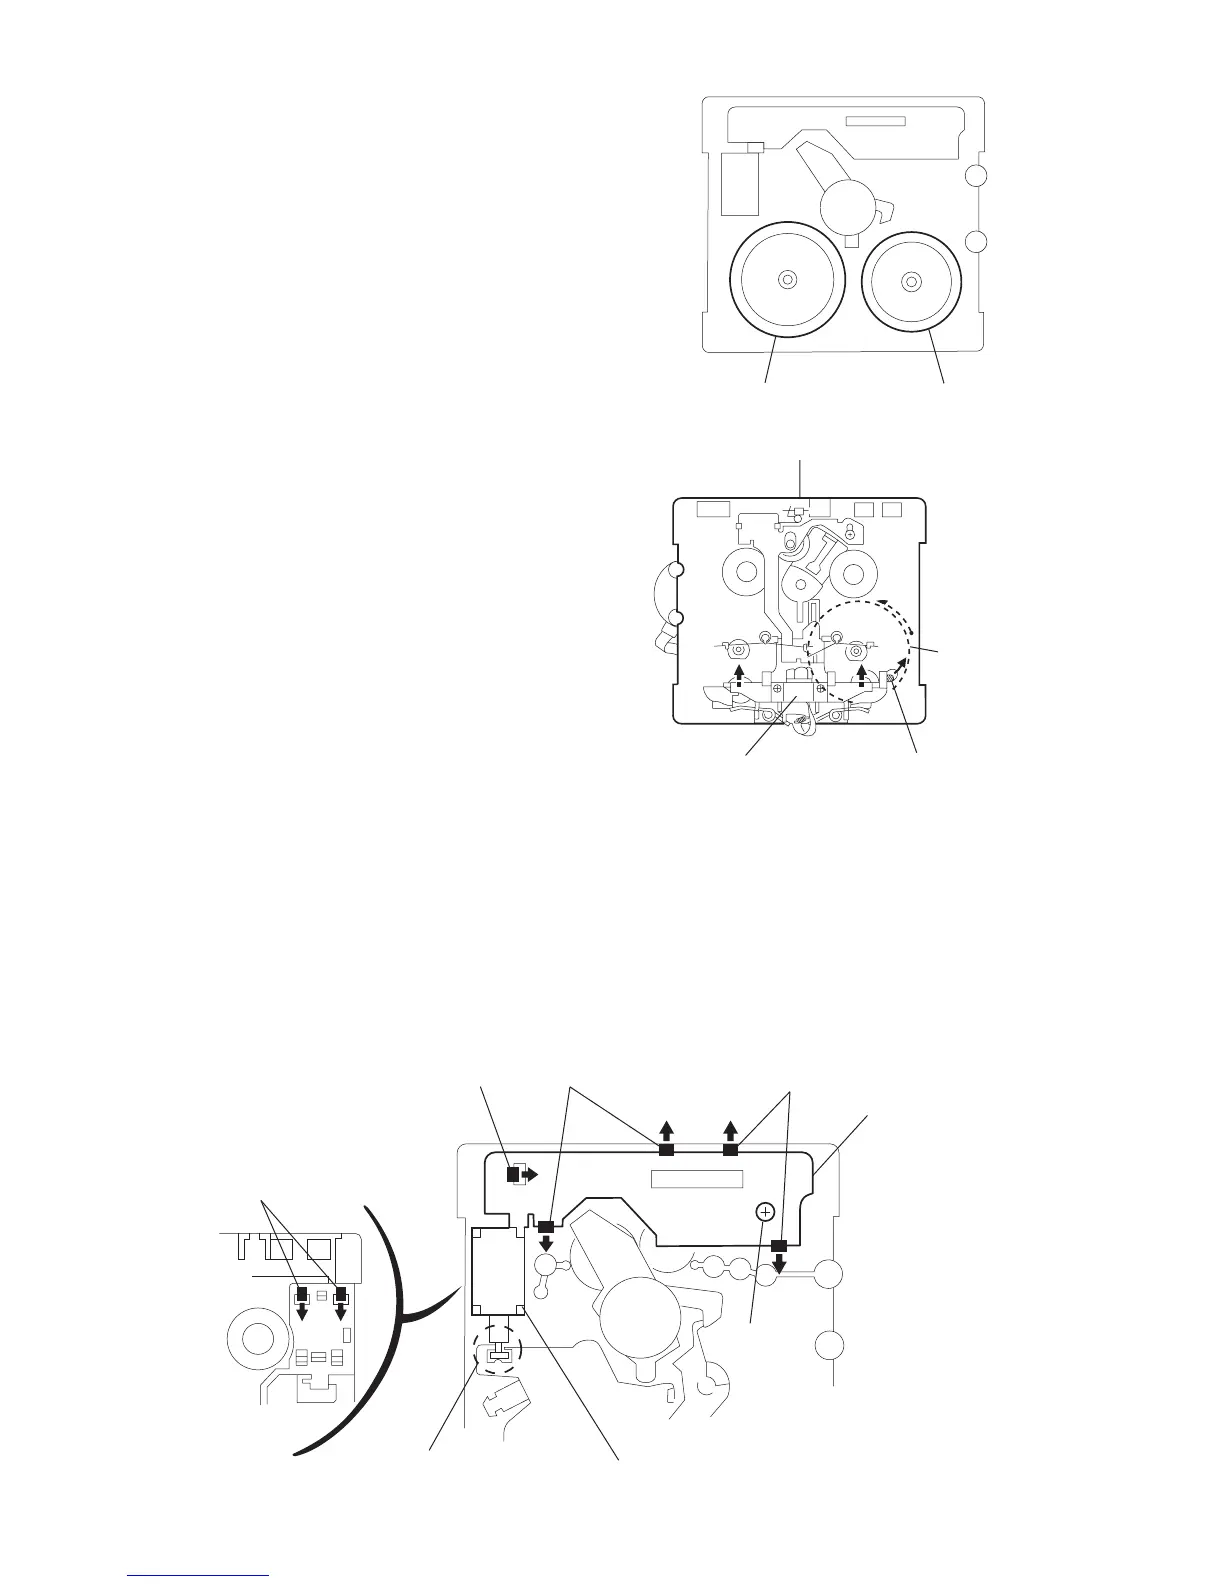
2.2.5 Removing the flywheel
(See Fig.8 and 9)
• Prior to the following procedure, remove the head amplifier
&mechanism control board.
• Prior to the following procedure, remove the main motor as-
sembly.
(1) Remove the slit washers c and d fixing the capstan shafts
(L) and (R) from the front of the cassette mechanism as-
sembly. And pull out the flywheels (L) and (R) respectively
from the rear of the cassette mechanism assembly in the
arrow direction. Then, remove the flywheels (L) and (R).
Fig.8
Fig.9
2.2.6 Removing the reel pulse board and solenoid
(See Fig.10)
• Prior to the following procedure, remove the head amplifier &mechanism control board.
• Prior to the following procedure, remove the main motor assembly.
(1) Remove one screw D attaching the reel pulse board.
(2) Remove the five fixing points e attaching the reel pulse board respectively in the arrow direction.
(3) From the front of the cassette mechanism assembly, push the two fixing points f retaining the solenoid in the arrow direction,
and remove the solenoid.
Note:
When reassembly, make sure that the fixing point g of the solenoid is attached properly.
Fig.10
fly wheel (L)fly wheel (R)
Cassette mechanism
Fly wheel(R)
Trigger arm
Head mount
Reel pulse board
solenoid
z
fixing point f
fixing point g
fixing point e fixing point e fixing point e

 Loading...