15
14
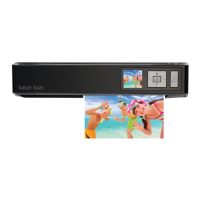
SCAN AND SAVE
Ensure WiFi function is enabled on the scanner and connected to your
device prior to use. (See p.12)
From iPad, iPhone and iPod Touch
1. Press iScan Air on your device to open it
2. Place a photo/document facing up against right edge, adjust the paper
guide, gently push it in until it is pulled into the feed slot
3. Press the Settings to set the resolution (standard 300dpi or fine
600dpi), then press the Scan button
Your device will show a real-time preview and the WiFi LED indicator will
blink pink whilst scanning
4. Press the Save button to save the image in JPG format to the device’s
Photo library
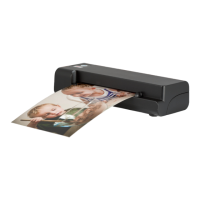
SCAN AND SAVE
From Android devices
1. Tap iScan Air app on your device to open it
2. Place a photo/document facing up, adjust the paper guide and slightly
push the photo/document in until the rollers grip it in the feed slot
3. Depending on your Android device, press either the Settings icon or
Menu button to set the Resolution (standard 300dpi or fine 600dpi).
4. Press the Scan button
Your device will show a real-time preview and the WiFi LED indicator will
blink pink whilst scanning
5. Tap Save to save the scanned image to JPEG format the device’s photo
library
Note: If you want to scan it
again press Cancel button
and repeat the above steps
Note: If you want to scan it
again press Cancel button
and repeat the above steps
 Loading...