Karel MS48 Installation & Maintenance Guide
Edition 3.2
51
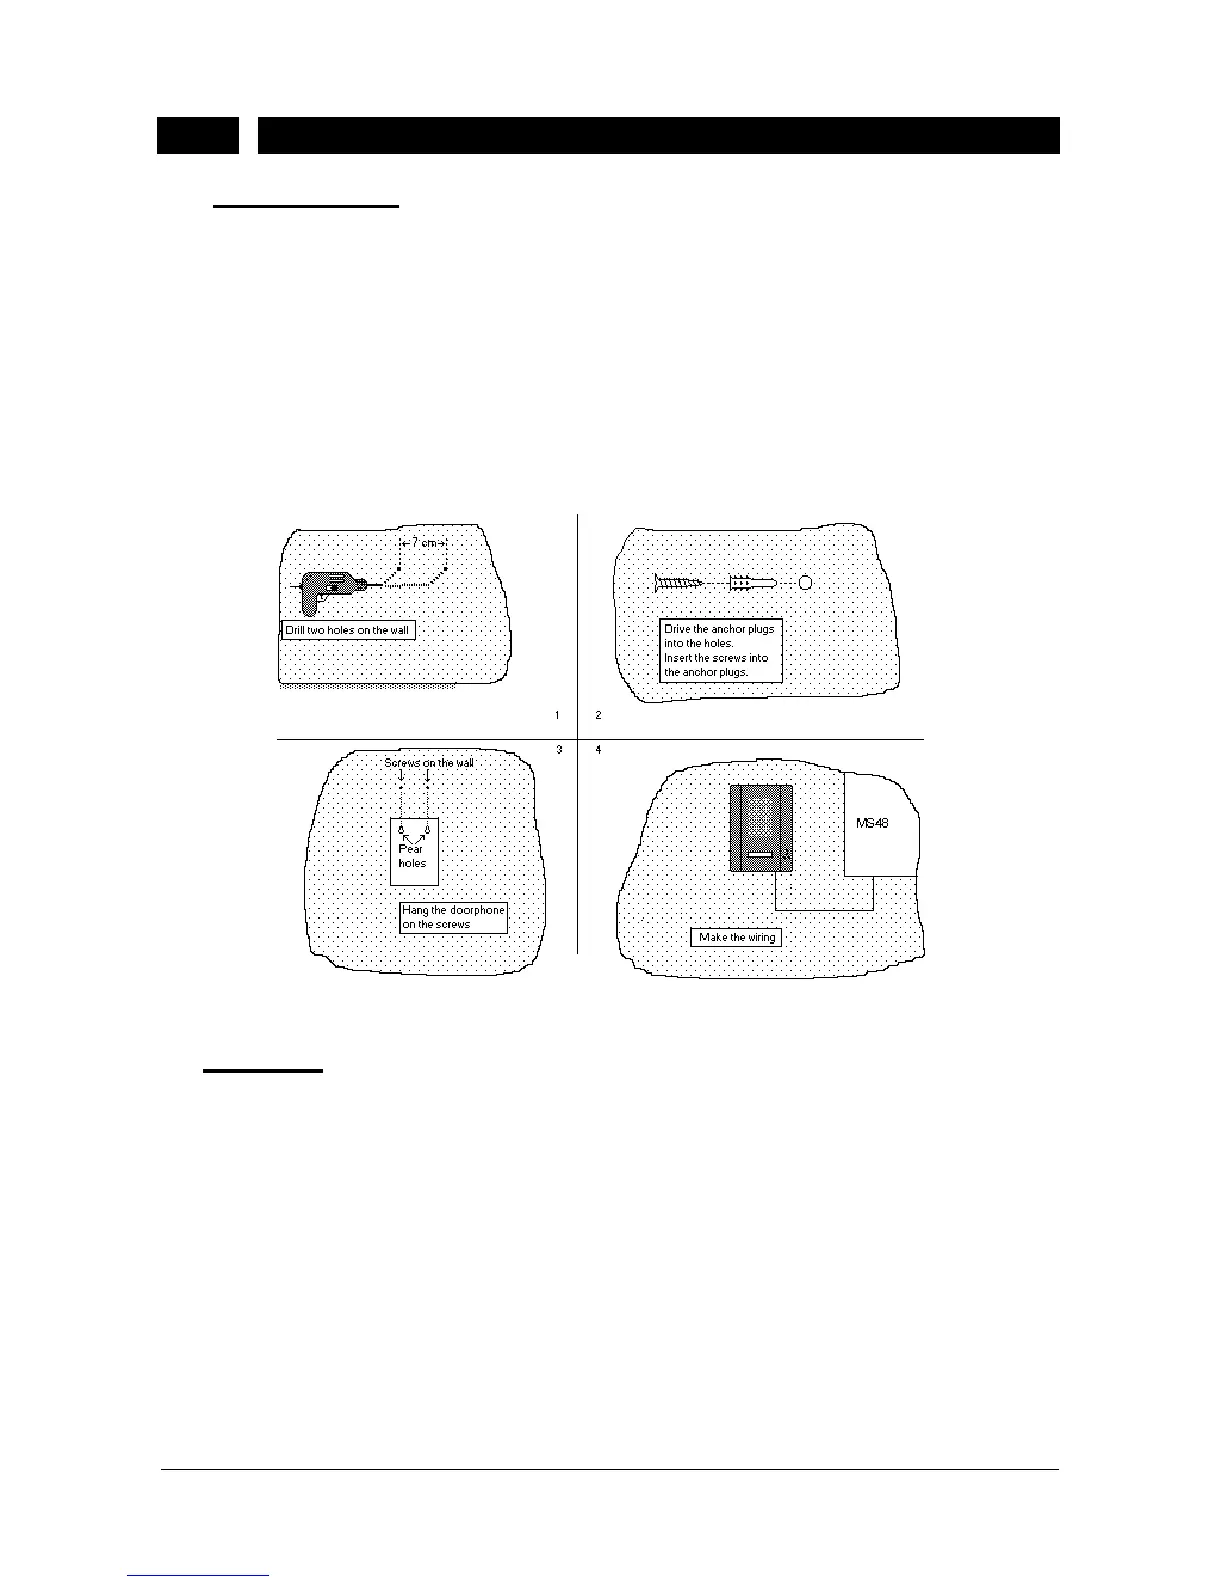
III.5. DOORPHONE
• I
NSTALLATION
DY26 Doorphone is designed to be mounted on the wall with a couple of
anchor plugs and screws. For this:
1) Drill two holes, which are 7.5 cm apart.
2) Drive the anchor plugs into the holes.
3) Insert the screws into the anchor plugs.
4) Hang the doorphone on the screws.
The following figure illustrates the installation.
Figure B-18
• C
ABLING
The cable that emerges from the bottom of the DY26 doorphone has a 4-pin
connector at its free end. For connecting the doorphone to the system, the free
end of this cable should be passed through the cable hole on the panel at the
down left corner of the system cabinet (the panel on which the system ON/OFF
switch resides) and then attached to the corresponding socket on the MB48
motherboard, as illustrated in the following figure.