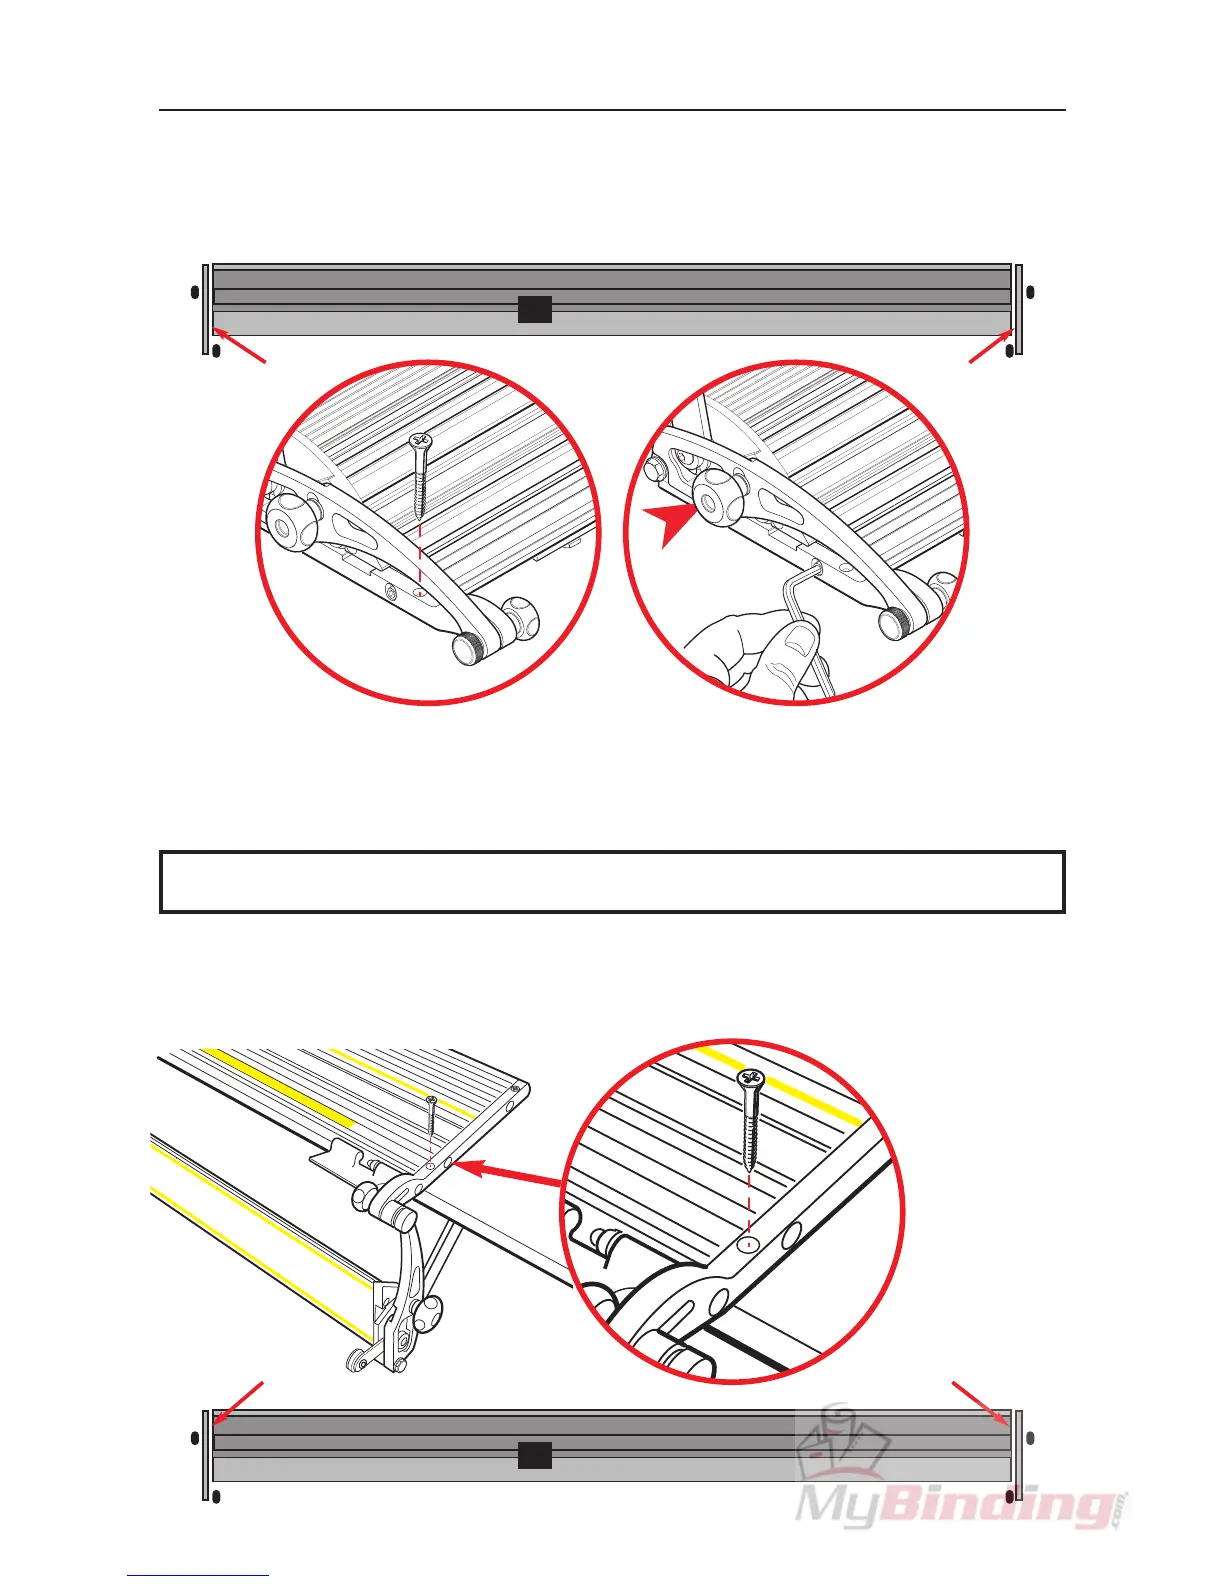
3.3 Setting Up 3.3
Place two of the long wood screws in the front holes of the Fixed Arms (A) and screw
then in but do not tighten them. Loosen the four Allen head screws (B) joining the Fixed
Arms to the Base by one turn then fully tighten screws (A).
To enable the table surface to be cleared of the cutter bar when it is required for other
work the whole cutter bar can be lifted and swung on its hinges towards you so that it
hangs down along the edge of the work bench (this also helps with cleaning).
x4
x2
NOTE: Be particularly careful with the longer versions of cutter as they are very heavy.
Carefully swing the cutter bar down now and place the remaining two long wood screws
(C) into the back two holes of the Fixed Arms and tighten. Return the cutter bar to its
working position.
x2