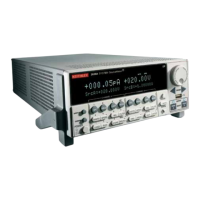
1-6 Performance Verification Model 2500 Service Manual
Performing the verification test procedures
Test summary
• Current measurement accuracy
• Voltage bias accuracy
If the Model 2500 is not within specifications and not under warranty, see the calibration
procedures in Section 2 for information on calibrating the unit.
Test considerations
When performing the verification procedures:
• Be sure to restore factory front panel defaults as previously outlined.
• Make sure that the test equipment is fully warmed up and properly connected to the
correct Model 2500 terminals as required.
• Allow signals to settle before making a measurement.
• Do not connect test equipment to the Model 2500 through a scanner, multiplexer,
or other switching equipment.
WARNING
The maximum common-mode voltage (voltage between LO and
chassis ground) is 200V DC. Exceeding this value may cause a shock
hazard.
CAUTION
Maximum signal on OUTPUT connectors is 100V @ 20mA DC.
Maximum signal on INPUT connectors is 20mA. Exceeding these
values may result in damage to the instrument.
Current measurement accuracy
Follow the steps below to verify that Model 2500 current measurement accuracy is within
specified limits. This test involves applying currents from a calibrator and verifying that
Model 2500 current readings are within required limits.
1. With the power off, connect the calibrator to the INPUT CHANNEL 1 triax jack,
as shown in Figure 1-2.
2. Turn on the Model 2500 and calibrator, and allow them to warm up for at least one
hour.
3. Restore front panel (BENCH) defaults as outlined in “Restoring factory defaults.”
 Loading...