EN
16. Material thickness and weld shape display
mm
When operating in adaptive mode and AUTOMATIC is selected from the mode selection
button 6, the material thickness and weld shape is displayed, based on your input selections
for plate thickness in mm and weld shape. Adjust these values though control knobs 2 and
3. As you adjust the power control (2), you will see the graphic indicating plate thickness
become thicker or thinner, and as you adjust the arc length control (3) you will see the weld
shape change from convex, at and concave. Select the desired settings and you are ready to
weld.
5.3 Parameter guides
Fe 0.8 mm, 5 – 18 % CO₂/Ar
PlateThickness mm 0.5 0.8 1 1.5 2 2.5 3
WireFeedSpeed m/min 2 2.5 3.5 5 8 10 13
SetVoltage V 14.5 15 15.5 16 17 18 20
MeanCurrent A 40 50 65 97 130 155 185
Fe 1.0 mm, 5 – 25% CO₂/Ar
Plate Thickness mm 0.7 1.5 2 3 4 5
Wire Feed Speed m/min 1.4 3.2 4.5 6.5 8.5 11.0
Set Voltage V 15.0 17.5 18.4 21.4 23.8 28.8
Mean Current A 40 100 150 180 200 240
Fe 1.2 mm, 5 – 25% CO₂/Ar
Plate Thickness mm 1 1.5 2 3 4 6
Wire Feed Speed m/min 1.5 2.2 3.2 5.0 6.0 7.2
Set Voltage V 14.6 17.0 17.8 21.0 22.7 26.3
Mean Current A 75 100 140 180 220 250
6. MIG/MAG WELDING
NOTE! Welding fumes may be dangerous to your health. Ensure that there is ample ventilation
during welding! Never look at the arc without a face shield specically designed for arc welding!
Protect yourself and your surrounding area from the arc and hot welding spatter!
NOTE! Always wear protective clothing, gloves, face and eye shields suitable for welding. It is
recommended that you make practice welds before you commence welding your main work piece.
NOTE! The work piece will be very hot. Protect yourself and others at all times.
You can start welding after you have made the necessary preparation described throughout
these instructions.
Providing you ensure that the equipment is correctly prepared and set for the material type
and joint to be welded, you will achieve exceptionally high quality welding results.
• Ensure that the correct ller wire type and size is selected for the work piece.
• Ensure that the correct wire liner and contact tip size is tted to the welding gun.
• Ensure that the correct shielding gas type is connected and the ow rate adjusted before
welding starts.
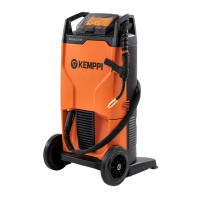
Kempact 251R, 253R, 323R, 181A, 251A, 253A, 323A
24
 Loading...

