CIM-LINK Setup Guide
Steps to Program the NETCOM2P – CIM-LINK on Master Communication
Loop
1. Mount the CIM-LINK with the NETCOM2P in the designated location. Ensure that the
NETCOM2P is mounted securely in the socket.
2. Connect the serial cable or USB-SER adaptor to the CIM-LINK terminal block COM2
(TB3) and the PC or laptop with the NETCOM Program Tool Utility software.
3. Place a jumper ON J12 on the CIM-LINK circuit board.
4. Turn on the laptop or PC connected to the CIM-LINK.
5. Connect the CIM-LINK to a power source or via the ribbon cable to H2 on the control
board.
6. Momentarily place a jumper on J1 RESET on the CIM-LINK.
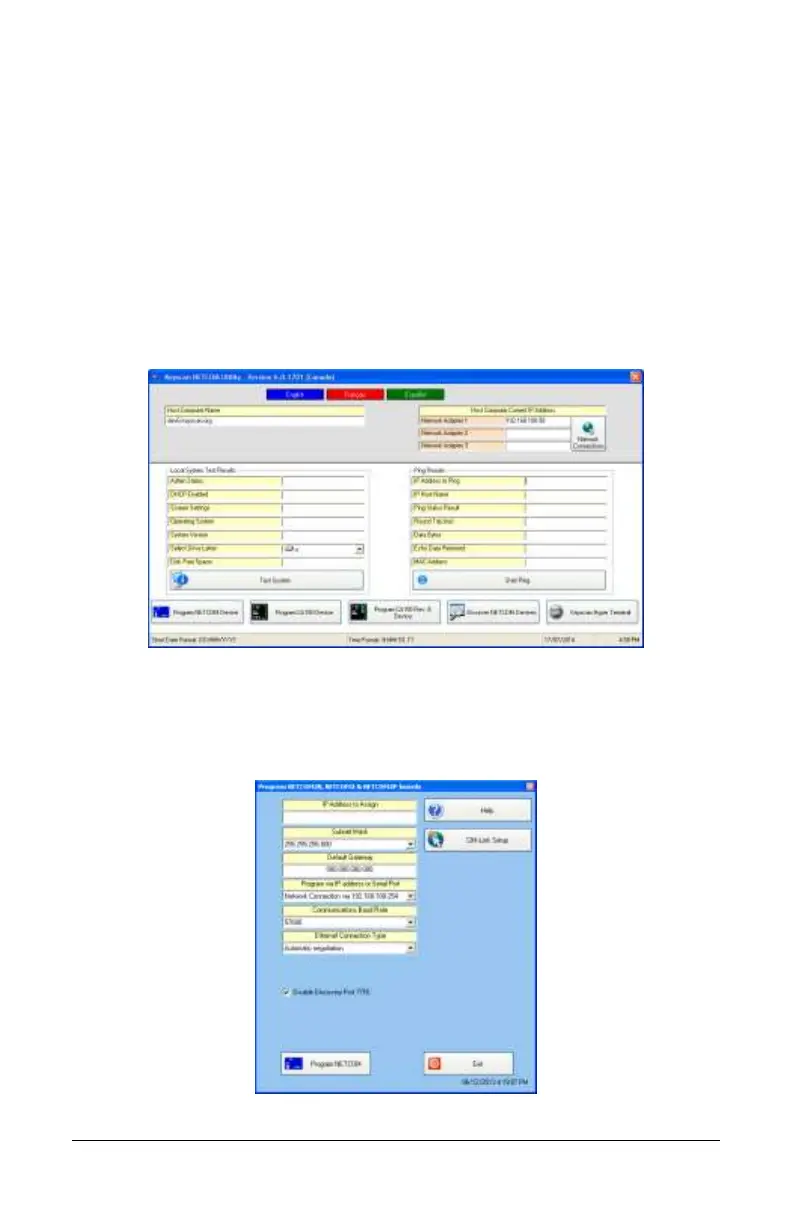
7. At the PC or laptop, select start > All Programs and select Keyscan NETCOM Program
Tool from the Keyscan software menu. At the PC or laptop, select start > All Programs
and select Keyscan NETCOM Program Tool from the Keyscan software menu.
8. From the Keyscan NETCOM Utility screen, click Program NETCOM Device.
9. From the Select NETCOM Device Type screen, select Program NETCOM2 Family of
Boards.
10. With the Program NETCOM2B, NETCOM2 & NETCOM2P Boards screen open, press the
F8 function key on the keyboard to open the CIM-LINK Setup button as shown.
Programming steps continued on the next page…