1Introduction
26 Keysight E-Series E9300 Operating and Service Guide
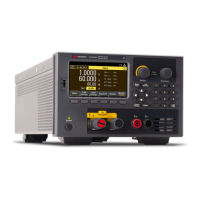
To carry out a zero and calibration cycle as requested by the power meter proceed
as follows:
– Ensure the Keysight E-Series E-Series E9300 power sensor is disconnected
from any signal source.
– When calibrating Keysight E-Series E9300B or E9301B sensors, first
remove the attenuator.
– On the power meter, press , (or / ). During
zeroing the wait symbol is displayed.
– When the wait period is complete connect the Keysight E-Series power
sensor to the power meter’s POWER REF output.
– Press (or , / ). The wait symbol is again displayed
during calibration.
On completion the power meter and sensor are ready to connect to the device
under test (DUT). Ensure the attenuator is re-connected to the Keysight E-Series
E9300B or E9301B sensors prior to making measurements.
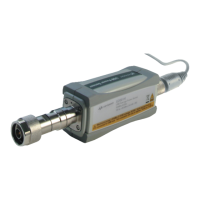
The measurement connector (for connection to DUT) is Type-N (male) for all the
Keysight E-Series E9300 power sensors. A torque wrench should be used to
tighten these connectors. Use a 3/4-inch open-end wrench and torque to 12 in-lb
(135 Ncm) for the Type-N connector.
The Keysight E-Series E9300B or E9301B sensors should not be operated
without the attenuator connected at any time other than for calibration. You
must ensure the attenuator is reconnected following calibration.
BEFORE CONNECTING THE POWER SENSOR TO OTHER INSTRUMENTS
ensure that all instruments are connected to the protective (earth) ground.
Any interruption of the protective earth grounding will cause a potential
shock hazard that could result in personal injury.